
In this tutorial we cover the following topics
- General information
- General app
- Property list with deprecated
NSArray write(to:atomically:) - Property list with
Codableprotocol - Bundle property list with
Codable - Encode and decode with a custom type
- Sources
- About Files and Directories
- Archives and Serializations Programming Guide
- Archives and Serializations Programming Guide
- Property List Programming Guide
There are many different methods we can use to save our data in iOS devices. Here we will examine the most basic, adequate to save small amount of data.
Every application has its own, independent and restricted, area in file system space, called sandbox. Generaly speaking, no other applications are allowed to get an access to this area. When working with simulator and Xcode, we can find this sandbox in
[YOUR_HOME_DIRECTORY]/Library/Developer/CoreSimulator/Devices/
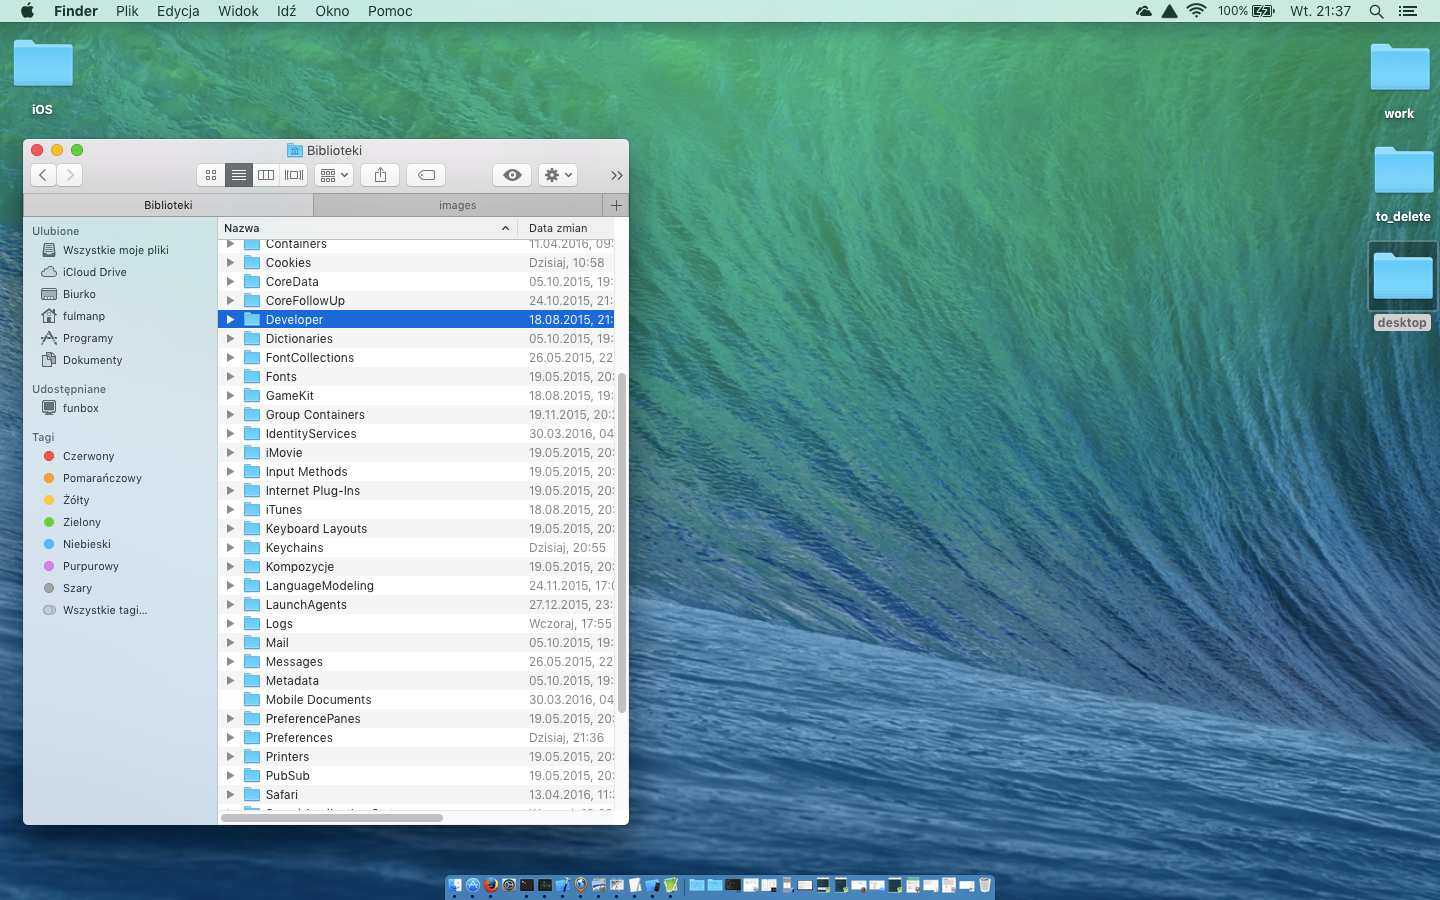
Let's test it. Open a Finder window and navigate to your home directory. If you can't see your Library folder, hold down the Alt key and select Go | Library from top main menu. Having Library displayed, select Developer/CoreSimulator/Devices/.

|

|

|
|
Within that directory, there is one subdirectory for each simulator in Xcode installation. The subdirectory names are GUIDs (globally unique identifiers) generated automatically by Xcode, so it’s impossible to know just by looking at them which directory corresponds to which simulator. To find out we should examine a file called device.plist in any of the simulator directories and open it.

|

|

|
We can also examine device_set.plist located in Devices
pc18:Devices fulmanp$ pwd

/Users/fulmanp/Library/Developer/CoreSimulator/Devices

pc18:Devices fulmanp$ ls

017F1FAA-A538-4B05-99DD-56005B2A781E	8DE4F1A7-E3C2-473E-81A4-522DD7A07CC0

033BC02B-C984-44A5-BAF6-858E8521B879	8DFEAA23-D012-4FAB-A7F4-B5D000F2078B

[... cut to save some space ...]

89EF7B1E-0902-4CA6-8FE9-19EB5B99D1E0	FF38963D-624D-423E-8B93-6989F334A20A

8C70AEA1-A42A-42CB-A513-93EF80591E5D	device_set.plist

8D3575AE-DBDC-474E-8652-4E2420833DBB

pc18:Devices fulmanp$
[USER_HOME_DIRECTORY]/Library/Developer/CoreSimulator/Devices/device_set.plist

|

|
Every application sandbox contains three directories
- Documents Our application can store data in
Documentsdirectory. Use this directory to store user-generated content. If iTunes file sharing is enabled for our application, the user can see the contents of this directory and its subdirectories in iTunes and can also upload files to it. - Library This directory is used to store files that we do not want to share with others. This is the top-level directory for any files that are not user data files.
- tmp This directory is a place where an application can store temporary files. Files written into it will not be backed up by iTunes.
As we have seen, path to the applicaton folder is somehow random. To get the right one, we have to use one of the function prepared for this occasion.
|
1 2 3 4 5 6 7 8 9 |
// To get Documents directory let dirPaths = NSSearchPathForDirectoriesInDomains(.documentDirectory, .userDomainMask, true) let documentDirectory = dirPaths[0] // To get tmp directory let tmpDirectory = NSTemporaryDirectory(); // To create a full path to a file "someFile.txt" located in "directory" directory let filePathString = directory + "/" + "someFile.txt" |
The same in more Swifty way
|
1 2 |
let documentDirectory = FileManager.default.urls(for: .documentDirectory, in: .userDomainMask).first let filePathURL = documentDirectory!.appendingPathComponent("someFile.txt") |
- Step 1: create a new project
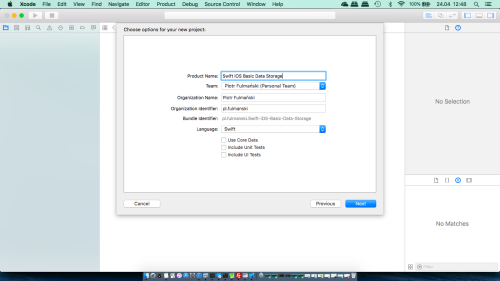
Create a new project- Select File | New | Project...
- Select Single View Application on the template selection sheet.
- As the product name enter
Swift iOS Basic Data Storage - Set the Language to Swift. Because we will not use tests in this tutorial, you can leave both test check boxes unchecked as well as make sure the check box labeled Use Core Data is also unchecked.
- Step 2: add components
- Select
Main.storyboardand from the Object library drag- one Text field
- two Buttons
- one Text view
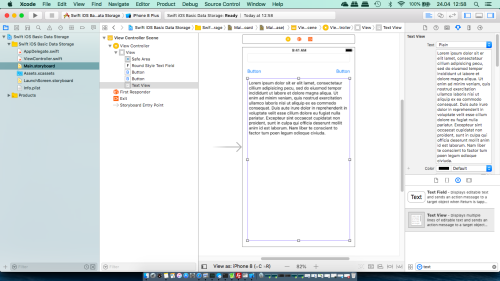
- Set all the constraints required for a correc layout.
- Set Title for a left button as
Save. - Set Title for a right button as
Load.
- Set Title for a left button as
- Create outlets for all components so we can use them in the future
- for Text field creat
textFieldoutlet - for left (Save) Button creat
buttonSaveoutlet - for right (Load) Button creat
buttonLoadoutlet - for Text view creat
textViewoutlet
- for Text field creat
- Create actions for button
- for left (Save) Button creat
buttonPressSaveaction - for right (Load) Button creat
buttonPressLoadaction
- for left (Save) Button creat
Now our code should look like below
123456789101112131415161718192021222324252627282930313233//// ViewController.swift// Swift iOS Basic Data Storage//// Created by Piotr Fulmański on 2018.04.24.// Copyright © 2018 Piotr Fulmański. All rights reserved.//import UIKitclass ViewController: UIViewController {@IBOutlet weak var textField: UITextField!@IBOutlet weak var buttonSave: UIButton!@IBOutlet weak var buttonLoad: UIButton!@IBOutlet weak var textView: UITextView!@IBAction func buttonPressSave(_ sender: UIButton) {}@IBAction func buttonPressLoad(_ sender: UIButton) {}override func viewDidLoad() {super.viewDidLoad()// Do any additional setup after loading the view, typically from a nib.}override func didReceiveMemoryWarning() {super.didReceiveMemoryWarning()// Dispose of any resources that can be recreated.}} - Select


NSArray write(to:atomically:)In case we want to use property lists to persist our data, we have to use either an
NSArray or an NSDictionary as a main data structure to hold the data that needs to be saved. In addition to this we can build our data model from the following objects
NSArray,NSMutableArrayNSDictionary,NSMutableDictionaryNSData,NSMutableDataNSString,NSMutableStringNSNumberNSDate
Main drawback of this approach is that custom objects cannot be serialized into property lists.
Assuming that all the objects that we put into the NSArray or an NSDictionary are serializable objects from this list, we can write and read a property list, like so
- Step 1: add/modify
ViewController's code to get path
1234567891011121314var pathFull:String?func getPath() -> String {let dirPaths = NSSearchPathForDirectoriesInDomains(.documentDirectory, .userDomainMask, true)let documentDirectory = dirPaths[0]return documentDirectory + "/" + "test.plist"}override func viewDidLoad() {super.viewDidLoad()// Do any additional setup after loading the view, typically from a nib.pathFull = getPath()} - Step 2: add/modify code
1234567891011121314151617181920212223242526272829303132@IBAction func buttonPressSave(_ sender: UIButton) {savePList()}@IBAction func buttonPressLoad(_ sender: UIButton) {loadPList()}func loadPList() {if let path = pathFull {let data:NSArray = NSArray(contentsOfFile: path)!print(data)}}func savePList() {if let path = pathFull {// It is not possible to save dictionary which basically can// store any key-value (for example [String:Any]) pair// It must be for example [String:Int]let data = [["name": "List 1", "items": "1", "0": "1"],["name": "List 2", "items": "2", "0": "2", "1": "test2"],["name": "List 3", "items": "3", "0": "2", "2": "test3", "3": "3.21"]]let pathUrl = URL(fileURLWithPath: path)textView.text = pathUrl.absoluteString// Method below works, however according to// https://developer.apple.com/documentation/foundation/nsarray/1411480-write// write(to:atomically:) is deprecated(data as NSArray).write(to: pathUrl, atomically: true)}} - Step 3: run app
Executed an application and press Save button. A path smilar to the following should be printed as an output in the Text view
file:///Users/fulmanp/Library/Developer/CoreSimulator/Devices/7CF76BA3-51AB-461C-8AE5-B890E6971352/

data/Containers/Data/Application/6D3282F2-343B-40BC-A0DB-C12FF847F1AC/Documents/test.plist
We can check its contents
12345678910111213141516171819202122232425262728293031323334353637383940414243MacBook-Air-Piotr:Documents fulmanp$ pwd/Users/fulmanp/Library/Developer/CoreSimulator/Devices/7CF76BA3-51AB-461C-8AE5-B890E6971352/data/Containers/Data/Application/6D3282F2-343B-40BC-A0DB-C12FF847F1AC/DocumentsMacBook-Air-Piotr:Documents fulmanp$ ls -ltotal 8-rw-r--r-- 1 fulmanp staff 720 24 kwi 22:20 test.plistMacBook-Air-Piotr:Documents fulmanp$ cat test.plist<?xml version="1.0" encoding="UTF-8"?><!DOCTYPE plist PUBLIC "-//Apple//DTD PLIST 1.0//EN" "http://www.apple.com/DTDs/PropertyList-1.0.dtd"><plist version="1.0"><array><dict><key>0</key><string>1</string><key>items</key><string>1</string><key>name</key><string>List 1</string></dict><dict><key>0</key><string>2</string><key>1</key><string>test2</string><key>items</key><string>2</string><key>name</key><string>List 2</string></dict><dict><key>0</key><string>2</string><key>2</key><string>test3</string><key>3</key><string>3.21</string><key>items</key><string>3</string><key>name</key><string>List 3</string></dict></array></plist>
When Load is pressed, the following text should be printed as an output in the Debug area
(

        {

        0 = 1;

        items = 1;

        name = "List 1";

    },

        {

        0 = 2;

        1 = test2;

        items = 2;

        name = "List 2";

    },

        {

        0 = 2;

        2 = test3;

        3 = "3.21";

        items = 3;

        name = "List 3";

    }

)
Codable protocolNSArray write(to:atomically:) is deprecated and the Codable protocol which is new to Swift in iOS 11 should be used instead. In some sense Code is a logical consequence of preceding NSCoding protocol.Some good materials are
- Everything about Codable in Swift 4
- Using Swift Codable With Property Lists
- Encoding, Decoding and Serialization in Swift 4
- Step 1: add/modify code
123456789101112131415161718192021222324252627282930313233343536373839404142434445464748@IBAction func buttonPressSave(_ sender: UIButton) {//savePList()savePListWithCodable()}@IBAction func buttonPressLoad(_ sender: UIButton) {//loadPList()loadPListWithCodable()}func loadPListWithCodable() {if let path = pathFull {let pathUrl = URL(fileURLWithPath: path)do {let dataToDecode = try Data(contentsOf: pathUrl)let decoder = PropertyListDecoder()let data = try decoder.decode([[String:String]].self, from: dataToDecode)print(data)print(data[1]["name"]!)} catch {// Handle errorprint(error)}}}func savePListWithCodable() {if let path = pathFull {// It is not possible to save dictionary which basically can// store any key-value (for example [String:Any]) pair// It must be for example [String:Int]let data = [["name": "List 1", "items": "1", "0": "1"],["name": "List 2", "items": "2", "0": "2", "1": "test2"],["name": "List 3", "items": "3", "0": "2", "2": "test3", "3": "3.21"]]let pathUrl = URL(fileURLWithPath: path)textView.text = pathUrl.absoluteStringlet encoder = PropertyListEncoder()encoder.outputFormat = .xmldo {let dataEncoder = try encoder.encode(data)try dataEncoder.write(to: pathUrl)} catch {print(error)}}} - Step 2: run app
Executed an application and press Save button. A path smilar to the following should be printed as an output in the Text view
file:///Users/fulmanp/Library/Developer/CoreSimulator/Devices/7CF76BA3-51AB-461C-8AE5-B890E6971352/

data/Containers/Data/Application/2A5CB84C-D982-4FE0-AACD-E69813E905E4/Documents/test.plist
We can check its contents
12345678910111213141516171819202122232425262728293031323334353637383940414243MacBook-Air-Piotr:Documents fulmanp$ pwd/Users/fulmanp/Library/Developer/CoreSimulator/Devices/7CF76BA3-51AB-461C-8AE5-B890E6971352/data/Containers/Data/Application/2A5CB84C-D982-4FE0-AACD-E69813E905E4/DocumentsMacBook-Air-Piotr:Documents fulmanp$ ls -ltotal 8-rw-r--r-- 1 fulmanp staff 720 24 kwi 23:37 test.plistMacBook-Air-Piotr:Documents fulmanp$ cat test.plist<?xml version="1.0" encoding="UTF-8"?><!DOCTYPE plist PUBLIC "-//Apple//DTD PLIST 1.0//EN" "http://www.apple.com/DTDs/PropertyList-1.0.dtd"><plist version="1.0"><array><dict><key>0</key><string>1</string><key>items</key><string>1</string><key>name</key><string>List 1</string></dict><dict><key>0</key><string>2</string><key>1</key><string>test2</string><key>items</key><string>2</string><key>name</key><string>List 2</string></dict><dict><key>0</key><string>2</string><key>2</key><string>test3</string><key>3</key><string>3.21</string><key>items</key><string>3</string><key>name</key><string>List 3</string></dict></array></plist>
When Load is pressed, the following text should be printed as an output in the Debug area
[["items": "1", "0": "1", "name": "List 1"], ["items": "2", "name": "List 2", "1": "test2",

"0": "2"], ["items": "3", "name": "List 3", "2": "test3", "0": "2", "3": "3.21"]]

List 2
Codable protocolCodable and bundle property list works exactly the same way as property lists. The only true diference is how we get the path to a bundle propert list.
- Step 1: cerate bundle property list
- In the Project Navigator, right-click the Swift iOS Basic Data Storage group and select New File....
- Choose Property List from the iOS | Resources section in the template dialog and then press Next
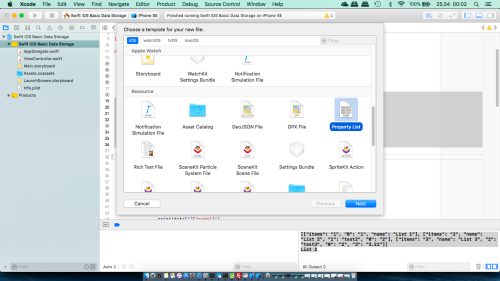
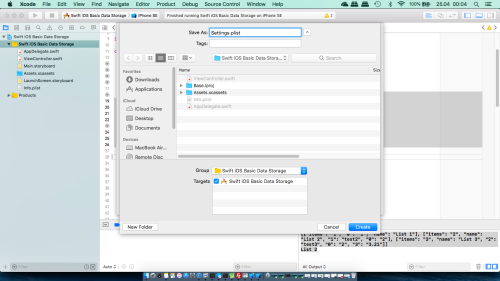
- Name the property list
Settings.plistand press Create. We should see a blank property list

- Step 2: add property list items
- When hover over the root entry we will find a
+button to add an entry

- When the
+button is clicked a new entry appears, with a default type of String

- By analogy, add some items

- When hover over the root entry we will find a
- Step 3: add/modify code
123456789101112131415161718192021222324252627282930313233343536373839404142434445464748495051@IBAction func buttonPressSave(_ sender: UIButton) {//savePList()//savePListWithCodable()savePListBoundle()}@IBAction func buttonPressLoad(_ sender: UIButton) {//loadPList()//loadPListWithCodable()loadPListBoundle()}func loadPListBoundle() {pathFull = Bundle.main.path(forResource:"Settings", ofType: "plist")if let path = pathFull {let pathUrl = URL(fileURLWithPath: path)do {let dataToDecode = try Data(contentsOf: pathUrl)let decoder = PropertyListDecoder()let data = try decoder.decode([String:String].self, from: dataToDecode)print(data)if let d = data["Setting 1"] {print(d)}} catch {print(error)}}}func savePListBoundle() {pathFull = Bundle.main.path(forResource:"Settings", ofType: "plist")if let path = pathFull {// It is not possible to save dictionary which basically can// store any key-value (for example [String:Any]) pair// It must be for example [String:Int]let data = ["name": "List 3", "items": "3", "0": "2", "2": "test3", "3": "3.21"]let pathUrl = URL(fileURLWithPath: path)textView.text = pathUrl.absoluteStringlet encoder = PropertyListEncoder()encoder.outputFormat = .xmldo {let dataEncoder = try encoder.encode(data)try dataEncoder.write(to: pathUrl)} catch {print(error)}}} - Step 4: run app
- Executed an application and press Load button. The following text should be printed as an output in the Debug area
["Setting 1": "Value 1"]

Value 1
- Press Save button. A path smilar to the following should be printed as an output in the Text view
file:///Users/fulmanp/Library/Developer/CoreSimulator/Devices/7CF76BA3-51AB-461C-8AE5-B890E6971352/

data/Containers/Bundle/Application/689888CB-3540-457C-952B-4A2D8E29B941/Swift%20iOS%20Basic%20Data%

20Storage.app/Settings.plist
We can check its contents
1234567891011121314151617181920212223242526272829303132333435363738394041424344454647484950MacBook-Air-Piotr:Swift iOS Basic Data Storage.app fulmanp$ pwd/Users/fulmanp/Library/Developer/CoreSimulator/Devices/7CF76BA3-51AB-461C-8AE5-B890E6971352/data/Containers/Bundle/Application/689888CB-3540-457C-952B-4A2D8E29B941/Swift iOS Basic Data Storage.appMacBook-Air-Piotr:Swift iOS Basic Data Storage.app fulmanp$ ls -ltotal 1920drwxr-xr-x 4 fulmanp staff 128 25 kwi 00:52 Base.lprojdrwxr-xr-x 15 fulmanp staff 480 25 kwi 00:52 Frameworks-rw-r--r-- 1 fulmanp staff 1180 24 kwi 13:10 Info.plist-rw-r--r-- 1 fulmanp staff 8 24 kwi 13:10 PkgInfo-rw-r--r-- 1 fulmanp staff 720 25 kwi 00:52 Settings.plist-rwxr-xr-x 1 fulmanp staff 116032 25 kwi 00:52 Swift iOS Basic Data Storagedrwxr-xr-x 3 fulmanp staff 96 25 kwi 00:52 _CodeSignature-rw-r--r-- 1 fulmanp staff 799312 25 kwi 00:52 libswiftRemoteMirror.dylibMacBook-Air-Piotr:Swift iOS Basic Data Storage.app fulmanp$ cat Settings.plist<?xml version="1.0" encoding="UTF-8"?><!DOCTYPE plist PUBLIC "-//Apple//DTD PLIST 1.0//EN" "http://www.apple.com/DTDs/PropertyList-1.0.dtd"><plist version="1.0"><array><dict><key>0</key><string>1</string><key>items</key><string>1</string><key>name</key><string>List 1</string></dict><dict><key>0</key><string>2</string><key>1</key><string>test2</string><key>items</key><string>2</string><key>name</key><string>List 2</string></dict><dict><key>0</key><string>2</string><key>2</key><string>test3</string><key>3</key><string>3.21</string><key>items</key><string>3</string><key>name</key><string>List 3</string></dict></array></plist> - Press Load button. The following text should be printed as an output in the Debug area
["items": "3", "name": "List 3", "2": "test3", "0": "2", "3": "3.21"]
- Executed an application and press Load button. The following text should be printed as an output in the Debug area


As we have seen
Codable protocols simplify saving our data to propert list. If we want to operate this way with more complex object than for example [String: String] dictionary, preferably something like [String: Any], we have to use custom types. Having custom type, we can save/read our data to/from a property list as well as JSON. Some good materials we can read about this were mentioned in Property list with Codable protocol section. In short, to encode and decode a custom type, we need to make it Codable. The simplest way to make a type codable is to declare its properties using types that are already Codable
- Built-in
Codabletypes: String, Int, Double, Data, URL. - Array, Dictionary, Optional are
Codableif they containCodabletypes.
We will show how it works with JSON files, but the same apprach is used for property list - simply use ideas from the previous sections: Property list with Codable protocol or Bundle property list with Codable protocol.
- Step 1: change path generating code to make it more Swifty
123456789101112131415161718192021222324// Old way:var pathFull:String?func getPath() -> String {let dirPaths = NSSearchPathForDirectoriesInDomains(.documentDirectory, .userDomainMask, true)let documentDirectory = dirPaths[0]return documentDirectory + "/" + "test.plist"}// The same in more Swifty way:var pathUrl:URL?func getPath() -> URL {let documentDirectory = FileManager.default.urls(for: .documentDirectory, in: .userDomainMask).first//return documentDirectory.appendingPathComponent("test.plist")return documentDirectory!.appendingPathComponent("test.json")}override func viewDidLoad() {super.viewDidLoad()// Do any additional setup after loading the view, typically from a nib.pathFull = getPath() // Path as a StringpathUrl = getPath() // Path as an URL} - Step 2: add custom types to be saved
12345678910111213141516struct Lists: Codable {var count: Intvar lists: [List]}struct List: Codable {var name: Stringvar itemInt: Intvar itemString: Stringvar itemFloat: Doublevar itemBool: Bool}class ViewController: UIViewController {...} - Step 3: add/modify code
123456789101112131415161718192021222324252627282930313233343536373839404142434445464748495051@IBAction func buttonPressSave(_ sender: UIButton) {//savePList()//savePListWithCodable()//savePListBoundle()saveCustomTypeWithCodable()}@IBAction func buttonPressLoad(_ sender: UIButton) {//loadPList()//loadPListWithCodable()//loadPListBoundle()loadCustomTypeWithCodable()}func loadCustomTypeWithCodable() {if let pathUrl = pathUrl {do {let jsonFileContents = try String(contentsOf: pathUrl, encoding: .utf8)let lists = try JSONDecoder().decode(Lists.self, from: jsonFileContents.data(using: .utf8)!)print(lists.count)for list in lists.lists {print("\(list.name): \(list.itemInt) \(list.itemString) \(list.itemFloat) \(list.itemBool)")}} catch let error {print("Encoding error: ", error)}}}func saveCustomTypeWithCodable() {if let pathUrl = pathUrl {textView.text = pathUrl.absoluteStringlet list1 = List(name: "List 1", itemInt: 1, itemString: "String 1", itemFloat: 1.23, itemBool: true)let list2 = List(name: "List 2", itemInt: 2, itemString: "String 2", itemFloat: 2.34, itemBool: false)let list3 = List(name: "List 3", itemInt: 3, itemString: "String 3", itemFloat: 3.45, itemBool: true)let lists = Lists(count: 3, lists: [list1, list2, list3])let jsonEncoder = JSONEncoder()do {let jsonData = try jsonEncoder.encode(lists)let jsonString = String(data: jsonData, encoding: .utf8)print(jsonString!)try jsonString?.write(to: pathUrl, atomically: true, encoding: .utf8)} catch let error {print("Encoding error: ", error)}}} - Step 4: run app
Executed an application and press Save button. A path smilar to the following should be printed as an output in the Debug area
{"count":3,"lists":[{"itemBool":true,"itemString":"String 1","name":"List 1","itemInt":1,"itemFloat":1.23},

{"itemBool":false,"itemString":"String 2","name":"List 2","itemInt":2,"itemFloat":2.3399999999999999},{"ite

mBool":true,"itemString":"String 3","name":"List 3","itemInt":3,"itemFloat":3.4500000000000002}]}
At the same time a path smilar to the following should be printed as an output in the Text view
file:///Users/fulmanp/Library/Developer/CoreSimulator/Devices/7CF76BA3-51AB-461C-8AE5-B890E6971352/data/

Containers/Data/Application/3520AE20-2B0C-4737-80A2-9B5B0902C07D/Documents/test.json
We can check its contents
123456789MacBook-Air-Piotr:Documents fulmanp$ pwd/Users/fulmanp/Library/Developer/CoreSimulator/Devices/7CF76BA3-51AB-461C-8AE5-B890E6971352/data/Containers/Data/Application/3520AE20-2B0C-4737-80A2-9B5B0902C07D/DocumentsMacBook-Air-Piotr:Documents fulmanp$ ls -ltotal 16-rw-r--r--@ 1 fulmanp staff 311 25 kwi 14:18 test.json-rw-r--r-- 1 fulmanp staff 720 24 kwi 23:45 test.plistMacBook-Air-Piotr:Documents fulmanp$ cat test.json{"count":3,"lists":[{"itemBool":true,"itemString":"String 1","name":"List 1","itemInt":1,"itemFloat":1.23},{"itemBool":false,"itemString":"String 2","name":"List 2","itemInt":2,"itemFloat":2.3399999999999999},{"itemBool":true,"itemString":"String 3","name":"List 3","itemInt":3,"itemFloat":3.4500000000000002}]}
When Load is pressed, the following text should be printed as an output in the Debug area
3

List 1: 1 String 1 1.23 true

List 2: 2 String 2 2.34 false

List 3: 3 String 3 3.45 true