In this tutorial we cover the following topics
There is no advanced theory related to application's main menu and also editing it consists of simple drag and drop activities, so we jump right away into a first project. The one thing which counts is whether we will use
.xib or .storyboard. We will show both approaches but for some details related to discussion which is better, please refer to First application: Xcode file formats section.
- Step 1: setting up a project in Xcode
Launch Xcode and select File | New | Project... from main menu or from Welcome to Xcode screen select Create a new Xcode project.
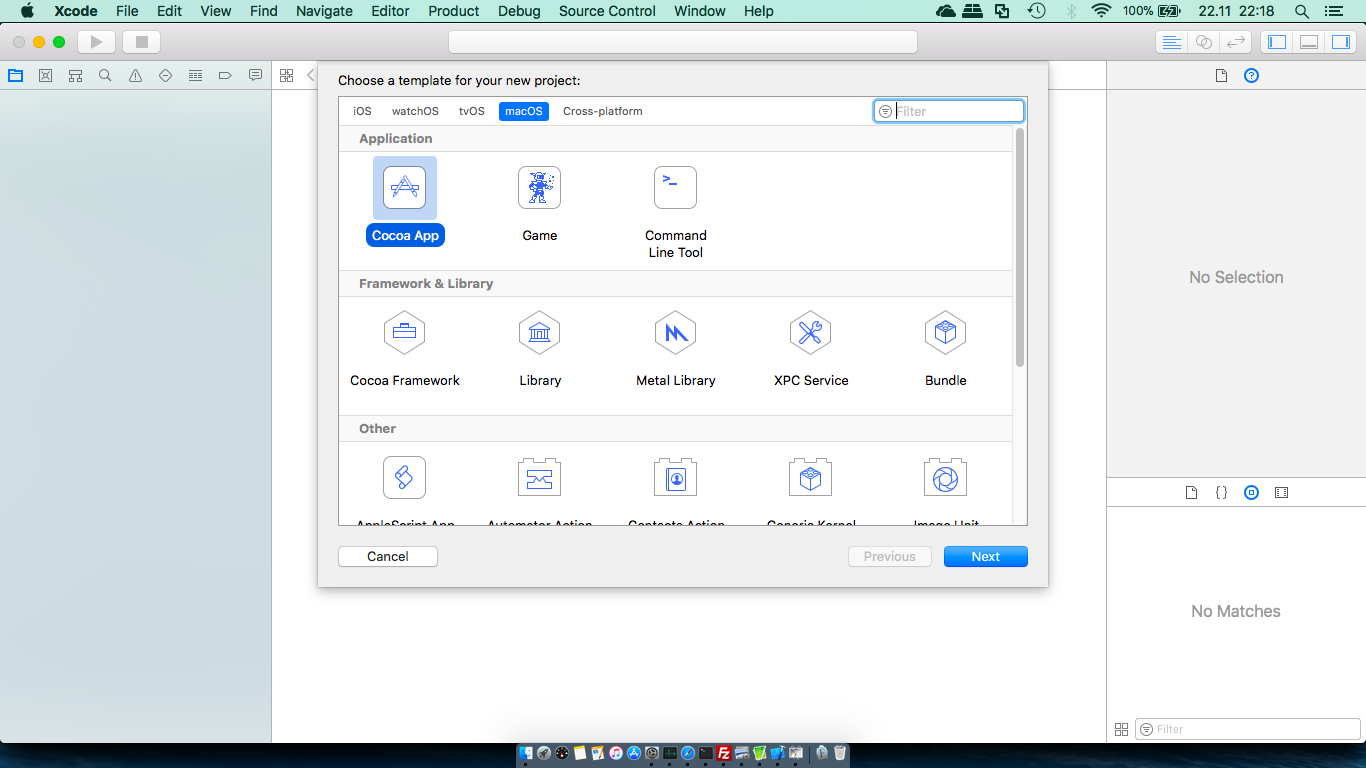
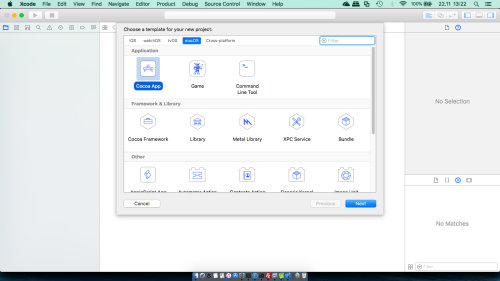
In project window select macOS | Application | Cocoa App template and then click the Next button.
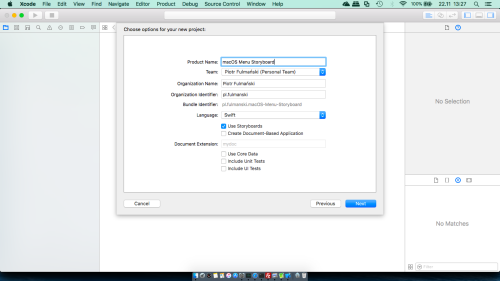
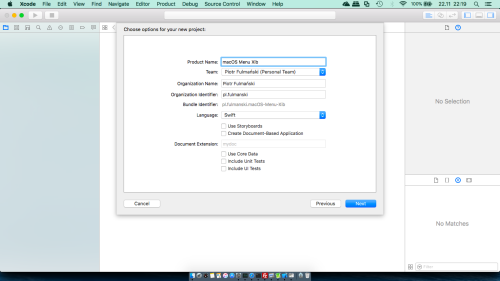
You will see the project options sheet. Name it macOS Menu Storyboard and make sure that only the Use storyboards check box is selected. Completed sheet should look like below
Press Next button, and you will be prompted for a location for your project. When selected, press Create to save the project. - Step 2: add label
Single clickMain.storyboardfile in Project Navigator to open the application’s view in Xcode’s Interface Builder.

From the Object Library drag aLabelobject onto theView Controller Scene(we can display Object Library selecting View | Utilities | Show Object Library
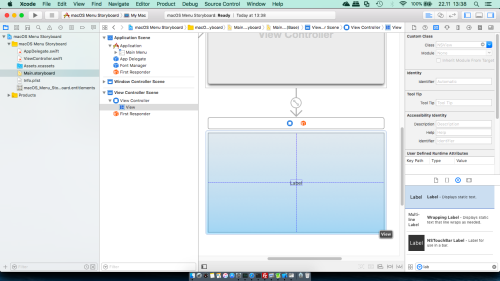
Select the Size inspector by selecting right icon (or press command + option + 5) and/or the Attributes inspector by selecting right icon (or press command + option + 4) and set label's property like its width or title to whatever you want. In my case Title was set to an empty string as well as some constraints.


- Step 3: create an outlet for the label
ShowViewController.swiftfile next to the user interface selecting either View | Assistant Editor | Show Assistant Editor or clicking right icon (an icon with double circles).

Control drag a mouse pointer (drag it with Ctrl pressed) from the label to theViewControllerclass.
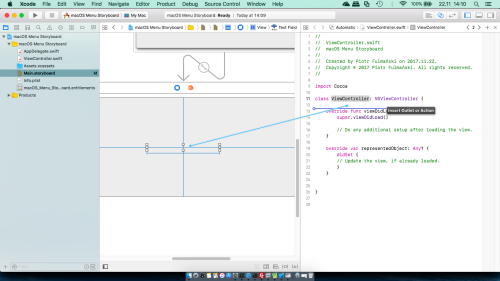
Fill the popup with name labelSelectedMenuItem
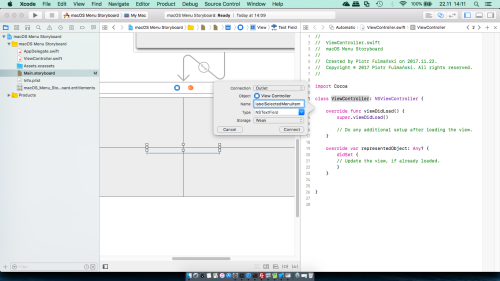
Xcode should add the following code to theViewControllerclass:
1@IBOutlet weak var labelSelectedMenuItem: NSTextField! - Step 4: add an action for an existing menu item
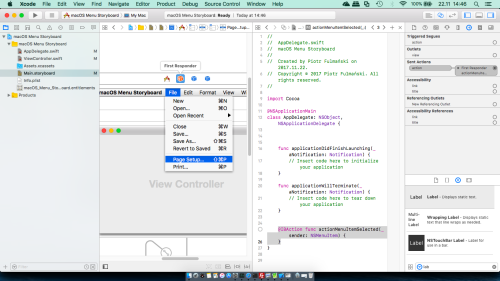
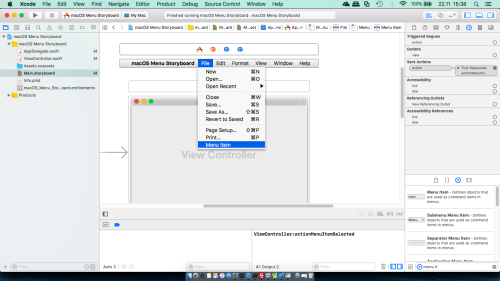
Click the File pull-down menu in the Interface Builder. Notice that the Assistant Editor should now display theAppDelegate.swiftfile.

Control drag a mouse pointer (drag it with Ctrl pressed) from the menu item you want (Page Setup in my cases) to theAppDelegateclass.

Select Action as a Connection type, name it actionMenuItemSelected and select NSMenuItem as its Type

Xcode should add the following code to theAppDelegateclass:
12@IBAction func actionMenuItemSelected(_ sender: NSMenuItem) {}
Notice that we can't control drag a mouse pointer from the menu item to theViewControllerclass -- there will be no option to create an action in this case. - Step 5: connect an action with an outlet
Now we have to connect somehow label outlet with an action which both are in separate files.Control drag a mouse pointer (drag it with Ctrl pressed) from menu item you have selected previously (Page Setup in my cases) to the First Responder icon

From a pop-up select actionMenuItemSelected

We can verify existence of this connection in the Connections inspector
More information about first responder can be found in firstResponder or Responder object. We can think of this as the control/view that has the focus, because it will be the first to respond to events.Copy the
actionMenuItemSelectedfrom theAppDelegateclass to theViewControllerclass.Add / modify
actionMenuItemSelectedmethod in theAppDelegateclass with the following code1print("AppDelegate:actionMenuItemSelected")Add / modify
actionMenuItemSelectedmethod in theViewControllerclass with the following code1print("ViewController:actionMenuItemSelected") - Step 6: make a test
Run the application. From application's top main menu select menu item you have selected previously (Page Setup in my cases). You should see
ViewController:actionMenuItemSelected
printed as an output. - Step 7: make a test
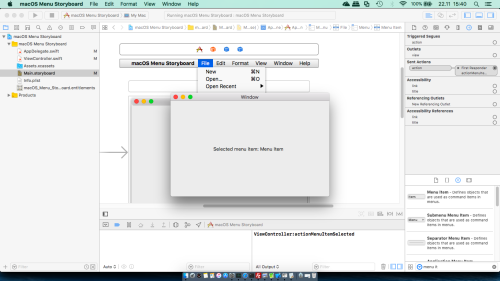
Now we can connect a label outlet with an action.Add / modify
actionMenuItemSelectedmethod in theViewControllerclass with the following code1234@IBAction func actionMenuItemSelected(_ sender: NSMenuItem) {print("ViewController:actionMenuItemSelected")labelSelectedMenuItem.stringValue = "Selected menu item: " + sender.title}and test the application

- Step 8: add a new menu item
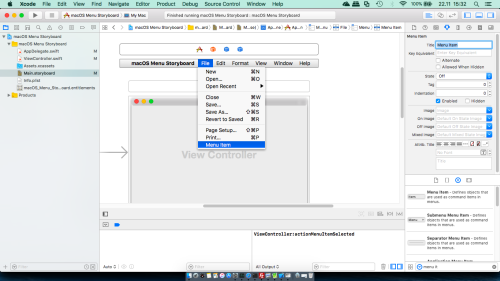
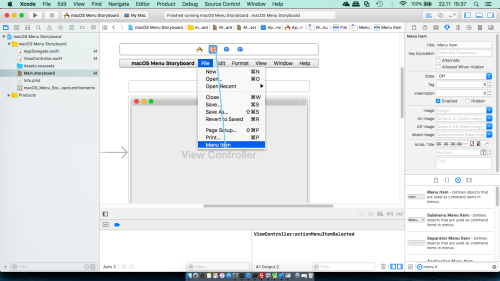
Single clickMain.storyboardfile in Project Navigator to open the application’s view in Xcode’s Interface Builder.Click the File pull-down menu in the Interface Builder.
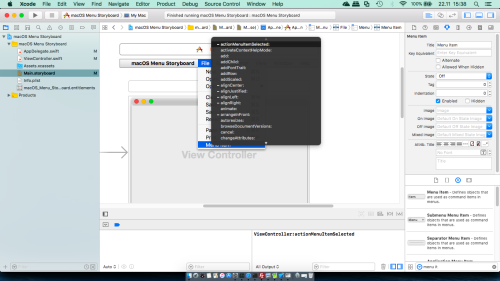
From the Object Library drag a
Menu itemobject to the File and place it somewhere there

Change its name (and/or any other properties you want) to Menu Item
- Step 9: bind a new menu item with an action
Control drag a mouse pointer (drag it with Ctrl pressed) from the menu item you have just add (Menu Item in my cases) to the First Responder icon
From a pop-up select actionMenuItemSelected
We can verify existence of this connection in the Connections inspector
- Step 10: make a test
Test the application


- Step 1: setting up a project in Xcode
Launch Xcode and select File | New | Project... from main menu or from Welcome to Xcode screen select Create a new Xcode project.
In project window select macOS | Application | Cocoa App template and then click the Next button.

You will see the project options sheet. Name it macOS Menu Xib and make sure that the Use storyboards check box is NOT selected. Completed sheet should look like below
Press Next button, and you will be prompted for a location for your project. When selected, press Create to save the project. - Step 2: add label
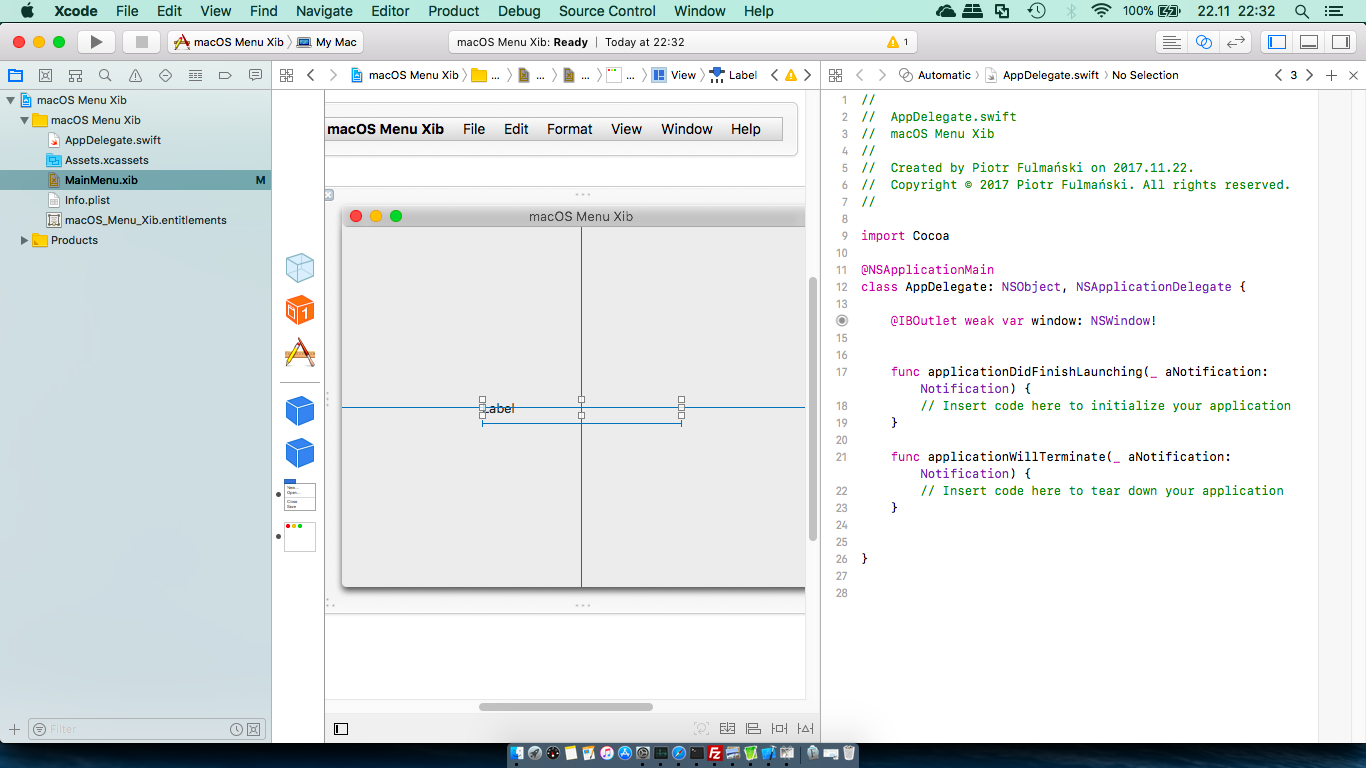
Single clickMainMenu.xibfile in Project Navigator to open the application’s view in Xcode’s Interface Builder.

Click the Window icon in the Document Outline to display the program’s user interface.

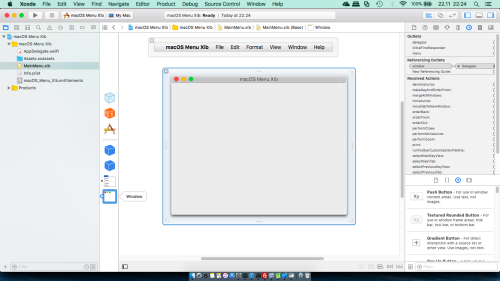
From the Object Library drag aLabelobject onto the user interface window (we can display Object Library selecting View | Utilities | Show Object Library

Select the Size inspector by selecting right icon (or press command + option + 5) and/or the Attributes inspector by selecting right icon (or press command + option + 4) and set label's property like its width or title to whatevery you want. In my case Title was set to an empty string as well as some constraints.

- Step 3: create an outlet for the label
ShowAppDelegate.swiftfile next to the user interface selecting either View | Assistant Editor | Show Assistant Editor or clicking right icon (an icon with double circles).

Control drag a mouse pointer (drag it with Ctrl pressed) from the label to theAppDelegateclass.

Fill the popup with name labelSelectedMenuItem

Xcode should add the following code to theAppDelegateclass:
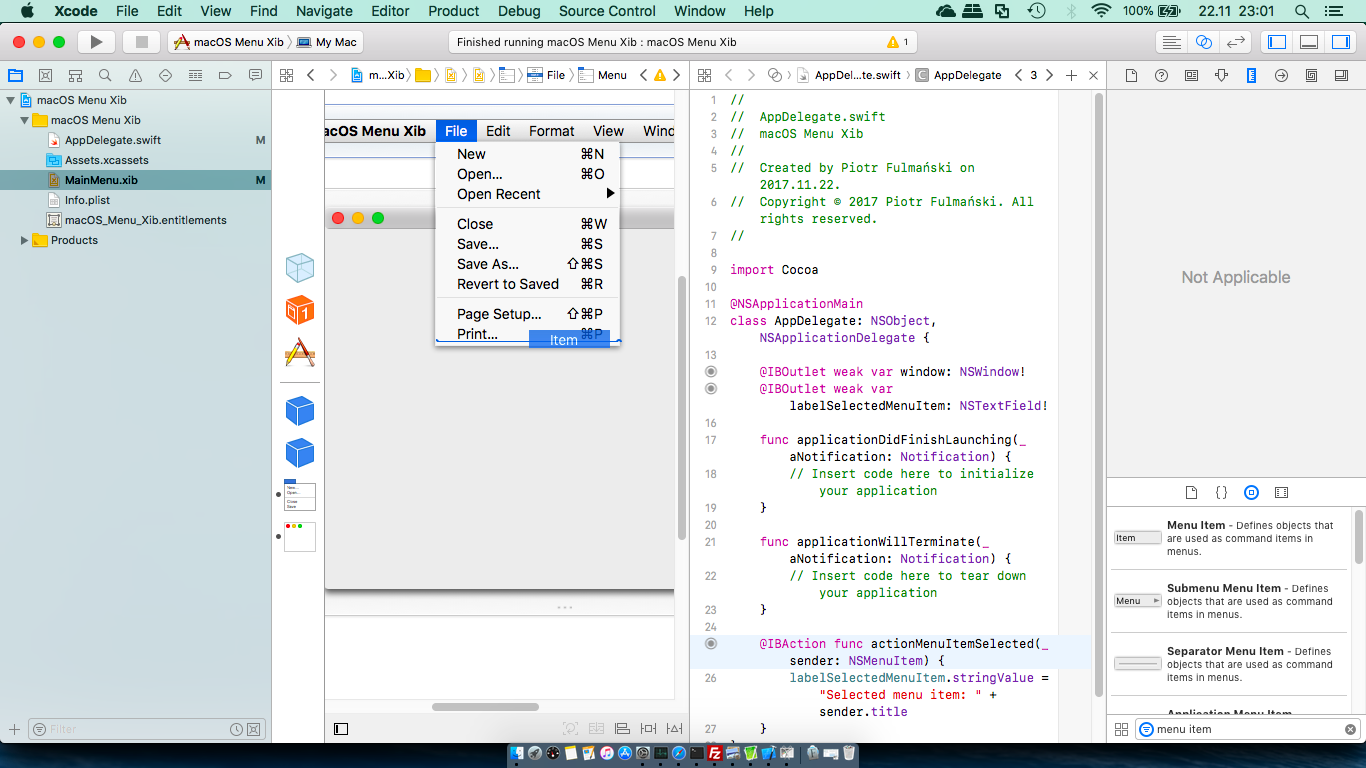
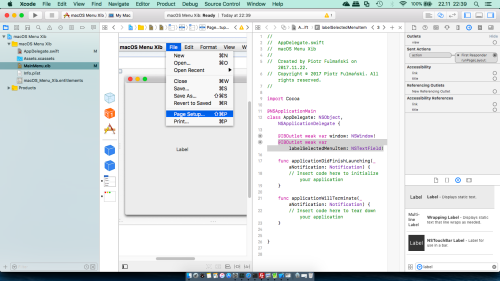
1@IBOutlet weak var labelSelectedMenuItem: NSTextField! - Step 4: add an action for an existing menu item
Click the File pull-down menu in the Interface Builder, next the menu item you want (Page Setup in my cases), and show the Connections inspector by selecting right icon (or press command + option + 6)
As we can see, the Connections Inspector pane shows that the Page Setup command (or any other you selected) is connected to the runPageLayout action method in the First Responder.Click the close icon (the X) that appears in the top-left corner of the First Responder. This breaks the connection between the command and the method.
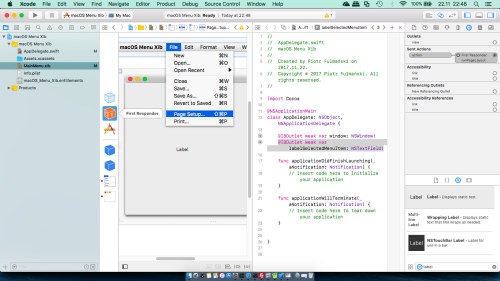

Control drag a mouse pointer (drag it with Ctrl pressed) from the menu item you have selected (Page Setup in my cases) to the
AppDelegateclass.
Select Action as a Connection type, name it actionMenuItemSelected and select NSMenuItem as its Type

Xcode should add the following code to theAppDelegateclass:12@IBAction func actionMenuItemSelected(_ sender: NSMenuItem) {} - Step 5: make a test
Now we can connect a label outlet with an action.Add / modify
actionMenuItemSelectedmethod in theAppDelegateclass with the following code123@IBAction func actionMenuItemSelected(_ sender: NSMenuItem) {labelSelectedMenuItem.stringValue = "Selected menu item: " + sender.title}and test the application

- Step 6: add a new menu item
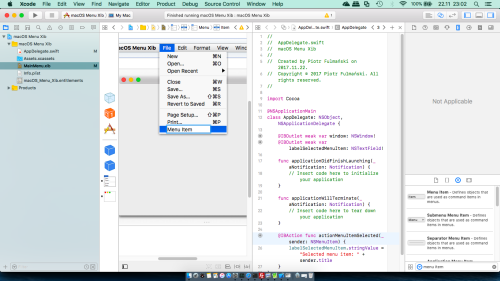
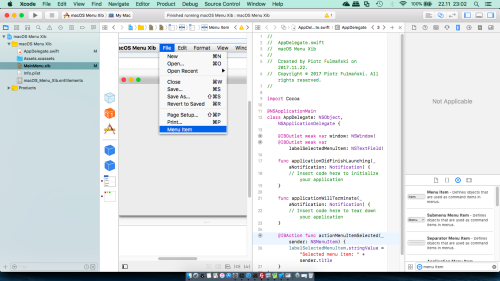
Click the File pull-down menu in the Interface Builder.From the Object Library drag a
Menu itemobject to the File and place it somewhere there

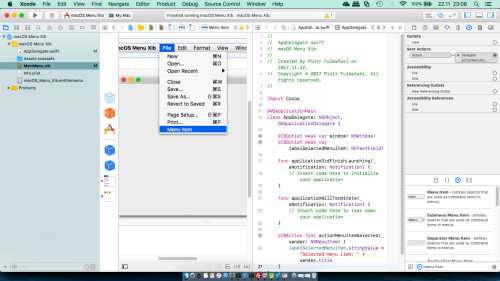
Change its name (and/or any other properties you want) to Menu Item
- Step 7: bind a new menu item with an action
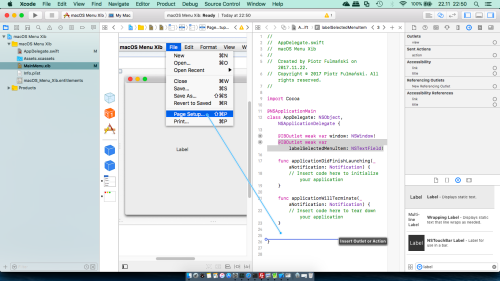
Control drag a mouse pointer (drag it with Ctrl pressed) from the menu item you have just add (Menu Item in my cases) to theactionMenuItemSelectedfuncton body. Make sure that the entire method is highlighted.
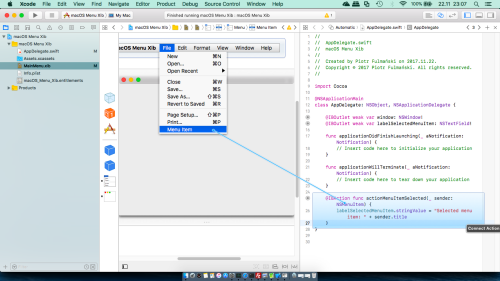
We can verify existence of this connection in the Connections inspector
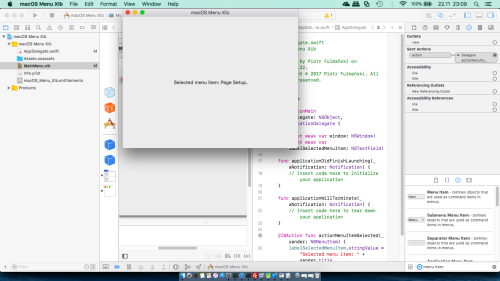
- Step 8: make a test
Test the application