
Prepared and tested with Xcode 9 and Swift 4
In this tutorial we cover the following topics
- General information
- Persist with
UserDefaults - Persist with
NSString - Persist with
NSKeyedArchiver/NSKeyedUnarchiverwithNSCoding
General information
Methods we can use
In this tutorial we will show persistent storage method based on files. We will examine three options, each offering different possibilities imposing other requirements.
- Using
UserDefaultsSimply speaking, withUserDefaultsany data that is reasonably simply structured can be stored with just a few lines of code. It's very easy to use and for small amount of data is more than enought. WithUserDefaultswe can save the following data types:- Bool,
- Number types,
- String,
- Array,
- Dictionary,
- Date,
- URL,
- Data (a byte buffer in memory Data).
- Using
.writeand.loadTextmethods fromNSStringclass We can store and load text data using FoundationNSString's object method (NSString and String). - Using
NSKeyedArchiver/NSKeyedUnarchiverwithNSCodingprotocol With this we can save custom objects.NSKeyedArchiverencodes (saves) whileNSKeyedUnarchiverdecodes (retrieves) anyNSCodingcompliant classes we want persisted.NSCodingis a protocol that requires two methods:required init(coder decoder: NSCoder)andencode(with coder: NSCoder). Any class that conforms toNSObjectandNSCoder, can be serialized (translated from its current data structure into a format that can be stored as bytes sequence) and deserialized (extracted from bytes sequence into a data structure) into data that can be saved to a user’s disk.
You can read also meterial related to Objective-C and iOS: Basic data storage
In the following sections we will create a class which can be used to save our data using the described methods.
Apple file system remarks
- User have not access to directories for which he does not have the appropriate security privileges.
- Application is expected to follow certain conventions regarding the location of different files for different purposes.
- There are commonly used directory defined by constants located in
FileManager.SearchPathDirectory:.applicationSupportDirectory,.desktopDirectory,.documentDirectory,.libraryDirectory,.moviesDirectory,.musicDirectory,.picturesDirectory.
- Another set of constants is defined in
FileManager.SearchPathDomainMask. Search path domain constants specifying base locations for theFileManager.SearchPathDirectorytype. We have the following set of constants.allDomainsMask,.localDomainMask,.networkDomainMask,.systemDomainMask,.userDomainMask.
- Terms serialize, archive, and encode very often are used interchangably. The right meaning is as follow: The program archives an object, by instructing it to encode itself, which results a serialized data.
Persist with
UserDefaults- Step 1: setting up a project in Xcode
Launch Xcode and select File | New | Project... from main menu or from Welcome to Xcode screen select Create a new Xcode project.
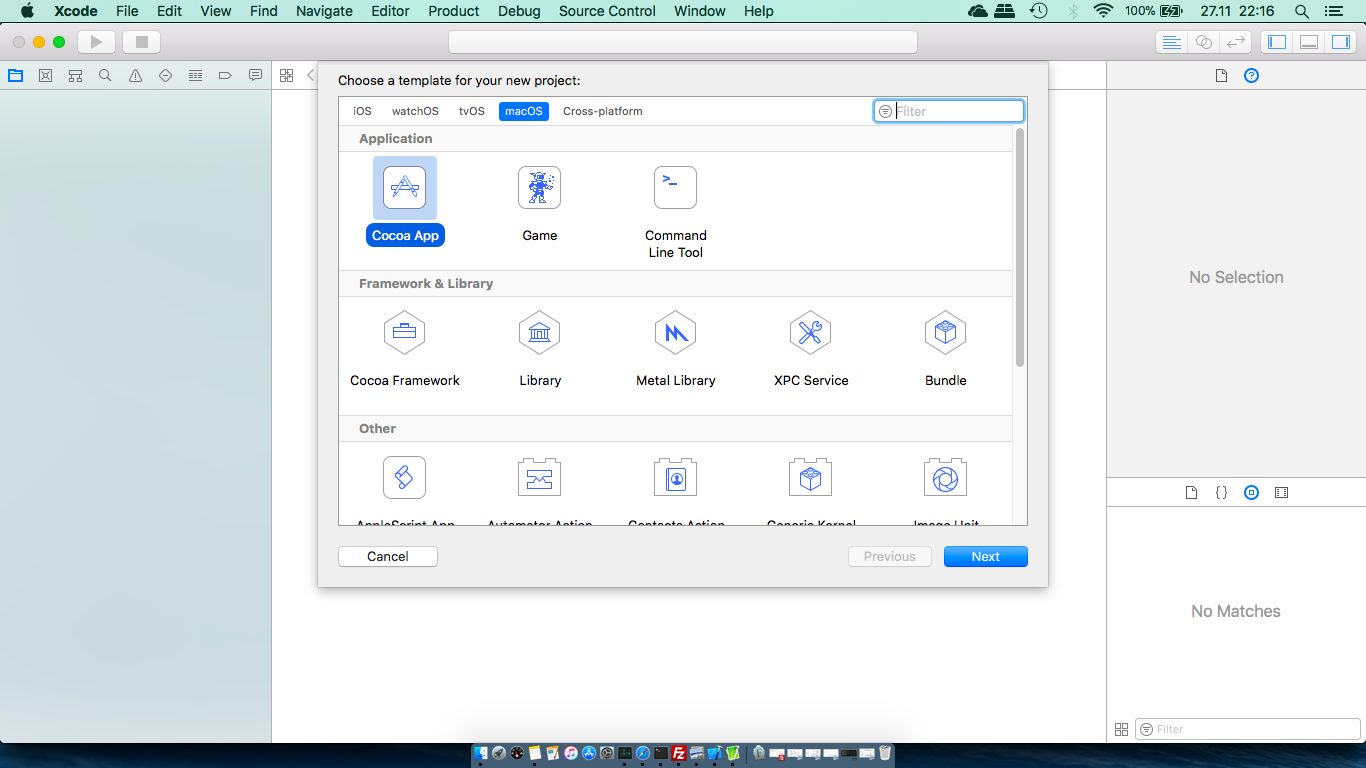
In project window select macOS | Application | Cocoa App template and then click the Next button.

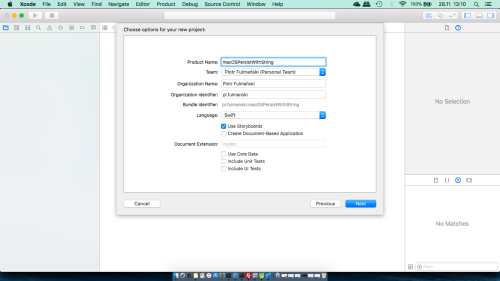
You will see the project options sheet. Name it macOSPersistWithUserDefaults. Completed sheet should look like below
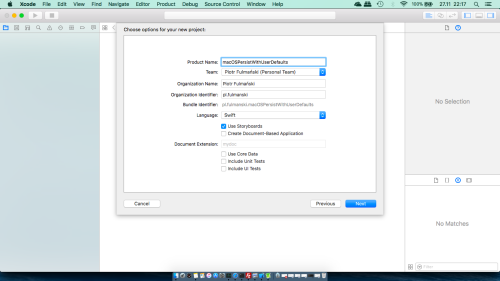
Press Next button, and you will be prompted for a location for your project. When selected, press Create to save the project. - Step 2: add a new class
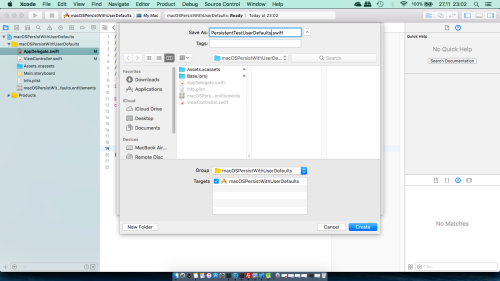
Select File | New | File... to create a new Swift class and name itPersistentTestUserDefaults
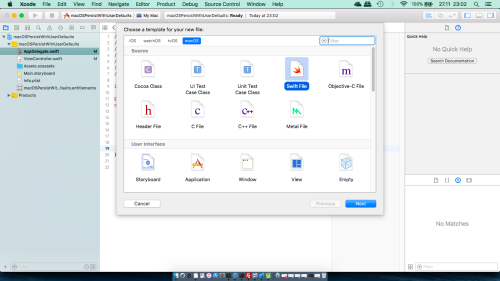
Add the followingPersistentTestUserDefaultsclass definition to thePersistentTestUserDefaults.swiftfile
12345678910111213141516171819202122232425262728import Foundationclass PersistentTestUserDefaults{// Setting up the class as a singleton.static let sharedTest = PersistentTestUserDefaults()// "userDefaults" will maintain a reference to the "standard" defaults provided by "UserDefaults".let userDefaults = UserDefaults.standardlet keyValueBool = "valueBool"let keyValueInt = "valueInt"let keyValueFloat = "valueFloat"let keyValueDouble = "valueDouble"let keyValueObject = "valueObject"let keyValueArray = "valueArray"let keyValueDictionary = "valueDictionary"let keyValueString = "valueString"let keyValueURL = "valueURL"let keyValueDate = "valueDate"func saveDefaults(){}func loadDefaults(){}} - Step 3: add
viewDidAppearmethod skeleton
AddviewDidAppearmethod toViewController.swiftfile
123override func viewDidAppear() {testUserDefaults()} - Step 4: add
testUserDefaultsmethod
AddtestUserDefaultsmethod toViewController.swiftfile
12345func testUserDefaults(){let persistentTestUserDefaults = PersistentTestUserDefaults.sharedTestpersistentTestUserDefaults.saveDefaults()persistentTestUserDefaults.loadDefaults()} - Step 5: modify
saveDefaultsmethod - Add / modify
saveDefaultsmethod located inPersistentTestUserDefaultsclass
12345678910111213141516171819202122232425func saveDefaults(){let valueBool = truelet valueInt = 123let valueFloat: Float = 4.56let valueDouble: Double = 7.89// "String" is used as object for cimplicitylet valueObject = "Object"let valueArray = [1, 2, 3]let valueDictionary = ["a": 1, "b": 2, "c": 3]let valueString = "Just a string"let valueURL = URL(string: "http://fulmanski.pl/tutorials")let valueDate = Date()userDefaults.set(valueBool, forKey: keyValueBool)userDefaults.set(valueInt, forKey: keyValueInt)userDefaults.set(valueFloat, forKey: keyValueFloat)userDefaults.set(valueDouble, forKey: keyValueDouble)userDefaults.set(valueObject, forKey: keyValueObject)userDefaults.set(valueArray, forKey: keyValueArray)userDefaults.set(valueDictionary, forKey: keyValueDictionary)userDefaults.set(valueString, forKey: keyValueString)userDefaults.set(valueURL, forKey: keyValueURL)userDefaults.set(valueDate, forKey: keyValueDate)} - Step 6: modify
loadDefaultsmethod - Add / modify
loadDefaultsmethod located inPersistentTestUserDefaultsclass
12345678910111213141516171819202122232425262728293031323334353637383940414243444546474849505152535455565758596061626364656667686970717273747576777879808182838485868788func loadDefaults(){var valueBool: Boolvar valueInt: Intvar valueFloat: Floatvar valueDouble: Doublevar valueObject: Anyvar valueArray: [Int]var valueDictionary: [String: Int]var valueString: Stringvar valueURL: URL//var valueDate: Dateif let value = userDefaults.object(forKey: keyValueBool) as? Bool{print("object forKey: \(keyValueBool), value: \(value)")}if let value = userDefaults.object(forKey: keyValueInt) as? Int{print("object forKey: \(keyValueInt), value: \(value)")}if let value = userDefaults.object(forKey: keyValueFloat) as? Float{print("object forKey: \(keyValueFloat), value: \(value)")}if let value = userDefaults.object(forKey: keyValueDouble) as? Double{print("object forKey: \(keyValueDouble), value: \(value)")}if let value = userDefaults.object(forKey: keyValueObject) as Any?{print("object forKey: \(keyValueObject), value: \(value)")}if let value = userDefaults.object(forKey: keyValueArray) as? [Int]{print("object forKey: \(keyValueArray), value: \(value)")}if let value = userDefaults.object(forKey: keyValueDictionary) as? [String: Int]{print("object forKey: \(keyValueDictionary), value: \(value)")}if let value = userDefaults.object(forKey: keyValueString) as? String{print("object forKey: \(keyValueString), value: \(value)")}if let value = userDefaults.object(forKey: keyValueURL) as? URL{print("object forKey: \(keyValueURL), value: \(value)")}if let value = userDefaults.object(forKey: keyValueDate) as? Date{print("object forKey: \(keyValueDate), value: \(value)")}// Other method. We can also load data by type// Returns either a value stored with the specified key,// or a default value if none is found.valueBool = userDefaults.bool(forKey: keyValueBool)valueInt = userDefaults.integer(forKey: keyValueInt)valueFloat = userDefaults.float(forKey: keyValueFloat)valueDouble = userDefaults.double(forKey: keyValueDouble)valueObject = userDefaults.object(forKey: keyValueObject) ?? "default value"valueArray = userDefaults.array(forKey: keyValueArray) as! [Int]valueDictionary = userDefaults.dictionary(forKey: keyValueDictionary) as! [String : Int]valueString = userDefaults.string(forKey: keyValueString)!valueURL = userDefaults.url(forKey: keyValueURL)!//valueDate = userDefaults.date(forKey: keyValueDate)print("object forKey: \(keyValueBool), value: \(valueBool)")print("object forKey: \(keyValueInt), value: \(valueInt)")print("object forKey: \(keyValueFloat), value: \(valueFloat)")print("object forKey: \(keyValueDouble), value: \(valueDouble)")print("object forKey: \(keyValueObject), value: \(valueObject)")print("object forKey: \(keyValueArray), value: \(valueArray)")print("object forKey: \(keyValueDictionary), value: \(valueDictionary)")print("object forKey: \(keyValueString), value: \(valueString)")print("object forKey: \(keyValueURL), value: \(valueURL)")//print("object forKey: \(keyValueDate), value: \(valueDate)")} - Step 7: make a test
Run the application. You should see
object forKey: valueBool, value: true

object forKey: valueInt, value: 123

object forKey: valueFloat, value: 4.56

object forKey: valueDouble, value: 7.89

object forKey: valueObject, value: Object

object forKey: valueArray, value: [1, 2, 3]

object forKey: valueDictionary, value: ["b": 2, "a": 1, "c": 3]

object forKey: valueString, value: Just a string

object forKey: valueDate, value: 2017-11-28 11:31:23 +0000

object forKey: valueBool, value: true

object forKey: valueInt, value: 123

object forKey: valueFloat, value: 4.56

object forKey: valueDouble, value: 7.89

object forKey: valueObject, value: Object

object forKey: valueArray, value: [1, 2, 3]

object forKey: valueDictionary, value: ["b": 2, "a": 1, "c": 3]

object forKey: valueString, value: Just a string

object forKey: valueURL, value: http://fulmanski.pl/tutorials
printed as an output.


Persist with
NSString- Step 1: setting up a project in Xcode
Launch Xcode and select File | New | Project... from main menu or from Welcome to Xcode screen select Create a new Xcode project.
In project window select macOS | Application | Cocoa App template and then click the Next button.

You will see the project options sheet. Name it macOSPersistWithString. Completed sheet should look like below
Press Next button, and you will be prompted for a location for your project. When selected, press Create to save the project. - Step 2: add a new class
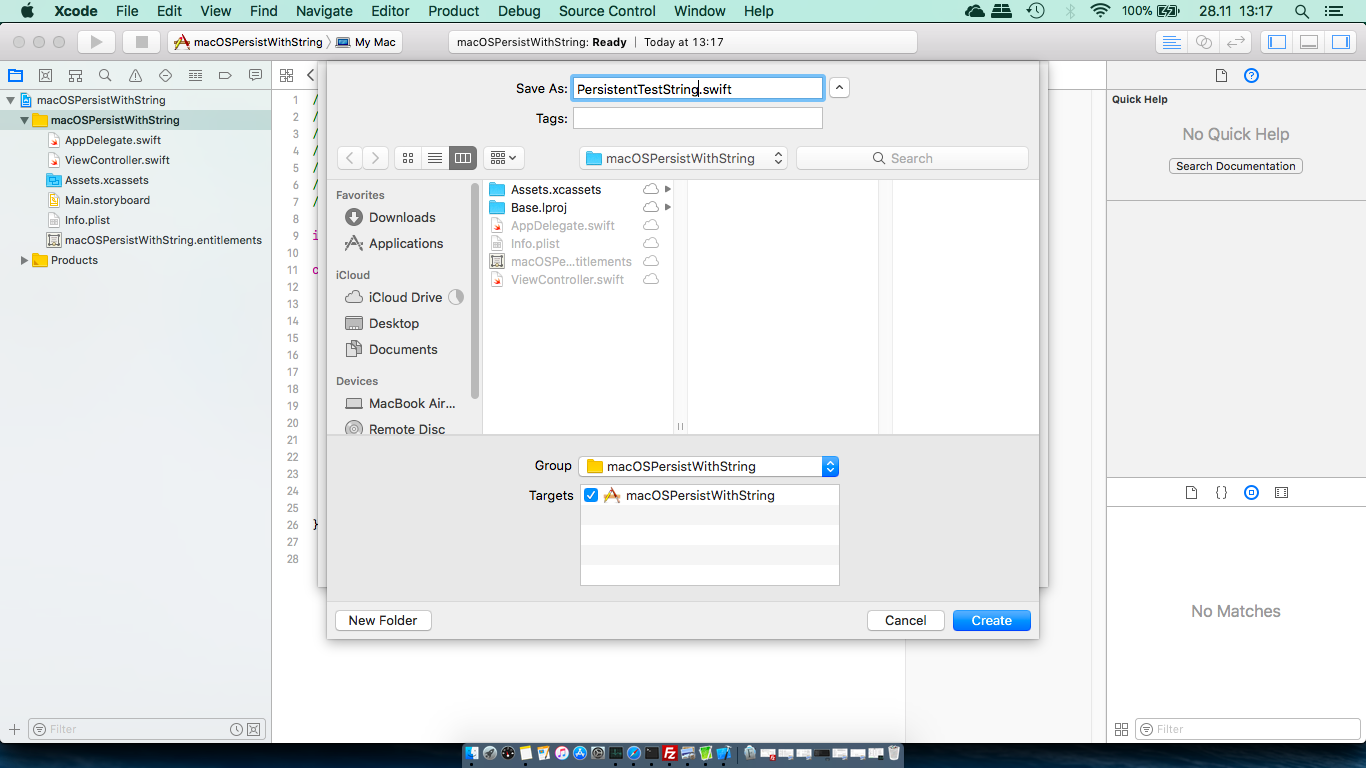
Select File | New | File... to create a new Swift class and name itPersistentTestString


Add the followingPersistentTestStringclass definition to thePersistentTestUserDefaults.swiftfile
1234567891011121314151617181920212223242526272829import Foundationclass PersistentTestUserString{// Setting up the class as a singleton.static let sharedTest = PersistentTestUserString()var urlTextFile: URL?{let fileName = "PersistentTestUserString.txt"if let dir = FileManager.default.urls(for: .documentDirectory,in: .userDomainMask).first{let path = dir.appendingPathComponent(fileName)return path}return nil}func saveString(){}func loadString(){}} - Step 3: add
viewDidAppearmethod skeleton
AddviewDidAppearmethod toViewController.swiftfile
123override func viewDidAppear() {testString()} - Step 4: add
testStringmethod
AddtestStringmethod toViewController.swiftfile
12345func testString(){let persistentTestString = PersistentTestString.sharedTestpersistentTestString.saveString()persistentTestString.loadString()} - Step 5: modify
saveStringmethod - Add / modify
saveStringmethod located inPersistentTestUserDefaultsclass
123456789101112func saveString(){let text = "Some text to save"if let path = urlTextFile{do {try text.write(to: path,atomically: true, // the file is written completely or not at allencoding: String.Encoding.utf8)}catch { print(error) }}} - Step 6: modify
loadStringmethod - Add / modify
loadStringmethod located inPersistentTestUserDefaultsclass
12345678910111213func loadString(){if let path = urlTextFile{do {let loadedText = try String(contentsOf: path,encoding: String.Encoding.utf8)print(loadedText)}catch {print(error)}}} - Step 7: make a test
Run the application. You should see
Some text to save
printed as an output.


Persist with
NSKeyedArchiver/NSKeyedUnarchiver with NSCoding- Step 1: setting up a project in Xcode
Launch Xcode and select File | New | Project... from main menu or from Welcome to Xcode screen select Create a new Xcode project.
In project window select macOS | Application | Cocoa App template and then click the Next button.

You will see the project options sheet. Name it macOSPersistWithNSKeyedArchiver. Completed sheet should look like below

Press Next button, and you will be prompted for a location for your project. When selected, press Create to save the project. - Step 2: add a new class
Select File | New | File... to create a new Swift class and name itPersistentTestNSKeyedArchiver

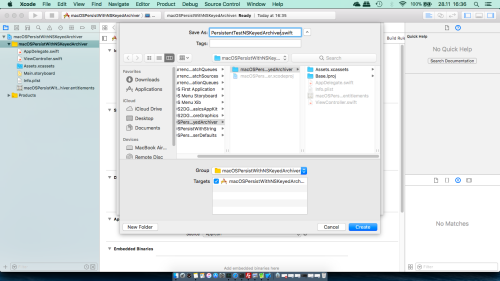
Add the followingPersistentTestPersistWithNSKeyedArchiverclass definition to thePersistentTestNSKeyedArchiver.swiftfile
1234567891011121314151617181920212223242526272829import Foundationclass PersistentTestNSKeyedArchiver{// Setting up the class as a singleton.static let sharedTest = PersistentTestNSKeyedArchiver()var urlAchiveFile: URL?{let fileName = "PersistentTestNSKeyedArchiver.txt"if let dir = FileManager.default.urls(for: .documentDirectory,in: .userDomainMask).first{let path = dir.appendingPathComponent(fileName)return path}return nil}func saveArchive(){}func loadArchive(){}} - Step 3: add
viewDidAppearmethod skeleton
AddviewDidAppearmethod toViewController.swiftfile
123override func viewDidAppear() {testArchive()} - Step 4: add
testArchivemethod
AddtestArchivemethod toViewController.swiftfile
12345func testArchive(){let persistentTestNSKeyedArchiver = PersistentTestNSKeyedArchiver.sharedTestpersistentTestNSKeyedArchiver.saveArchive()persistentTestNSKeyedArchiver.loadArchive()} - Step 5: creating an
NSCoding-compliant class
Select File | New | File... to create a new Swift class and name itArchiveObject
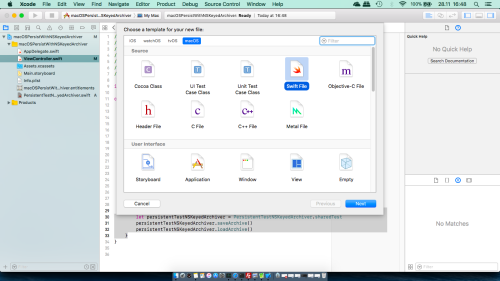

Add the followingArchiveObjectclass definition to theArchiveObject.swiftfile
1234567891011121314151617181920212223242526272829303132333435363738394041424344454647484950515253545556575859606162import Foundationclass ArchiveObject: NSObject, NSCoding{/*I don't like magic numbers, strings etc. so I want to use constants.Unfortunetely definition likelet keyValueBool = "valueBool"results withUse of 'self' in property access 'keyValueBool' before self.init initializes selferror. This could be solved easily with nested class. There will be no problems withthis nested class, since no code outside of the main class will access it.*/class ArchiveObjectKeys {static let keyValueBool = "valueBool"static let keyValueInt = "valueInt"static let keyValueArray = "valueArray"}var valueBool: Boolvar valueInt: Intvar valueArray: [Int]init(_ bool: Bool, _ int: Int, _ array: [Int]) {self.valueBool = boolself.valueInt = intself.valueArray = arraysuper.init()}required convenience init?(coder aDecoder: NSCoder) {// By some reason AnyObject does not cast to Integer in Swift 3// though it did in Swift 2.2 so we can't write// valueBool = aDecoder.decodeObject(forKey: ArchiveObjectKeys.keyValueBool) as? Bool// which was correct in Swift < 3var valueBool = falseif aDecoder.containsValue(forKey: ArchiveObjectKeys.keyValueBool) {valueBool = aDecoder.decodeBool(forKey: ArchiveObjectKeys.keyValueBool)}var valueInt = 0if aDecoder.containsValue(forKey: ArchiveObjectKeys.keyValueInt) {valueInt = aDecoder.decodeInteger(forKey: ArchiveObjectKeys.keyValueInt)}guard let valueArray = aDecoder.decodeObject(forKey: ArchiveObjectKeys.keyValueArray) as? [Int]else {return nil}self.init(valueBool, valueInt, valueArray)}func encode(with aCoder: NSCoder) {aCoder.encode(valueBool, forKey: ArchiveObjectKeys.keyValueBool)aCoder.encode(valueInt, forKey: ArchiveObjectKeys.keyValueInt)aCoder.encode(valueArray, forKey: ArchiveObjectKeys.keyValueArray)}} - Step 6: modify
saveArchivemethod - Add / modify
saveArchivemethod located inPersistentTestUserDefaultsclass
1234567891011func saveArchive(){let object = ArchiveObject(true, 123, [4, 5, 6])if let path = urlAchiveFile{let data = NSKeyedArchiver.archivedData(withRootObject: object)do {try data.write(to: path)}catch { print(error) }}} - Step 7: modify
loadArchivemethod - Add / modify
loadArchivemethod located inPersistentTestUserDefaultsclass
12345678func loadArchive(){if let path = urlAchiveFile{let object = NSKeyedUnarchiver.unarchiveObject(withFile: path.path) as? ArchiveObjectprint("\(object?.valueBool ?? true) \(object?.valueInt ?? 0) \(object?.valueArray ?? [])")}} - Step 8: make a test
Run the application. You should see
true 123 [4, 5, 6]
printed as an output. - Step 9: modify
testArchivemethod
Add / modifytestArchiveinViewController.swiftfile
12345678func testArchive(){let persistentTestNSKeyedArchiver = PersistentTestNSKeyedArchiver.sharedTest// persistentTestNSKeyedArchiver.saveArchive()// persistentTestNSKeyedArchiver.loadArchive()persistentTestNSKeyedArchiver.saveArchiveWithUserDefaults()persistentTestNSKeyedArchiver.loadArchiveWithUserDefaults()} - Step 10: add
saveArchiveWithUserDefaultsmethod - Add / modify
saveArchiveWithUserDefaultsmethod located inPersistentTestUserDefaultsclass
12345func saveArchiveWithUserDefaults(){let userDefaults = UserDefaults.standardlet object = ArchiveObject(false, 654, [3, 2, 2])userDefaults.set(NSKeyedArchiver.archivedData(withRootObject: object), forKey: "A")} - Step 11: add
loadArchiveWithUserDefaultsmethod - Add / modify
loadArchiveWithUserDefaultsmethod located inPersistentTestUserDefaultsclass
12345func loadArchiveWithUserDefaults(){let userDefaults = UserDefaults.standardlet object = NSKeyedUnarchiver.unarchiveObject(with: userDefaults.object(forKey: "A") as! Data) as? ArchiveObjectprint("\(object?.valueBool ?? true) \(object?.valueInt ?? 0) \(object?.valueArray ?? [])")} - Step 12: make a test
Run the application. You should see
false 654 [3, 2, 2]
printed as an output.


