In this tutorial we cover the following topics
- General information
- Example 1: use AppKit to create custom button
- Step 1: setting up a project in Xcode
- Step 2: add Custom View
- Step 3: create a stub of Custom View's class
- Step 4: add basic test code
- Step 5: prepare to make a target view
- Step 6: draw target view
- Step 7: keep target drawing area square
- Step 8: draw an arrow
- Step 9: add stop
- Step 10: test
- Step 11: fix
- Example 2: use Core Graphics to create custom view
For more details please refer to Quartz 2D Programming Guide
We have two ways to access the functionality made available by Core Graphics
- We can use a wrapper named AppKit, which provide a simple and abstracted, but sometimes limited interface. This type of code is recognizable by the
NSprefix (for exampleNSColor). - We can call the CG methods directly, leveraging all its power, but with the additional workload that that entails. A Core Graphics code is recognizable by the
CGprefix (for exampleCGRect). As is generally the case with the core libraries, Core Graphics requires a bit more work from the developer but offers a greater degree of control and detail than is possible with AppKit's methods.
One of the main components of Core Graphics is a set of APIs called Quartz 2D. This is a collection of functions, data types, and objects designed to let us draw directly into a view or an image in memory. Quartz 2D treats the view or image that is being drawn into as a virtual canvas. It follows what’s called a painter’s model, which is just a fancy way of saying that the drawing commands are applied in much the same way that paint is applied to a canvas.
Quartz 2D provides a variety of line, shape, and image drawing functions. Though easy to use, Quartz 2D is limited to two-dimensional drawing.
When using Quartz 2D (Quartz for short), we will usually add the drawing code to the view doing the drawing. For example, we might create a subclass of NSView and add Quartz function calls to that class’s draw method. The draw method is part of the NSView class definition and is called every time a view needs to redraw itself.
Dependencies among all the components are shown below:
|
1 2 3 4 5 6 7 8 9 10 11 12 13 14 15 16 |
Applications APP1 APP2 APP3 APP4 3D graphics GPU compute User interface Drawing | | | | | | | + +--------------+ | | | | | | | | UIKit | | | | | | | Core Graphics | | | | | Quartz 2D | | | Metal | Hardware (GPU) |
Todo (id=no todo id): img make a real image
In Quartz, as in many other graphics libraries, drawing happens in a graphics context, usually referred to simply as a context. Every view has an associated context. We retrieve the current context and use it to make various Quartz drawing calls, and let the context worry about rendering our drawing onto the view. We can think of this context as a sort of canvas. The system provides us with a default context where the contents will appear on the screen. However, it’s also possible to create a context of our own for doing drawing that we don’t want to appear immediately, but to save for later or use for something else. We’re going to be focusing mainly on the default context, which we can acquire with this line of code:
|
1 |
CGContext context = NSGraphicsContext.current()!.cgContext |
A graphics context is an opaque data type (CGContext) that encapsulates all the information Quartz uses to draw images to an output device, such as a PDF file, a bitmap, or a window on a display. The information inside a graphics context includes graphics drawing parameters and a device-specific representation of the paint on the page. All objects in Quartz are drawn to, or contained by, a graphics context.
Thanks to graphics context, when we draw with Quartz, all device-specific characteristics are contained within the specific type of graphics context we use. In other words, we can draw the same image to a different device simply by providing a different graphics context to the same sequence of Quartz drawing routines. We do not need to perform any device-specific calculations; Quartz does it for us.
Example 1: use AppKit to create custom button
- Step 1: setting up a project in Xcode
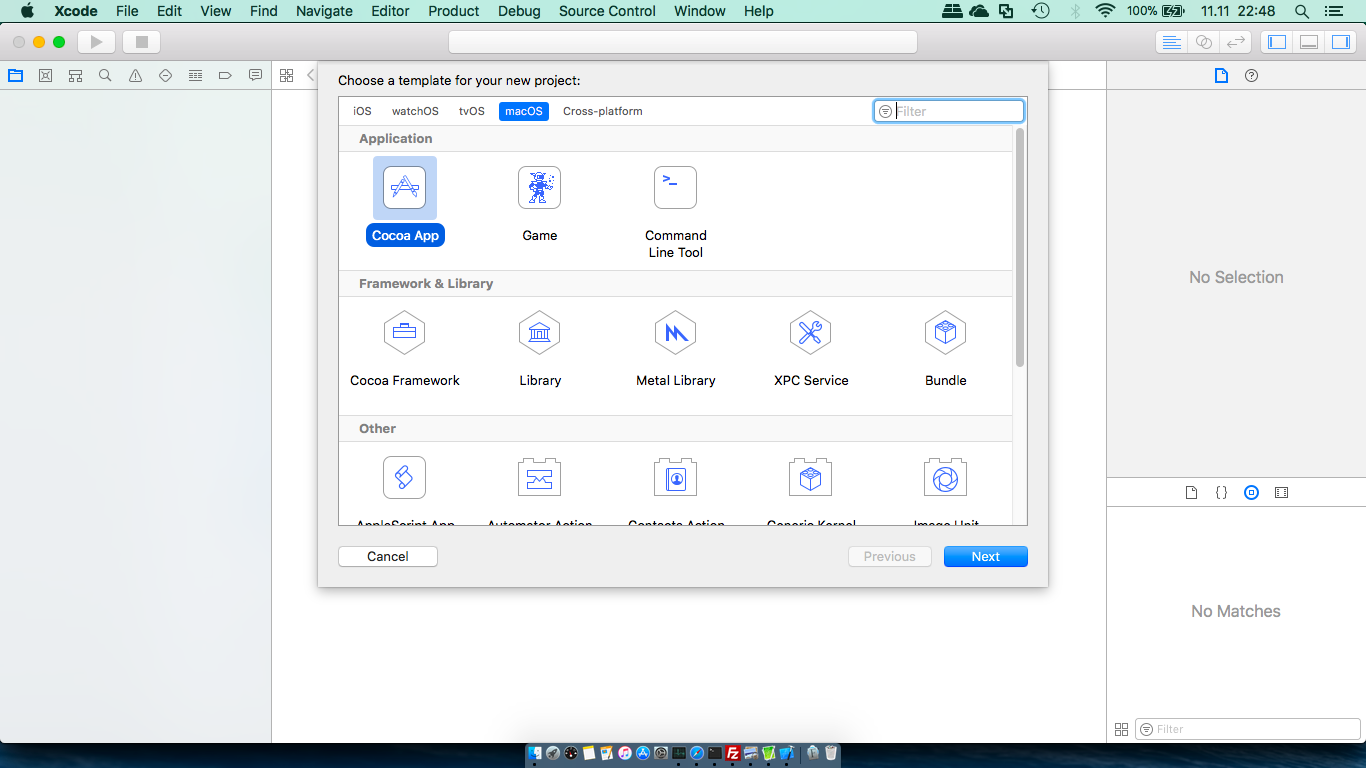
Launch Xcode and select File | New | Project... from main menu or from Welcome to Xcode screen select Create a new Xcode project.
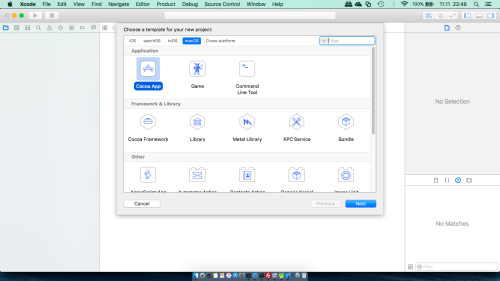
In project window select macOS | Application | Cocoa App template and then click the Next button.
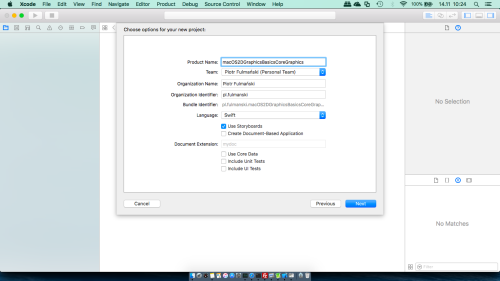
You will see the project options sheet, which should look like below (image below shows the completed options sheet after specifying the fields)
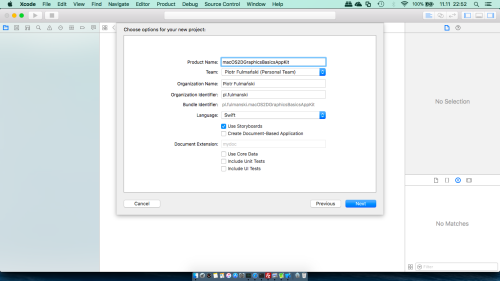
Press Next button, and you will be prompted for a location for your project. When selected, press Create to save the project. - Step 2: add Custom View
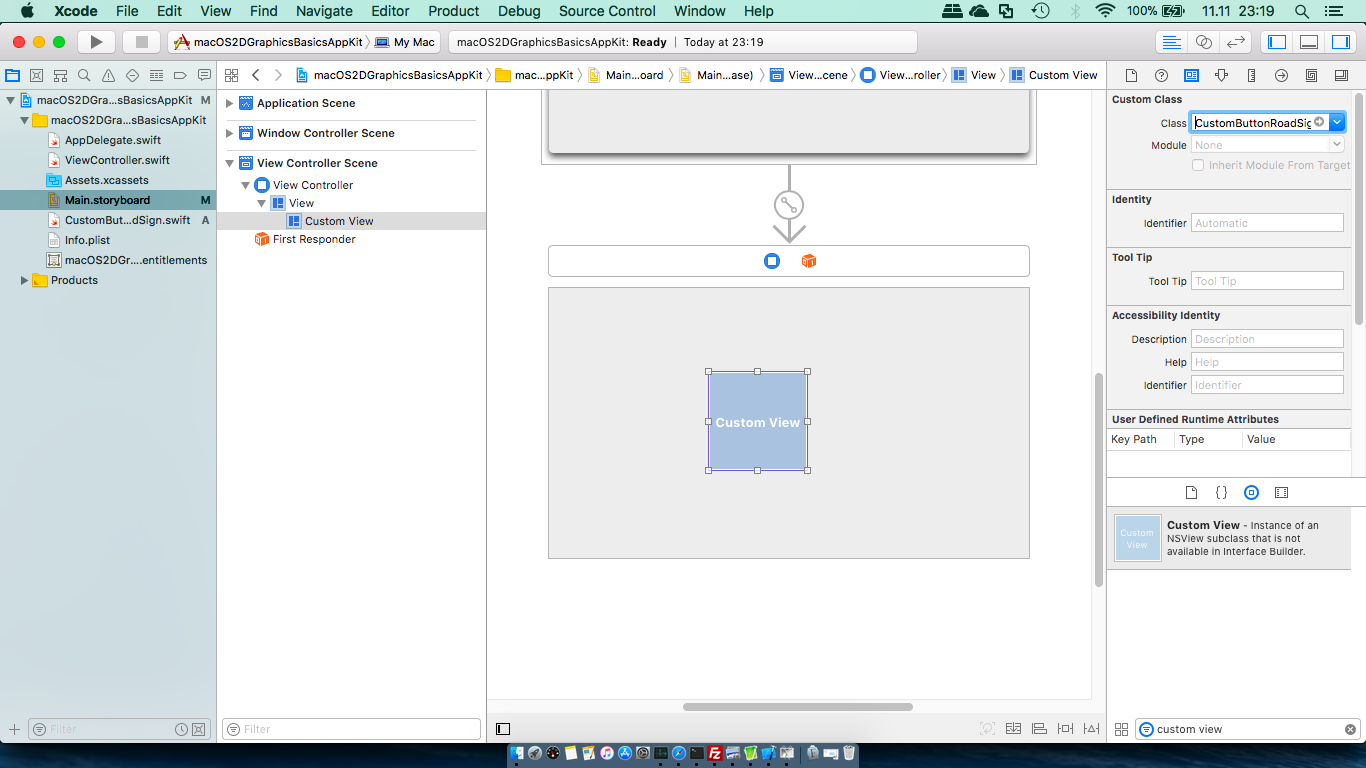
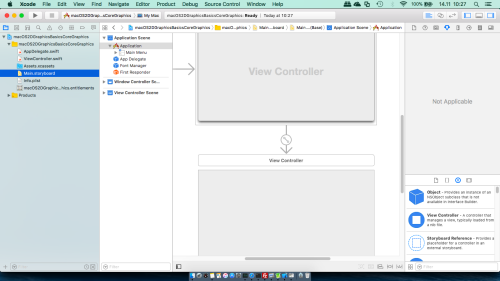
Single clickMain.storyboardfile to open the application’s view in Xcode’s Interface Builder.

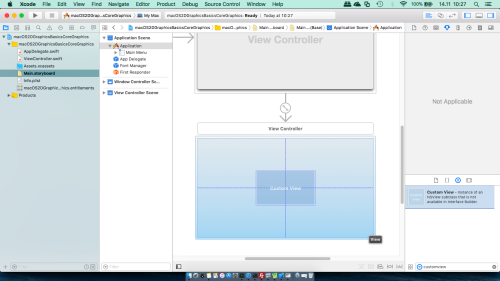
Drag aCustom Viewobject onto theView Controller Scene

Select the Size inspector by selecting right icon (or press command + option + 5) and set its Width and Height property to 101.

- Step 3: create a stub of Custom View's class
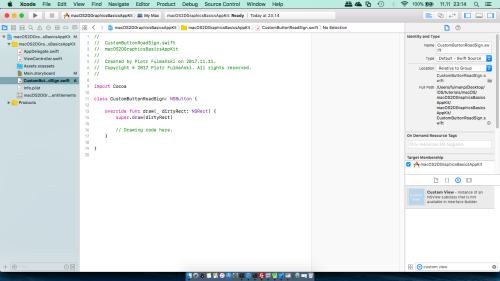
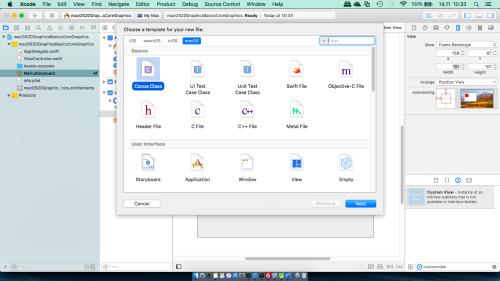
Select File | New | File... to create a new Cocoa class file under the nameCustomButtonRoadSign, and make it a subclass ofNSButton


SelectMain.storyboard, click on Cutom View we have previously add. Next select the Identity Inspector by selecting right icon (or press command + option + 3) and set its Custom Class property toCustomButtonRoadSign.

- Step 4: add basic test code
Although not necessary it would be convenience to see at ones application’s view in Xcode’s Interface Builder as well as content ofCustomButtonRoadSign.swiftfile.

Add the following code to theCustomButtonRoadSign.swiftfile:
123456789101112@IBDesignableclass CustomButtonRoadSign: NSButton {@IBInspectable var borderColor: NSColor = .black@IBInspectable var normal: Bool= trueoverride func draw(_ dirtyRect: NSRect) {super.draw(dirtyRect)// Drawing code here.}}
Live rendering with@IBDesignableand@IBInspectable.Xcode has an great feature: live rendering. It allows us to see how our custom view looks in Interface Builder without the need to build and run our application.
To enable it, we just need to add the@IBDesignableannotation to our class (and optionally implementprepareForInterfaceBuilder()method to provide some sample data).We can also change the visual attributes of our custom view in real time inside Interface Builder. To to that we just need to add the
@IBInspectableannotation to a property. Note that to make a property inspectable, we must declare its type, even if it’s obvious from the rest of our code.
To verify if live rendering works replace the
// Drawing code here.line located inCustomButtonRoadSignclass'sdraw(_ dirtyRect: NSRect)method with:12NSColor.yellow.setFill()__NSRectFill(dirtyRect)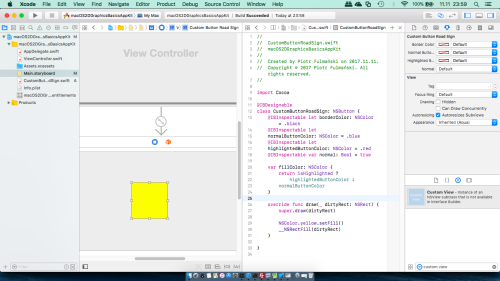
You may wander why we use a
Custom Viewobject whileCustomButtonRoadSigninherits from anNSButton. The reason for this is that anNSButtondoesn't render in live view in Interface Builder. - Step 5: prepare to make a target view
Add / modifyCustomButtonRoadSignclass with the following code1234567891011121314151617181920var borderLineWidth: CGFloat {return min(bounds.width, bounds.height) * 0.05}var insetRect: CGRect {return bounds.insetBy(dx: borderLineWidth * 0.5,dy: borderLineWidth * 0.5)}override func draw(_ dirtyRect: NSRect) {super.draw(dirtyRect)NSColor.yellow.setFill()__NSRectFill(dirtyRect)let path = NSBezierPath(rect: insetRect)NSColor.red.setFill()path.fill()}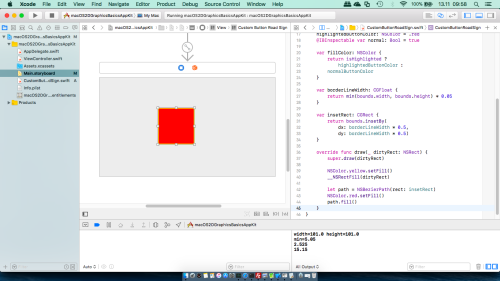
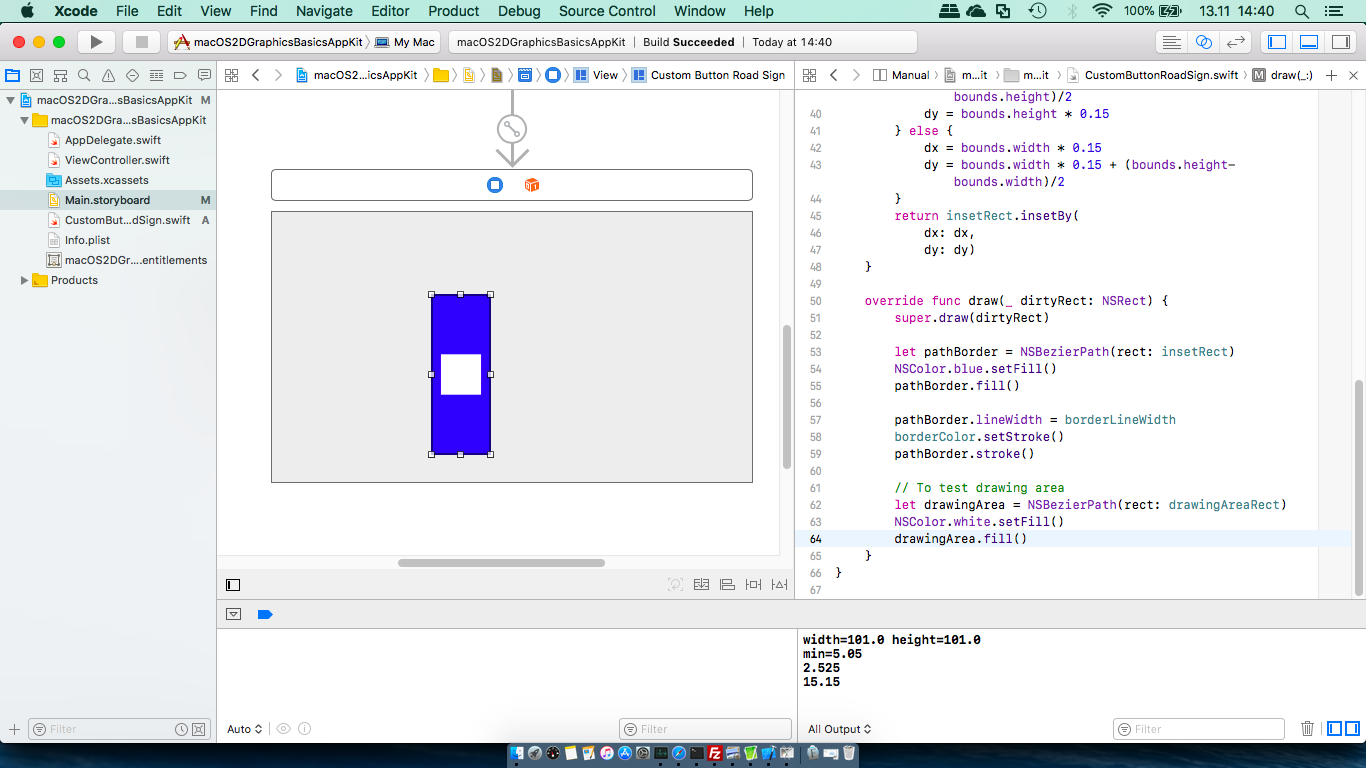
As a result we should be able to see thin yellow frame around red rectangle. In fact there are two rectangles: bigger which is yellow and is drawn as a firsst and a little bit smaler which is red and drawn over the first one. - Step 6: draw target view
Add / modifyCustomButtonRoadSignclass with the following code123456789101112131415var borderLineWidth: CGFloat {return min(bounds.width, bounds.height) * 0.025}override func draw(_ dirtyRect: NSRect) {super.draw(dirtyRect)let pathBorder = NSBezierPath(rect: insetRect)NSColor.blue.setFill()pathBorder.fill()pathBorder.lineWidth = borderLineWidthborderColor.setStroke()pathBorder.stroke()}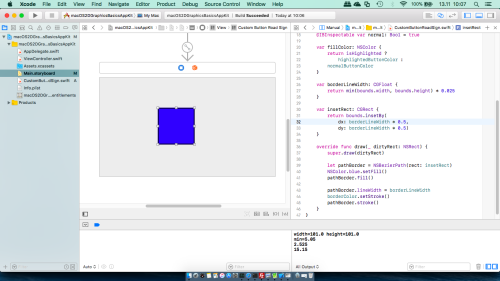
As we can see I have changed border line thickness which was for me to thick, removed yellow square and chenge red color to blue. - Step 7: keep target drawing area square
Add / modifyCustomButtonRoadSignclass with the following code123456789101112131415161718192021222324252627282930var drawingAreaRect: CGRect {var dx, dy: CGFloatif(bounds.width > bounds.height){dx = bounds.height * 0.15 + (bounds.width-bounds.height)/2dy = bounds.height * 0.15} else {dx = bounds.width * 0.15dy = bounds.width * 0.15 + (bounds.height-bounds.width)/2}return insetRect.insetBy(dx: dx,dy: dy)}override func draw(_ dirtyRect: NSRect) {super.draw(dirtyRect)let pathBorder = NSBezierPath(rect: insetRect)NSColor.blue.setFill()pathBorder.fill()pathBorder.lineWidth = borderLineWidthborderColor.setStroke()pathBorder.stroke()// To test drawing arealet drawingArea = NSBezierPath(rect: drawingAreaRect)NSColor.white.setFill()drawingArea.fill()}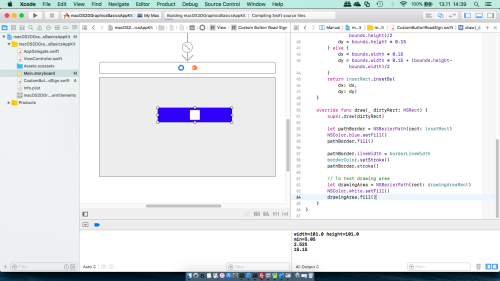

As we can see a drawing area is keept square. - Step 8: draw an arrow
Add / modifyCustomButtonRoadSignclass with the following code12345678910111213141516171819202122232425262728293031323334353637override func draw(_ dirtyRect: NSRect) {super.draw(dirtyRect)let pathBorder = NSBezierPath(rect: insetRect)NSColor.blue.setFill()pathBorder.fill()pathBorder.lineWidth = borderLineWidthborderColor.setStroke()pathBorder.stroke()// To test drawing area// let drawingArea = NSBezierPath(rect: drawingAreaRect)// NSColor.white.setFill()// drawingArea.fill()let pathArrow = NSBezierPath()let midX = drawingAreaRect.midXlet midY = drawingAreaRect.midYlet side = drawingAreaRect.widthlet dx = side * 0.15let offsetY = side * 0.1 + midYpathArrow.move(to: NSMakePoint(midX, offsetY - side/2))pathArrow.line(to: NSMakePoint(midX + dx, offsetY - side/2))pathArrow.line(to: NSMakePoint(midX + dx, offsetY + side * 0.05))pathArrow.line(to: NSMakePoint(midX + 2 * dx, offsetY + side * 0.05))pathArrow.line(to: NSMakePoint(midX, offsetY + side * 0.35))pathArrow.line(to: NSMakePoint(midX - 2 * dx, offsetY + side * 0.05))pathArrow.line(to: NSMakePoint(midX - dx, offsetY + side * 0.05))pathArrow.line(to: NSMakePoint(midX - dx, offsetY - side/2))pathArrow.close()NSColor.white.setFill()pathArrow.fill()}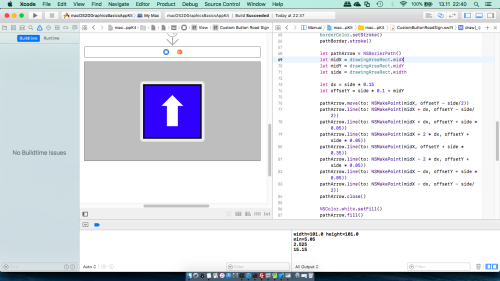
- Step 9: add stop
Add / modifyCustomButtonRoadSignclass with the following code1234567891011121314151617181920212223242526272829303132333435363738394041424344454647484950515253545556575859606162636465666768697071727374757677787980818283var drawingAreaRect: CGRect {var dx, dy: CGFloatvar d: CGFloatif(normal){d = 0.15} else {d = 0.0}if(bounds.width > bounds.height){dx = bounds.height * d + (bounds.width-bounds.height)/2dy = bounds.height * d} else {dx = bounds.width * ddy = bounds.width * d + (bounds.height-bounds.width)/2}return insetRect.insetBy(dx: dx,dy: dy)}override func draw(_ dirtyRect: NSRect) {super.draw(dirtyRect)if(normal){let pathBorder = NSBezierPath(rect: insetRect)NSColor.blue.setFill()pathBorder.fill()pathBorder.lineWidth = borderLineWidthborderColor.setStroke()pathBorder.stroke()let pathArrow = NSBezierPath()let midX = drawingAreaRect.midXlet midY = drawingAreaRect.midYlet side = drawingAreaRect.widthlet dx = side * 0.15let offsetY = side * 0.1 + midYpathArrow.move(to: NSMakePoint(midX, offsetY - side/2))pathArrow.line(to: NSMakePoint(midX + dx, offsetY - side/2))pathArrow.line(to: NSMakePoint(midX + dx, offsetY + side * 0.05))pathArrow.line(to: NSMakePoint(midX + 2 * dx, offsetY + side * 0.05))pathArrow.line(to: NSMakePoint(midX, offsetY + side * 0.35))pathArrow.line(to: NSMakePoint(midX - 2 * dx, offsetY + side * 0.05))pathArrow.line(to: NSMakePoint(midX - dx, offsetY + side * 0.05))pathArrow.line(to: NSMakePoint(midX - dx, offsetY - side/2))pathArrow.close()NSColor.white.setFill()pathArrow.fill()} else {let pathBorder = NSBezierPath(ovalIn: drawingAreaRect)NSColor.red.setFill()pathBorder.fill()pathBorder.lineWidth = borderLineWidthborderColor.setStroke()pathBorder.stroke()let pathArrow = NSBezierPath()let midX = drawingAreaRect.midXlet midY = drawingAreaRect.midYlet side = drawingAreaRect.widthlet dy = side * 0.125let offsetX = side * 0.4pathArrow.move(to: NSMakePoint(midX, midY - dy))pathArrow.line(to: NSMakePoint(midX + offsetX, midY - dy))pathArrow.line(to: NSMakePoint(midX + offsetX, midY + dy))pathArrow.line(to: NSMakePoint(midX - offsetX, midY + dy))pathArrow.line(to: NSMakePoint(midX - offsetX, midY - dy))pathArrow.close()NSColor.white.setFill()pathArrow.fill()}}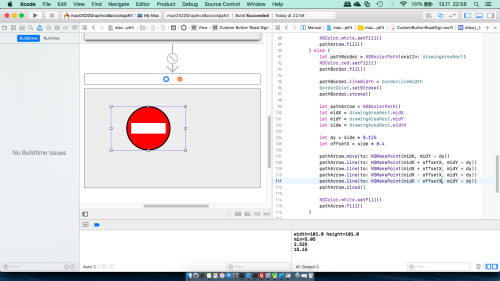
Remember to change Normal property in the Attributes inspector from On/Default to Off to be able to see second version of our button.

- Step 10: test
As we know, anNSButtondoesn't render in live view in Interface Builder. So to test we have to go back toNSButtonclass.You can keep or delete the
NSView, and drag anNSButton(Push button) from the object library. In the Attributes Inspector, set the button's Style property to Square, so that it becomes fully resizable, and deselect Bordered. You may also want to delete Title.
Next in the Identity Inspector set button's Custom Class property toCustomButtonRoadSign.
In Size insoector set the button size.
Add / modifyCustomButtonRoadSignclass with the following code123var normal: Bool {return isHighlighted}Run our application. Now we should be able to click on the button to check that it shows its highlighted state (stop sign should change to blue sign).
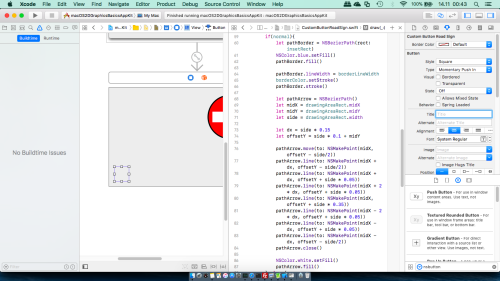
- Step 11: fix
In my case button's coordinate system occured to be flipped. By default, Cocoa uses a standard Cartesian coordinate system, where positive values extend up and to the right of the origin and the origin itself is positioned in the bottom-left corner of the current view or window. When flipped, positive values extend down and to the right of the origin and the origin itself is positioned in the top-left corner of the current view or window (see Flipped Coordinate Systems section in https://developer.apple.com/library/content/documentation/Cocoa/Conceptual/CocoaDrawingGuide/Transforms/Transforms.html)
Add / modifyCustomButtonRoadSignclass with the following code1234567class CustomButtonRoadSign: NSButton {...override var isFlipped: Bool {return false}...}Now the arrow should point up.


Example 2: use Core Graphics to create custom view
- Step 1: setting up a project in Xcode
Launch Xcode and select File | New | Project... from main menu or from Welcome to Xcode screen select Create a new Xcode project. Next,
in project window select macOS | Application | Cocoa App template and then click the Next button.
You will see the project options sheet, which should look like below (image below shows the completed options sheet after specifying the fields)
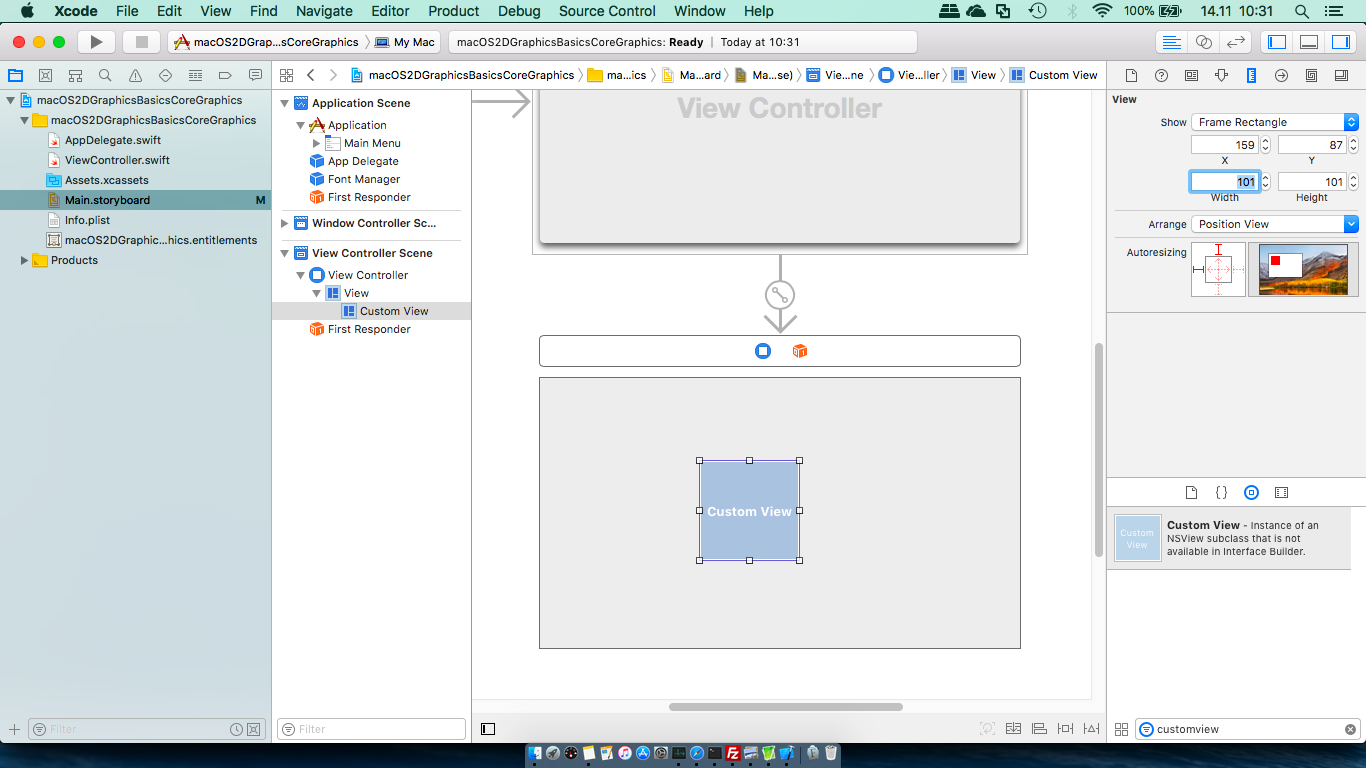
Press Next button, and you will be prompted for a location for your project. When selected, press Create to save the project. - Step 2: add Custom View
Single clickMain.storyboardfile to open the application’s view in Xcode’s Interface Builder.
Drag aCustom Viewobject onto theView Controller Scene
Select the Size inspector by selecting right icon (or press command + option + 5) and set its Width and Height property to 101.

- Step 3: create a stub of Custom View's class
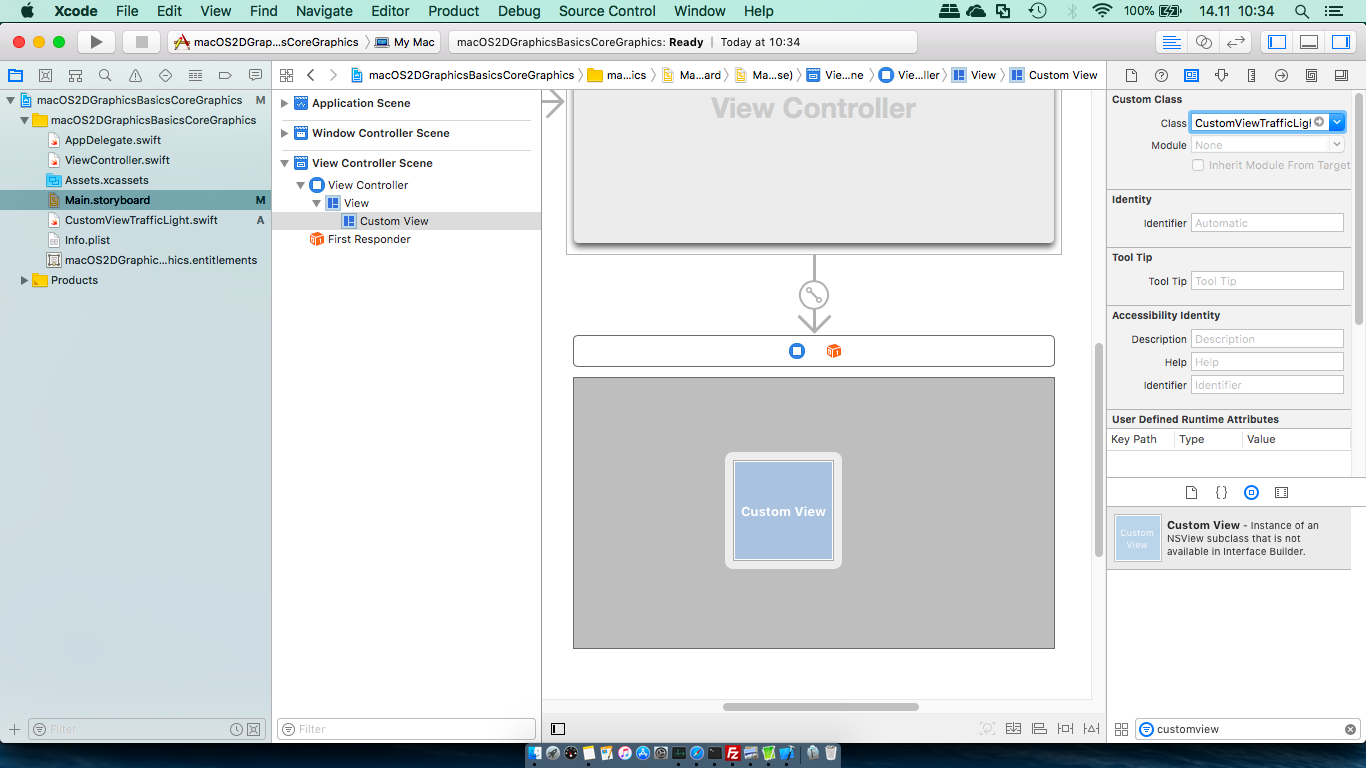
Select File | New | File... to create a new Cocoa class file under the nameCustomViewTrafficLight, and make it a subclass ofNSView


SelectMain.storyboard, click on Cutom View we have previously add. Next select the Identity Inspector by selecting right icon (or press command + option + 3) and set its Custom Class property toCustomViewTrafficLight.

- Step 4: add basic test code
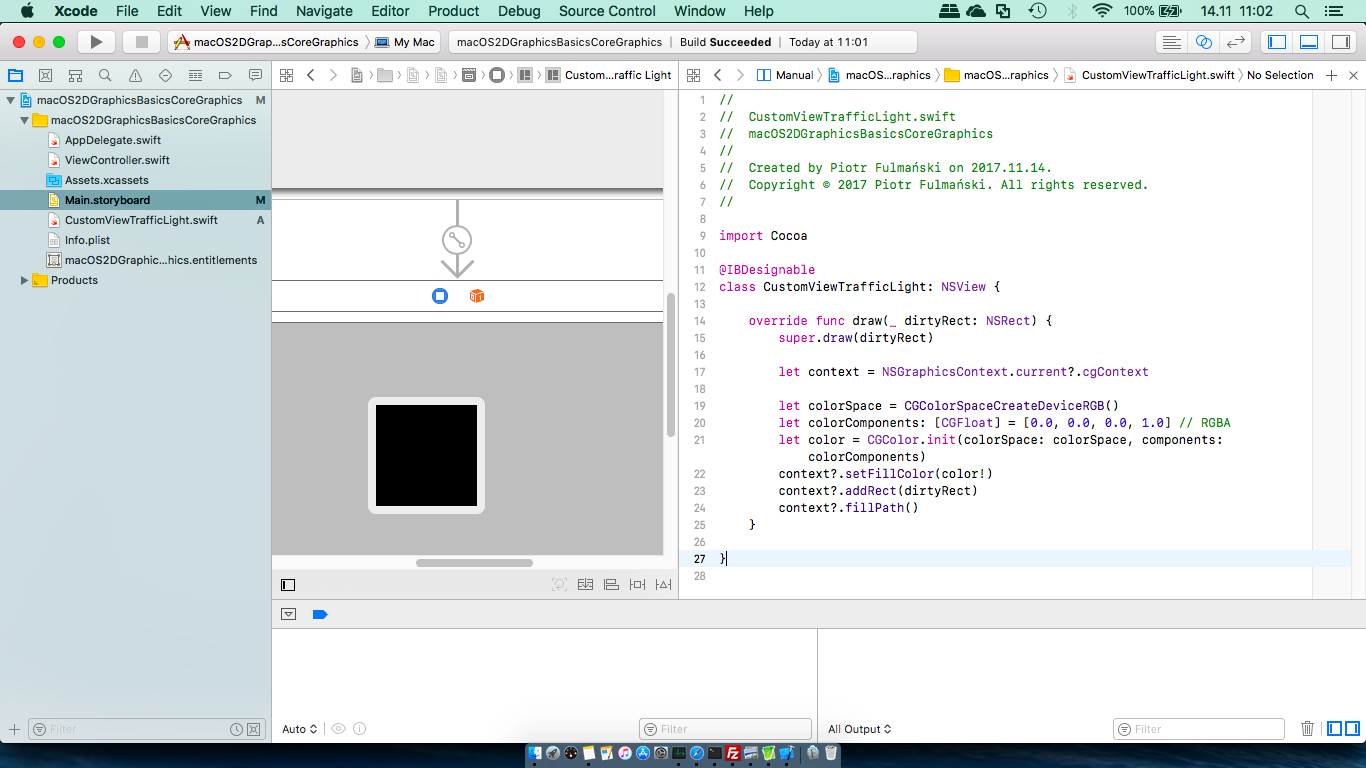
Although not necessary it would be convenience to see at ones application’s view in Xcode’s Interface Builder as well as content ofCustomViewTrafficLight.swiftfile.
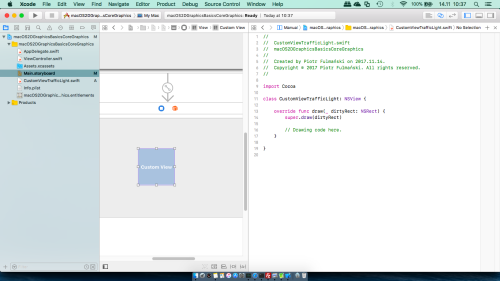
Replace the// Drawing code here.line located inCustomViewTrafficLightclass'sdraw(_ dirtyRect: NSRect)method with:
12345678let context = NSGraphicsContext.current?.cgContextlet colorSpace = CGColorSpaceCreateDeviceRGB()let colorComponents: [CGFloat] = [0.0, 0.0, 0.0, 1.0] // RGBAlet color = CGColor.init(colorSpace: colorSpace, components: colorComponents)context?.setFillColor(color!)context?.addRect(dirtyRect)context?.fillPath()
Remember to add@IBDesignablejust before the class to enable live rendering
1234@IBDesignableclass CustomViewTrafficLight: NSView {...}

- Step 5: target view: first approach (flat)
Add / modifyCustomViewTrafficLightclass with the following code
1234567891011121314151617181920212223242526272829303132333435363738394041424344454647484950515253545556575859@IBDesignableclass CustomViewTrafficLight: NSView {var borderLineWidth: CGFloat {return min(bounds.width, bounds.height) * 0.05}var insetRect: CGRect {return bounds.insetBy(dx: borderLineWidth * 0.5,dy: borderLineWidth * 0.5)}var context: CGContext? {return NSGraphicsContext.current?.cgContext}let colorSpace = CGColorSpaceCreateDeviceRGB()// Define CGColor either with pure Core Graphics functionsvar colorBorder: CGColor {return CGColor.init(colorSpace: colorSpace, components: [0.0, 0.0, 0.0, 1.0])!}// or with NSColor helplet colorGo = NSColor.green.cgColorlet colorReady = NSColor.orange.cgColorlet colorStop = NSColor.red.cgColorvar colorCurrent: CGColor {switch internalState {case .go:return colorGocase .ready:return colorReadycase .stop:return colorStop}}enum internalStates {case go, ready, stop}var internalState = internalStates.gooverride func draw(_ dirtyRect: NSRect) {super.draw(dirtyRect)context?.setFillColor(colorCurrent)context?.addEllipse(in: insetRect)context?.fillPath()context?.addEllipse(in: insetRect)context?.setLineWidth(borderLineWidth)context?.setStrokeColor(colorBorder)context?.strokePath()}}

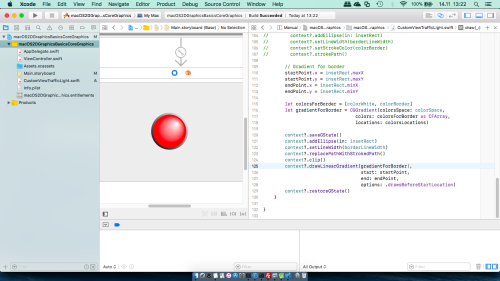
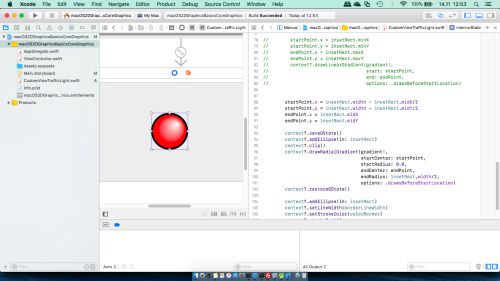
- Step 6: target view: second approach (gradient)
Add / modifyCustomViewTrafficLightclass with the following code
12345678910111213141516171819202122232425262728293031323334override func draw(_ dirtyRect: NSRect) {super.draw(dirtyRect)let colorsLocations: [CGFloat] = [ 0.0, 1.0 ]let colors = [colorWhite, colorCurrent]let gradient = CGGradient(colorsSpace: colorSpace,colors: colors as CFArray,locations: colorsLocations)var startPoint = CGPoint()var endPoint = CGPoint()startPoint.x = insetRect.width - insetRect.midX/2startPoint.y = insetRect.width - insetRect.midY/2endPoint.x = insetRect.midXendPoint.y = insetRect.midYcontext?.saveGState()context?.addEllipse(in: insetRect)context?.clip()context?.drawRadialGradient(gradient!,startCenter: startPoint,startRadius: 0.0,endCenter: endPoint,endRadius: insetRect.width/2,options: .drawsBeforeStartLocation)context?.restoreGState()context?.addEllipse(in: insetRect)context?.setLineWidth(borderLineWidth)context?.setStrokeColor(colorBorder)context?.strokePath()}
- Step 7: target view: third approach (border with a gradient)
Add / modifyCustomViewTrafficLightclass with the following code
123456789101112131415161718192021222324252627282930313233343536373839404142434445464748495051override func draw(_ dirtyRect: NSRect) {super.draw(dirtyRect)let colorsLocations: [CGFloat] = [ 0.0, 1.0 ]let colors = [colorWhite, colorCurrent]let gradient = CGGradient(colorsSpace: colorSpace,colors: colors as CFArray,locations: colorsLocations)var startPoint = CGPoint()var endPoint = CGPoint()startPoint.x = insetRect.width - insetRect.midX/2startPoint.y = insetRect.width - insetRect.midY/2endPoint.x = insetRect.midXendPoint.y = insetRect.midYcontext?.saveGState()context?.addEllipse(in: insetRect)context?.clip()context?.drawRadialGradient(gradient!,startCenter: startPoint,startRadius: 0.0,endCenter: endPoint,endRadius: insetRect.width/2,options: .drawsBeforeStartLocation)context?.restoreGState()// Gradient for borderstartPoint.x = insetRect.maxXstartPoint.y = insetRect.maxYendPoint.x = insetRect.minXendPoint.y = insetRect.minYlet colorsForBorder = [colorWhite, colorBorder]let gradientForBorder = CGGradient(colorsSpace: colorSpace,colors: colorsForBorder as CFArray,locations: colorsLocations)context?.saveGState()context?.addEllipse(in: insetRect)context?.setLineWidth(borderLineWidth)context?.replacePathWithStrokedPath()context?.clip()context?.drawLinearGradient(gradientForBorder!,start: startPoint,end: endPoint,options: .drawsBeforeStartLocation)context?.restoreGState()}