
In this tutorial you will see a complete, long, but detailed tutorial where you will learn:
- how to create Django project,
- how to upload data via webpage -- in this case you will upload GPX files with GPS track points,
- how to process uploaded GPX file and transform them to JSON documents,
- how to save JSON document in document NoSQL database (CouchDB),
- how to use CouchDB's view to process data in document database -- in this case you will calculate total track length for each user in database.
Table of contents:
- Project description and prerequisites
- Create starting Django project
- Django and templates
- Uploading files: models and forms
- Processing files
- Put data into CouchDB
- Get data from CouchDB with views
Create an application that allows you to:
- import data about the location of the object in space (GPS coordinates) from the GPX file ( sample data in GPX format );
- displaying the length of each route (as preferred an internal database features should be used; in case od CouchDB view should be used);
- displaying the total length of all routes for each user (as preferred an internal database features should be used; in case od CouchDB view with map-reduce mechanism should be used).
In addition, we assume that:
- one route is one document;
- each route is assigned to a specific user identified by a unique number
userId; - each route has its unique (within a given user) number
trackId.
As a starting point for our project we need
- correctly installed Python with all supporting tools etc.;
- CouchDB to be installed;
- curl.
Installing CouchDB is strightforward process: see Installation or follow latest installation procedure on 1.1. Installation on Unix-like systems. On the page Document stores you can find examples related to working witch CouchDB.
To install Python with all needed packages and then manage it I use Anaconda (see a basic working Django project).
If curl is not installed in your system, please use package manager or terminal commands to install it.
- Use Anaconda Navigator
Use Anaconda Navigator to:- Create new virtual environment of the name
project. - Install all required libraries.
- Create new virtual environment
OpenTerminaland run Anaconda Navigator
1(base) fulmanp@vm-couchdb:~$ anaconda-navigator
In Anaconda Navigator selectEnvironmentsand thenCreate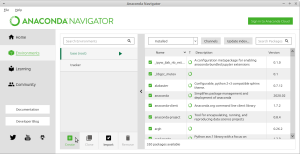
name new environment
project, select required version of Python and pressCreate.
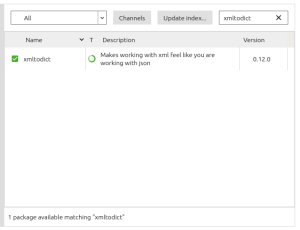
- Install all required libraries
In Anaconda Navigator in package section of created environment install all needed packages:xmltodict

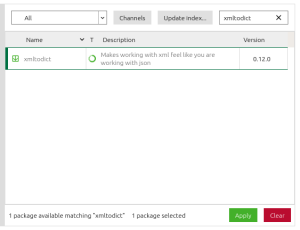
Because I can't find all required packages in Anaconda Navigator, some of them I will install later manually.
Now you can quit Anaconda Navigator as we will not need it any more.
- Install Python library for CouchDB
Usepip install couchdbcommand to instalcouchdblibrary
1(project) fulmanp@vm-couchdb:~/Desktop/project/project$ pip install couchdb
Read the following materials - Create database and user
- Create database
12fulmanp@vm-couchdb:~$ curl -X PUT http://admin:admin@127.0.0.1:5984/project{"ok":true} - Add user (login=userL, password=userP)
12(project) fulmanp@vm-couchdb:~$ curl -X PUT http://admin:admin@localhost:5984/_users/org.couchdb.user:userL -H "Accept: application/json" -H "Content-Type: application/json" -d '{"name": "userL", "password": "userP", "roles": [], "type": "user"}'{"ok":true,"id":"org.couchdb.user:userL","rev":"1-5d9ed49b0519a3541e5687d3d6606f0e"} - Grant access to the
projectbase for useruserL
12(project) fulmanp@vm-couchdb:~$ curl -X PUT http://localhost:5984/project/_security -u admin:admin -H "Content-Type: application/json" -d '{"admins": { "names": [], "roles": [] }, "members": { "names": ["userL"], "roles": [] } }'{"ok":true} - Put
{"testKey" : "testValue"}data intoprojectbase under the key001
12(project) fulmanp@vm-couchdb:~$ curl -X PUT -u userL:userP http://127.0.0.1:5984/project/"001" -d '{"testKey" : "testValue"}'{"ok":true,"id":"001","rev":"1-29eb04529a453588daaf38103d3002bd"} - Get from
projectbase document under the001key
12(project) fulmanp@vm-couchdb:~$ curl -X GET -u userL:userP http://127.0.0.1:5984/project/001{"_id":"001","_rev":"1-29eb04529a453588daaf38103d3002bd","testKey":"testValue"} - Now you should have CouchDB installed and fully operational.
- Create database
- Create new virtual environment of the name
- Create Django project
- Open
Terminaland check all available environment
123456(base) fulmanp@vm-couchdb:~$ conda info --env# conda environments:#base * /home/fulmanp/anaconda3project /home/fulmanp/anaconda3/envs/projecttracker /home/fulmanp/anaconda3/envs/tracker - Activate our newly created environment
12(base) fulmanp@vm-couchdb:~$ conda activate project(project) fulmanp@vm-couchdb:~$ - Check Python version
12(project) fulmanp@vm-couchdb:~$ python --versionPython 3.7.7 - Install Django (if this is a first time you install Django, a little bit more messages will be displayed)
1234567891011121314151617181920212223242526272829303132333435363738394041424344454647484950515253545556575859606162636465666768697071727374(project) fulmanp@vm-couchdb:~$ conda search djangoLoading channels: done# Name Version Build Channeldjango 1.11.8 py27hd476221_0 pkgs/maindjango 1.11.8 py35hd476221_0 pkgs/maindjango 1.11.8 py36hd476221_0 pkgs/maindjango 1.11.10 py27hd476221_0 pkgs/maindjango 1.11.10 py35hd476221_0 pkgs/maindjango 1.11.10 py36hd476221_0 pkgs/maindjango 2.0.2 py35hd476221_0 pkgs/maindjango 2.0.2 py36hd476221_0 pkgs/maindjango 2.0.5 py35hd476221_0 pkgs/maindjango 2.0.5 py36hd476221_0 pkgs/maindjango 2.0.5 py37hd476221_0 pkgs/maindjango 2.1 py35_0 pkgs/maindjango 2.1 py36_0 pkgs/maindjango 2.1 py37_0 pkgs/maindjango 2.1.1 py35_0 pkgs/maindjango 2.1.1 py36_0 pkgs/maindjango 2.1.1 py37_0 pkgs/maindjango 2.1.2 py36_0 pkgs/maindjango 2.1.2 py37_0 pkgs/maindjango 2.1.4 py36_0 pkgs/maindjango 2.1.4 py37_0 pkgs/maindjango 2.1.5 py36_0 pkgs/maindjango 2.1.5 py37_0 pkgs/maindjango 2.1.7 py36_0 pkgs/maindjango 2.1.7 py37_0 pkgs/maindjango 2.2 py36_0 pkgs/maindjango 2.2 py37_0 pkgs/maindjango 2.2.1 py36_0 pkgs/maindjango 2.2.1 py37_0 pkgs/maindjango 2.2.5 py36_0 pkgs/maindjango 2.2.5 py36_1 pkgs/maindjango 2.2.5 py37_0 pkgs/maindjango 2.2.5 py37_1 pkgs/maindjango 2.2.5 py38_1 pkgs/maindjango 3.0.3 py_0 pkgs/main(project) fulmanp@vm-couchdb:~$ conda install django=3.0Collecting package metadata (current_repodata.json): doneSolving environment: done==> WARNING: A newer version of conda exists. <==current version: 4.8.2latest version: 4.8.3Please update conda by running$ conda update -n base -c defaults conda## Package Plan ##environment location: /home/fulmanp/anaconda3/envs/projectadded / updated specs:- django=3.0The following NEW packages will be INSTALLED:asgiref pkgs/main/noarch::asgiref-3.2.7-py_0django pkgs/main/noarch::django-3.0.3-py_0putz pkgs/main/noarch::pytz-2020.1-py_0sqlparse pkgs/main/noarch::sqlparse-0.3.1-py_0Proceed ([y]/n)? yPreparing transaction: doneVerifying transaction: doneExecuting transaction: done - Create project folder
1234(project) fulmanp@vm-couchdb:~$ pwd/home/fulmanp(project) fulmanp@vm-couchdb:~$ cd Desktop/(project) fulmanp@vm-couchdb:~/Desktop$ mkdir project - Create a Django project named
project. This name has nothing in common with environmentproject-- both names could be different.
123456(project) fulmanp@vm-couchdb:~/Desktop/project$ django-admin startproject project(project) fulmanp@vm-couchdb:~/Desktop/project$ cd project/(project) fulmanp@vm-couchdb:~/Desktop/project/project$ ls -ltotal 8-rwxrwxr-x 1 fulmanp fulmanp 627 cze 7 09:30 manage.pydrwxrwxr-x 2 fulmanp fulmanp 4096 cze 7 09:30 project
A project directory should laid out like this
12345678project/manage.pyproject/asgi.py__init__.pysettings.pyurls.pywsgi.py - Run Django developper's server
123456789101112131415(project) fulmanp@vm-couchdb:~/Desktop/project/project$ pwd/home/fulmanp/Desktop/project/project(project) fulmanp@vm-couchdb:~/Desktop/project/project$ python manage.py runserverWatching for file changes with StatReloaderPerforming system checks...System check identified no issues (0 silenced).You have 17 unapplied migration(s). Your project may not work properly until you apply the migrations for app(s): admin, auth, contenttypes, sessions.Run 'python manage.py migrate' to apply them.June 07, 2020 - 07:36:16Django version 3.0.3, using settings 'project.settings'Starting development server at http://127.0.0.1:8000/Quit the server with CONTROL-C.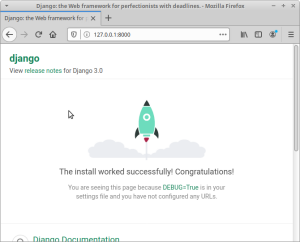
Check terminal window in case of any problems as this is a place where Django prints all messages -- very often it helps to identify where the problem is located.
- Open
- Add our main Django application
Add our main Django applicationmainto existing Django projectproject- Open a new terminal tab and type (keep server running in the previous tab)
1234(base) fulmanp@vm-couchdb:~/Desktop/project/project$ pwd/home/fulmanp/Desktop/project/project(base) fulmanp@vm-couchdb:~/Desktop/project/project$ conda activate project(project) fulmanp@vm-couchdb:~/Desktop/project/project$ python manage.py startapp main
A project directory should laid out like this
12345678910111213141516project/db.sqlite3manage.pymain/admin.pyapps.pymodels.pytests.pyviews.pymigrations/project/asgi.py__init__.pysettings.pyurls.pywsgi.py - Edit
views.pyfile
Open the file~/Desktop/project/project/main/views.pyand put the following Python code in it:
12345from django.http import HttpResponsefrom django.shortcuts import renderdef index(request):return HttpResponse("TestFirst") - Create
urls.pyfile inmainapplicationIn
~/Desktop/project/project/maindirectory create a file calledurls.py123(project) fulmanp@vm-couchdb:~/Desktop/project/project/main$ pwd/home/fulmanp/Desktop/project/project/main(project) fulmanp@vm-couchdb:~/Desktop/project/project/main$ touch urls.pyPut the following Python code in it:
1234567from django.urls import pathfrom . import viewsurlpatterns = [path('', views.index, name='index'),]With this code Django routing mechanism will call
indexmethod located in~/Desktop/project/project/main/views.pyfile every time we enter into web browser url127.0.0.1/To make it possible we have to complete one more step. - Add/edit to project's
urls.pyfile a codeAdd to
~/Desktop/project/project/project/urls.pythe following code:1234567from django.contrib import adminfrom django.urls import include, pathurlpatterns = [path('', include('main.urls')),path('admin/', admin.site.urls),]Now Django knows that routing for
/path is located inmain's application routing file (located in~/Desktop/project/project/main/urls.py). - Test application
Go to web browser and type
http://127.0.0.1:8000/url
- Add/modify
~/Desktop/project/project/main/urls.pyfile
12345678from django.urls import pathfrom . import viewsurlpatterns = [path('', views.index, name='index'),path('job', views.job, name='job')] - Create a new view
Add to
~/Desktop/project/project/main/views.pya new code12def job(request):return HttpResponse("Job") - Test application
Go to web browser and type
http://127.0.0.1:8000/joburl
Replace
12def job(request):return HttpResponse("Job")with
123def job(request):html = "<b>Job</b>"return HttpResponse(html)and again check results in web browser
As you can see, as an argument for
HttpResponsewe can pass also a HTML code. For simple, temporary cases we can prepare html response by hand in the body of the view (as we do injobcase). For real production purposes we should use templates and this is what we are going to do now.
- Open a new terminal tab and type (keep server running in the previous tab)


Now you should have a basic understanding of Django project structure, routing mechanism and views call. You can download a full project at this stage.
More about templates you can find at
You should read at least the first link before you proceed with reading this tutorial further.
- Create base template
- To serve pages with templates, we will start by writing the HTML in a template fashion. We need to add the templates folder. Go to the
mainfolder and create new subfolders
1234(project) fulmanp@vm-couchdb:~/Desktop/project/project/main$ pwd/home/fulmanp/Desktop/project/project/main(project) fulmanp@vm-couchdb:~/Desktop/project/project/main$ mkdir templates(project) fulmanp@vm-couchdb:~/Desktop/project/project/main$ mkdir templates/main
So inmainfolder we createtemplates/mainfolder. Themainfolder insidetemplatesis not required (we can put template files directly intemplatesfolder) but is a usual practice -- this way we get namespace for our templates. Namespaces will be very helpful in case we have more than one app under one Django project. Django will use the first static file it finds whose name matches, and if you had a static file with the same name in a different application, Django would be unable to distinguish between them. We need to be able to point Django at the right one, and the best way to ensure this is by namespacing them. That is, by putting those static files inside another directory named for the application itself. - In order to start with something a bit more modern than bare-bones HTML, we will implement a base template with Bootstrap. Bootstrap is a frontend framework that gives us a good set of styles and components to start with.
Let’s add some HTML to
~/Desktop/project/project/main/templates/main/index.htm-- we simply useStarter templatefrom Bootstrap Introduction page.12345678910111213141516171819202122<!doctype html><html lang="en"><head><!-- Required meta tags --><meta charset="utf-8"><meta name="viewport" content="width=device-width, initial-scale=1, shrink-to-fit=no"><!-- Bootstrap CSS --><link rel="stylesheet" href="https://stackpath.bootstrapcdn.com/bootstrap/4.5.0/css/bootstrap.min.css"><title>Hello, world!</title></head><body><h1>Hello, world!</h1><!-- Optional JavaScript --><!-- jQuery first, then Popper.js, then Bootstrap JS --><script src="https://code.jquery.com/jquery-3.5.1.slim.min.js"></script><script src="https://cdn.jsdelivr.net/npm/popper.js@1.16.0/dist/umd/popper.min.js"></script><script src="https://stackpath.bootstrapcdn.com/bootstrap/4.5.0/js/bootstrap.min.js"></script></body></html> - Before we proceed we should add
mainapp toINSTALLED_APPSin~/Desktop/project/project/project/settings.pyfile. Change it from12345678INSTALLED_APPS = ['django.contrib.admin','django.contrib.auth','django.contrib.contenttypes','django.contrib.sessions','django.contrib.messages','django.contrib.staticfiles',]to
123456789INSTALLED_APPS = ['django.contrib.admin','django.contrib.auth','django.contrib.contenttypes','django.contrib.sessions','django.contrib.messages','django.contrib.staticfiles','main'] - In
~/Desktop/project/project/main/views.pyfile replace12def index(request):return HttpResponse("TestFirst")with
12def index(request):return render(request, "main/index.htm", {}) - Now we finally can go to the browser and see our results, as you can see in figure below
- To serve pages with templates, we will start by writing the HTML in a template fashion. We need to add the templates folder. Go to the
- Add static contents used by templates
We see the page, but files are loaded from an external content delivery network (CDN), which may be good for production sites, but in development I prefere to work completely offline. We will not discuss if it's good or bad and instead we will treat it as an excuse to show how to use static contents in templates.- Create required folder structure: add
staticfolder into our appmainfolder and next to subfolders:cssandjs
123456(project) fulmanp@vm-couchdb:~/Desktop/project/project/main$ pwd/home/fulmanp/Desktop/project/project/main(project) fulmanp@vm-couchdb:~/Desktop/project/project/main$ mkdir static(project) fulmanp@vm-couchdb:~/Desktop/project/project/main$ mkdir static/main(project) fulmanp@vm-couchdb:~/Desktop/project/project/main$ mkdir static/main/css(project) fulmanp@vm-couchdb:~/Desktop/project/project/main$ mkdir static/main/js
Folder for static assets is defined insettings.pyfile as
1234# Static files (CSS, JavaScript, Images)# https://docs.djangoproject.com/en/3.0/howto/static-files/STATIC_URL = '/static/' - We need a copy of all required
jsandcssfiles inside our repository. To do this quickly, we can download that from the link that we already have in the HTML. We can usecurl(orwget) for this task:
123456789101112131415161718(project) fulmanp@vm-couchdb:~/Desktop/project/project/main$ pwd/home/fulmanp/Desktop/project/project/main(project) fulmanp@vm-couchdb:~/Desktop/project/project/main$ curl -o static/main/css/bootstrap.min.css https://stackpath.bootstrapcdn.com/bootstrap/4.5.0/css/bootstrap.min.css% Total % Received % Xferd Average Speed Time Time Time CurrentDload Upload Total Spent Left Speed100 156k 100 156k 0 0 828k 0 --:--:-- --:--:-- --:--:-- 828k(project) fulmanp@vm-couchdb:~/Desktop/project/project/main$ curl -o static/main/js/jquery.min.js https://code.jquery.com/jquery-3.5.1.slim.min.js% Total % Received % Xferd Average Speed Time Time Time CurrentDload Upload Total Spent Left Speed100 72380 100 72380 0 0 341k 0 --:--:-- --:--:-- --:--:-- 353k(project) fulmanp@vm-couchdb:~/Desktop/project/project/main$ curl -o static/main/js/popper.min.js https://cdn.jsdelivr.net/npm/popper.js@1.16.0/dist/umd/popper.min.js% Total % Received % Xferd Average Speed Time Time Time CurrentDload Upload Total Spent Left Speed100 21257 100 21257 0 0 85028 0 --:--:-- --:--:-- --:--:-- 85028(project) fulmanp@vm-couchdb:~/Desktop/project/project/main$ curl -o static/main/js/bootstrap.min.js https://stackpath.bootstrapcdn.com/bootstrap/4.5.0/js/bootstrap.min.js% Total % Received % Xferd Average Speed Time Time Time CurrentDload Upload Total Spent Left Speed100 60174 100 60174 0 0 413k 0 --:--:-- --:--:-- --:--:-- 416k
If everything goes well you should havebootstrap.min.cssfile insidemain/static/main/cssfolder andbootstrap.min.js,jquery.min.jsandpopper.min.jsinmain/static/main/jsfolder. - All the assets linked are now available offline. The last thing to do to finish this is replace the links to external sites with links to local links. To do so we will change
index.htmto usestatictemplate tag
1234567891011121314151617181920212223{% load static %}<!doctype html><html lang="en"><head><!-- Required meta tags --><meta charset="utf-8"><meta name="viewport" content="width=device-width, initial-scale=1, shrink-to-fit=no"><!-- Bootstrap CSS --><link rel="stylesheet" href="{% static "main/css/bootstrap.min.css" %}"><title>Hello, world!</title></head><body><h1>Hello, world!</h1><!-- Optional JavaScript --><!-- jQuery first, then Popper.js, then Bootstrap JS --><link rel="stylesheet" href="{% static "main/js/jquery.min.js" %}"></script><link rel="stylesheet" href="{% static "main/js/popper.min.js" %}"></script><link rel="stylesheet" href="{% static "main/js/bootstrap.min.js" %}"></script></body></html> - After applying changes you should see no changes in web browser (compare this figure with the figure we get in the last step of Create base template subsection above -- both should be the same).
You can also verify if static works in terminal where you should see either
200or304response status codes12345[10/Jun/2020 07:19:14] "GET / HTTP/1.1" 200 709[10/Jun/2020 07:19:14] "GET /static/main/js/jquery.min.js HTTP/1.1" 200 72380[10/Jun/2020 07:19:14] "GET /static/main/js/popper.min.js HTTP/1.1" 200 21257[10/Jun/2020 07:19:14] "GET /static/main/js/bootstrap.min.js HTTP/1.1" 200 60174[10/Jun/2020 07:19:14] "GET /static/main/css/bootstrap.min.css HTTP/1.1" 304 0If you see code
40412345[10/Jun/2020 06:42:56] "GET / HTTP/1.1" 200 709[10/Jun/2020 06:42:56] "GET /static/main/css/bootstrap.min.css HTTP/1.1" 404 1689[10/Jun/2020 06:42:56] "GET /static/main/js/jquery.min.js HTTP/1.1" 404 1674[10/Jun/2020 06:42:56] "GET /static/main/js/popper.min.js HTTP/1.1" 404 1674[10/Jun/2020 06:42:56] "GET /static/main/js/bootstrap.min.js HTTP/1.1" 404 1683quit the server with
CONTROL-Cand run it again with1(project) fulmanp@vm-couchdb:~/Desktop/project/project$ python manage.py runserver
- Create required folder structure: add
- Template inheritance
Now we will create a simple hierarchy of templates: we will have one base tamplate with common HTML code for all pages and then we will extend it with some new features typical for every page.
- Create
~/Desktop/project/project/main/templates/main/base.htmfile, copy code fromindex.htmand paste intobase.htm. - Edit
base.htmto the following form
1234567891011121314151617181920212223242526272829303132333435363738394041424344454647484950515253545556{% load static %}<!doctype html><html lang="en"><head><!-- Required meta tags --><meta charset="utf-8"><meta name="viewport" content="width=device-width, initial-scale=1, shrink-to-fit=no"><!-- Bootstrap CSS --><link rel="stylesheet" href="{% static "main/css/bootstrap.min.css" %}"><title>Project</title></head><body><h1>Project</h1><!-- BEGIN menu --><nav class="navbar navbar-expand-lg navbar-light bg-light"><a class="navbar-brand" href="/">Project</a><buttonclass="navbar-toggler"type="button"data-toggle="collapse"data-target="#navbarSupportedContent"><span class="navbar-toggler-icon"></span></button><divclass="collapse navbar-collapse"id="navbarSupportedContent"><ul class="navbar-nav mr-auto"><liclass="nav-item {% if request.path == "/" %}active{% endif %}"><a class="nav-link" href="/">Home</a></li><liclass="nav-item {% if request.path == "/about/" %}active{% endif %}"><a class="nav-link" href="/about">About</a></li><liclass="nav-item {% if request.path == "/job/" %}active{% endif %}"><a class="nav-link" href="/job">Job</a></li></ul></div></nav><!-- END menu -->{% block content %}{% endblock content %}<!-- Optional JavaScript --><!-- jQuery first, then Popper.js, then Bootstrap JS --><link rel="stylesheet" href="{% static "main/js/jquery.min.js" %}"></script><link rel="stylesheet" href="{% static "main/js/popper.min.js" %}"></script><link rel="stylesheet" href="{% static "main/js/bootstrap.min.js" %}"></script></body></html>
New elements aretitleandh1tag with text changed toProject.- Long
menusection to display app menu. block contentsection -- this is a place where we will "paste" an extending HTML code.
- Edit
index.htmto the following form
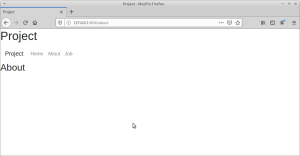
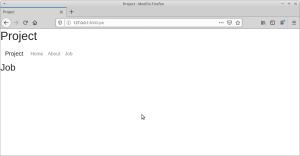
1234{% extends "main/base.htm" %}{% block content %}<h2>Main page</h2>{% endblock content %} - Go to the browser and see the results
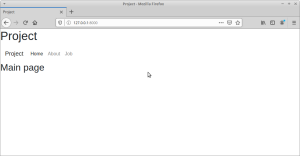
You should see app menu with
Home,AboutandJobelements. When you selectJobyou should see an old page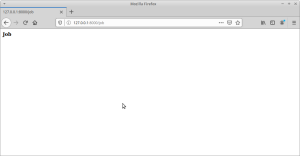
and an error when you select
Aboutpage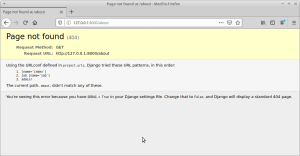
Now we are going to fix this.
- Create
~/Desktop/project/project/main/templates/main/job.htmfile with the following contents1234{% extends "main/base.htm" %}{% block content %}<h2>Job</h2>{% endblock content %} - Create
~/Desktop/project/project/main/templates/main/about.htmfile with the following contents1234{% extends "main/base.htm" %}{% block content %}<h2>About</h2>{% endblock content %} - Add this line
1path('about', views.about, name='about')
to
~/Desktop/project/project/main/urls.pyfile. After this changeurls.pyshould have the following contents123456789from django.urls import pathfrom . import viewsurlpatterns = [path('', views.index, name='index'),path('about', views.about, name='about')path('job', views.job, name='job')] - Almost done. Edit
~/Desktop/project/project/main/views.pyfile and replacejobfunction with1234567def job(request):return render(request, "main/job.htm", {})and add <code>about</code> functiondef about(request):return render(request, "main/about.htm", {}) - Now you should be able to switch between pages and all of them should have the same style
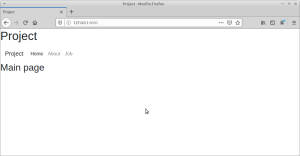
- Create


Now you should have a basic understanding of Django templates. You can download a full project at this stage.
Now we will implement basic form to upload GPX files to our application. We will do this with the help of Django's models and forms what makes this task quite easy.
- Define
MEDIAfolder- Open the
~/Desktop/project/project/project/settings.pyfile and at the end of this file add
12MEDIA_URL = '/media/'MEDIA_ROOT = os.path.join(BASE_DIR, 'media')
This way you defineMEDIAfolder of the namemedialocated in~/Desktop/project/projectfolder. In this folder we will save our uploaded files.
- Open the
- Add model
- Open the
~/Desktop/project/project/main/models.pyfile and paste there the followng code
12345678from django.db import modelsclass GPXFile(models.Model):userId = models.CharField(max_length=255, blank=True)trackId = models.CharField(max_length=255, blank=True)description = models.CharField(max_length=255, blank=True)document = models.FileField(upload_to='gpx/%Y%m%d')uploaded_at = models.DateTimeField(auto_now_add=True)
This is a typical Django model. Take a look at line with thedocumentfield definition where we specify that uploaded files will be saved ingpx/%Y%m%dfolder located inMEDIAfolder. - Check contents of
db.sqlite3file
12345678(project) fulmanp@vm-couchdb:~/Desktop/project/project$ pwd/home/fulmanp/Desktop/project/project(project) fulmanp@vm-couchdb:~/Desktop/project/project$ ls -ltotal 12-rw-r--r-- 1 fulmanp fulmanp 0 cze 7 09:36 db.sqlite3drwxrwxr-x 6 fulmanp fulmanp 4096 cze 11 22:12 main-rwxrwxr-x 1 fulmanp fulmanp 627 cze 7 09:30 manage.pydrwxrwxr-x 3 fulmanp fulmanp 4096 cze 11 22:09 project
As you can see,db.sqlite3is an empty file. - Press
CONTROL-Cto stop server, apply database changes and again run server
123456789101112131415161718192021222324252627282930313233343536Quit the server with CONTROL-C.^C(project) fulmanp@vm-couchdb:~/Desktop/project/project$ python manage.py makemigrationsMigrations for 'main':main/migrations/0001_initial.py- Create model GPXFile(project) fulmanp@vm-couchdb:~/Desktop/project/project$ python manage.py migrateOperations to perform:Apply all migrations: admin, auth, contenttypes, main, sessionsRunning migrations:Applying contenttypes.0001_initial... OKApplying auth.0001_initial... OKApplying admin.0001_initial... OKApplying admin.0002_logentry_remove_auto_add... OKApplying admin.0003_logentry_add_action_flag_choices... OKApplying contenttypes.0002_remove_content_type_name... OKApplying auth.0002_alter_permission_name_max_length... OKApplying auth.0003_alter_user_email_max_length... OKApplying auth.0004_alter_user_username_opts... OKApplying auth.0005_alter_user_last_login_null... OKApplying auth.0006_require_contenttypes_0002... OKApplying auth.0007_alter_validators_add_error_messages... OKApplying auth.0008_alter_user_username_max_length... OKApplying auth.0009_alter_user_last_name_max_length... OKApplying auth.0010_alter_group_name_max_length... OKApplying auth.0011_update_proxy_permissions... OKApplying main.0001_initial... OKApplying sessions.0001_initial... OK(project) fulmanp@vm-couchdb:~/Desktop/project/project$ python manage.py runserverWatching for file changes with StatReloaderPerforming system checks...System check identified no issues (0 silenced).June 11, 2020 - 20:17:55Django version 3.0.3, using settings 'project.settings'Starting development server at http://127.0.0.1:8000/Quit the server with CONTROL-C. - Check now contents of
db.sqlite3file
12345678(project) fulmanp@vm-couchdb:~/Desktop/project/project$ pwd/home/fulmanp/Desktop/project/project(project) fulmanp@vm-couchdb:~/Desktop/project/project$ ls -ltotal 144-rw-r--r-- 1 fulmanp fulmanp 135168 cze 11 22:17 db.sqlite3drwxrwxr-x 6 fulmanp fulmanp 4096 cze 11 22:12 main-rwxrwxr-x 1 fulmanp fulmanp 627 cze 7 09:30 manage.pydrwxrwxr-x 3 fulmanp fulmanp 4096 cze 11 22:09 project
As you can see, nowdb.sqlite3file is not empty. Let's check what is inside
12345678(project) fulmanp@vm-couchdb:~/Desktop/project/project$ cat db.sqlite3SQLite format 3@[...]tablemain_gpxfilemain_gpxfileCREATE TABLE "main_gpxfile" ("id" integer NOT NULL PRIMARY KEY AUTOINCREMENT, "userId" varchar(255) NOT NULL, "trackId" varchar(255) NOT NULL, "description" varchar(255) NOT NULL, "document" varchar(100) NOT NULL, "uploaded_at" datetime NOT NULL)[...]
Yes, our model was turn into SQL statements.
- Open the
- Add form
- Create
forms.pyfile in~/Desktop/project/project/mainfolder and paste there the following code
1234567from django import formsfrom .models import GPXFileclass GPXForm(forms.ModelForm):class Meta:model = GPXFilefields = ('userId', 'trackId', 'description', 'document')
As you can see, based on previously created model, we will create form with theuserId,trackId,descriptionanddocumentfields. - To bring this form to life, add
gpx_upload.htmfile to thetemplatesfolder and paste there the following code
1234567891011{% extends "main/base.htm" %}{% block content %}<form method="post" enctype="multipart/form-data">{% csrf_token %}{{ form.as_p }}<button type="submit">Upload</button></form><p><a href="{% url 'job' %}">Return to Job</a></p>{% endblock %}
Notice usage ofurlDjango tag to get correct and valid URL base onurls.pycontents, particularly the line
1path('job', views.job, name='job'),
where we can findname='job'. - We have to set urls to call proper method. Add this line
1path('about', views.about, name='about')
to~/Desktop/project/project/main/urls.pyfile. After this changeurls.pyshould have the following content
12345678910from django.urls import pathfrom . import viewsurlpatterns = [path('', views.index, name='index'),path('about', views.about, name='about'),path('job', views.job, name='job'),path('gpx_upload', views.gpxUpload, name='gpxUpload'),] - To
~/Desktop/project/project/main/views.pyfile add two imports
12from .models import GPXFilefrom .forms import GPXForm
and change line
1from django.shortcuts import render
to the form
1from django.shortcuts import render, redirect - To the same
views.pyfile add method called when url withgpx_uploadwill be entered. Add this line
1234567891011def gpxUpload(request):if request.method == 'POST':form = GPXForm(request.POST, request.FILES)if form.is_valid():form.save()return redirect('job')else:form = GPXForm()return render(request, 'main/gpx_upload.htm', {'form': form}) - Change
job.htmcode so it will display all uploaded files
12345678910111213141516{% extends "main/base.htm" %}{% block content %}<h2>Job</h2><ul><li><a href="gpx_upload">Import GPX</a></li></ul><p>All uploaded files (and saved in DB):</p><ul>{% for f in gpx %}<li><a href="{{ f.document.url }}">{{ f.document.name }}</a>, {{ f.description }}<small>(Uploaded at: {{ f.uploaded_at }})</small></li>{% endfor %}</ul>{% endblock content %} - Finally change
jobfunction
123def job(request):documents = GPXFile.objects.all()return render(request, "main/job.htm", { 'gpx': documents })
- Create
- Make upload test
- Enter the following URl into web browser
http://127.0.0.1:8000/job-- you should see something similar to figure below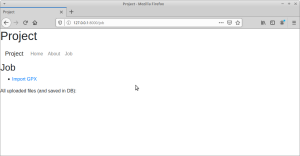
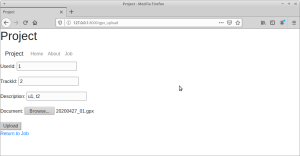
- Click on
Import GPXand upload form should be displayed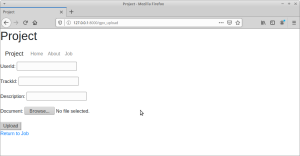
We can click on
Return to Jobto go back to Job screen. - Fill the form
and press
Uploadbutton. - You should see some info about uploaded file
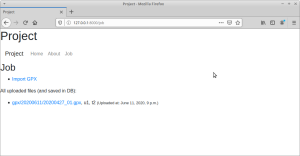
- Also a folder
mediashould be created in~/Desktop/project/projectfolder and in this folder there should be our uploaded files1234567891011121314151617181920212223242526272829303132333435363738(project) fulmanp@vm-couchdb:~/Desktop/project/project$ pwd/home/fulmanp/Desktop/project/project(project) fulmanp@vm-couchdb:~/Desktop/project/project$ ls -ltotal 148-rw-r--r-- 1 fulmanp fulmanp 135168 cze 11 23:02 db.sqlite3drwxrwxr-x 6 fulmanp fulmanp 4096 cze 11 23:04 main-rwxrwxr-x 1 fulmanp fulmanp 627 cze 7 09:30 manage.pydrwxrwxr-x 3 fulmanp fulmanp 4096 cze 11 23:00 mediadrwxrwxr-x 3 fulmanp fulmanp 4096 cze 11 22:09 project(project) fulmanp@vm-couchdb:~/Desktop/project/project$ ls -l media/total 4drwxrwxr-x 3 fulmanp fulmanp 4096 cze 11 23:00 gpx(project) fulmanp@vm-couchdb:~/Desktop/project/project$ ls -l media/gpx/total 4drwxrwxr-x 2 fulmanp fulmanp 4096 cze 11 23:02 20200611(project) fulmanp@vm-couchdb:~/Desktop/project/project$ ls -l media/gpx/20200611/total 4208-rw-r--r-- 1 fulmanp fulmanp 2152253 cze 11 23:00 20200427_01.gpx(project) fulmanp@vm-couchdb:~/Desktop/project/project$ pwd/home/fulmanp/Desktop/project/project(project) fulmanp@vm-couchdb:~/Desktop/project/project$ ls -ltotal 148-rw-r--r-- 1 fulmanp fulmanp 135168 cze 11 23:02 db.sqlite3drwxrwxr-x 6 fulmanp fulmanp 4096 cze 11 23:04 main-rwxrwxr-x 1 fulmanp fulmanp 627 cze 7 09:30 manage.pydrwxrwxr-x 3 fulmanp fulmanp 4096 cze 11 23:00 mediadrwxrwxr-x 3 fulmanp fulmanp 4096 cze 11 22:09 project(project) fulmanp@vm-couchdb:~/Desktop/project/project$ ls -l /media/total 0(project) fulmanp@vm-couchdb:~/Desktop/project/project$ ls -l media/total 4drwxrwxr-x 3 fulmanp fulmanp 4096 cze 11 23:00 gpx(project) fulmanp@vm-couchdb:~/Desktop/project/project$ ls -l media/gpx/total 4drwxrwxr-x 2 fulmanp fulmanp 4096 cze 11 23:02 20200611(project) fulmanp@vm-couchdb:~/Desktop/project/project$ ls -l media/gpx/20200611/total 2104-rw-r--r-- 1 fulmanp fulmanp 2152253 cze 11 23:00 20200427_01.gpxNotice, that if you try upload the sane file multiple times, some random sufix will be added to it
1234(project) fulmanp@vm-couchdb:~/Desktop/project/project$ ls -l media/gpx/20200611/total 4208-rw-r--r-- 1 fulmanp fulmanp 2152253 cze 11 23:00 20200427_01.gpx-rw-r--r-- 1 fulmanp fulmanp 2152253 cze 11 23:02 20200427_01_varvnud.gpx - Also information about uploaded files should be possible to be found is database
12345678910(project) fulmanp@vm-couchdb:~/Desktop/project/project$ pwd/home/fulmanp/Desktop/project/project(project) fulmanp@vm-couchdb:~/Desktop/project/project$ cat db.sqlite3SQLite format 3@[...]12u1, t2gpx/20200611/20200427_01.gpx2020-06-11 21:00:18.456117[...]
- Enter the following URl into web browser


Now you should have a basic understanding of Django models and forms role. You can download a full project at this stage.
Now we will stop saving uploaded files as our goal is to save data in document store, CouchDB in this case. Before we can save them, we have to make some processing extracting only necessary data.
Below there is a small piece of GPX file
|
1 2 3 4 5 6 7 8 9 10 11 12 13 14 15 16 17 18 19 20 21 22 23 24 25 26 27 28 29 30 31 32 33 34 35 36 37 38 39 40 |
<?xml version="1.0" encoding="UTF-8"?> <gpx creator="Garmin Connect" version="1.1" xsi:schemaLocation="http://www.topografix.com/GPX/1/1 http://www.topografix.com/GPX/11.xsd" xmlns:ns3="http://www.garmin.com/xmlschemas/TrackPointExtension/v1" xmlns="http://www.topografix.com/GPX/1/1" xmlns:xsi="http://www.w3.org/2001/XMLSchema-instance" xmlns:ns2="http://www.garmin.com/xmlschemas/GpxExtensions/v3"> <metadata> <link href="connect.garmin.com"> <text>Garmin Connect</text> </link> <time>2020-04-27T13:30:36.000Z</time> </metadata> <trk> <name>Łódź Spacerowanie</name> <type>walking</type> <trkseg> <trkpt lat="51.8243217654526233673095703125" lon="19.48958851397037506103515625"> <ele>211.399993896484375</ele> <time>2020-04-27T13:30:36.000Z</time> <extensions> <ns3:TrackPointExtension> <ns3:atemp>27.0</ns3:atemp> </ns3:TrackPointExtension> </extensions> </trkpt> [...] <trkpt lat="51.8231402523815631866455078125" lon="19.4881962798535823822021484375"> <ele>213.8000030517578125</ele> <time>2020-04-27T15:55:27.000Z</time> <extensions> <ns3:TrackPointExtension> <ns3:atemp>24.0</ns3:atemp> </ns3:TrackPointExtension> </extensions> </trkpt> </trkseg> </trk> </gpx> |
As we can see the root tag is gpx. Inside this tag, there may be one or more trk tag. Every trk tag enclosed one or more trkseg which in turn may have one or more trkpt tag. The trkpt describes one point: its coordinates, elevation, recording time and possibly some other arguments like temperature in the above case (ns3:atemp tag).
To simplify the task I assume that in every file there is only one trk with only one trkseg.
- Allow saving data after successful upload
- Edit
~/Desktop/project/project/main/views.pyfile and changegpxUploadfunction to the form
123456789101112131415def gpxUpload(request):if request.method == 'POST':form = GPXForm(request.POST, request.FILES)if form.is_valid():#form.save()handleUploadedFile({"document": request.FILES['document'],"userId": request.POST["userId"],"trackId": request.POST["trackId"],"description": request.POST["description"]})return redirect('job')else:form = GPXForm()return render(request, 'main/gpx_upload.htm', {'form': form})
Here we add a call tohandleUploadedFilefunction, so now we have to implement it. - Edit
~/Desktop/project/project/main/views.pyfile and add newhandleUploadedFilefunction
12345678910111213141516def handleUploadedFile(data):contentsGPX = data['document']userId = data['userId']trackId = data['trackId']description = data['description']fileOutName = os.path.join(settings.MEDIA_ROOT, 'gpx', 'temp', 'document.dat')documentDict = {"userId": userId,"trackId": trackId,"description": description}jsonS = json.dumps(documentDict)with open(fileOutName, 'w') as fileToSaveData:fileToSaveData.write(jsonS) - Add more imports at the top of the
~/Desktop/project/project/main/views.pyfile
1234import jsonimport osfrom django.conf import settings
Now you should have the following imports there
123456789import jsonimport osfrom django.conf import settingsfrom django.http import HttpResponsefrom django.shortcuts import render, redirectfrom .models import GPXFilefrom .forms import GPXForm - Create
tempdirectory under the~/Desktop/project/project/media/gpx/tempdirectory. - Open web browser and use
http://127.0.0.1:8000/jobURL. Click onImport GPX, fill the form
and press
Upload. If everything goes well you should be able to locatedocument.datfile in the~/Desktop/project/project/media/gpx/tempdirectory1234567(project) fulmanp@vm-couchdb:~/Desktop/project/project$ pwd/home/fulmanp/Desktop/project/project(project) fulmanp@vm-couchdb:~/Desktop/project/project$ ls -l media/gpx/temp/total 4-rw-rw-r-- 1 fulmanp fulmanp 56 cze 13 11:09 document.dat(project) fulmanp@vm-couchdb:~/Desktop/project/project$ cat media/gpx/temp/document.dat{"userId": "1", "trackId": "3", "description": "1u, 3t"}
- Edit
- Process XML file and prepare document ready to be uploaded to document store
- Add the following two methods to the
~/Desktop/project/project/main/views.pyfile1234567891011121314151617181920212223242526272829303132333435def transform(contents, userId, trackId):xml = xmltodict.parse(contents)trk = xml['gpx']['trk'] # xml is of OrderedDict typetrkseg = trk['trkseg']points = processSegment(trkseg)points[0]['extensions']['keys'].append('type')points[0]['extensions']['type'] = "trackFirstPoint"points[-1]['extensions']['keys'].append('type')points[-1]['extensions']['type'] = "trackLastPoint"document = {"userId": userId,"trackId": trackId,"points": points}return documentdef processSegment(trkseg):points = []for pt in trkseg['trkpt']:extensions = pt["extensions"]["ns3:TrackPointExtension"]point = {"lat": pt['@lat'],"lon": pt['@lon'],"ele": pt['ele'],"time": pt['time'],"extensions": {"keys": ["temp"],"temp": [extensions["ns3:atemp"]]}}points.append(point)return points - Add a call to
transformfunction inhandleUploadedFile-- replace123documentDict = {"userId": userId,"trackId": trackId,"description": description}with
12documentDict = transform(contentsGPX, userId, trackId)documentDict['description'] = description - Add one more import at the top of the
~/Desktop/project/project/main/views.pyfile1import xmltodict - Open web browser and use
http://127.0.0.1:8000/jobURL. Click onImport GPX, fill the form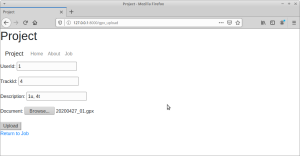
and press
Upload. If everything goes well you should be able to notice thatdocument.datfile has different size (now it is much bigger than previously). You can check it first300bytes (characters) withheadcommand1234567(project) fulmanp@vm-couchdb:~/Desktop/project/project$ pwd/home/fulmanp/Desktop/project/project(project) fulmanp@vm-couchdb:~/Desktop/project/project$ ls -l media/gpx/temp/total 1232-rw-rw-r-- 1 fulmanp fulmanp 1260355 cze 13 11:38 document.dat(project) fulmanp@vm-couchdb:~/Desktop/project/project$ head -c 300 media/gpx/temp/document.dat{"userId": "1", "trackId": "4", "points": [{"lat": "51.8243217654526233673095703125", "lon": "19.48958851397037506103515625", "ele": "211.399993896484375", "time": "2020-04-27T13:30:36.000Z", "extensions": {"keys": ["temp", "type"], "temp": ["27.0"], "type": "trackFirstPoint"}}, {"lat": "51.82431170We can observe the general structure of the document
1234567891011121314{"userId": "1","trackId": "4","points": [{"lat": "51.8243217654526233673095703125" ,"lon": "19.48958851397037506103515625" ,"ele": "211.399993896484375" ,"time": "2020-04-27T13:30:36.000Z" ,"extensions": {"keys": ["temp", "type"],"temp": ["27.0"],"type": "trackFirstPoint"}},...]}
- Add the following two methods to the


Now you should have a basic understanding of pure data saving in Django. You can download a full project at this stage.
- Use
couchdblibrary- Add one more import at the top of the
~/Desktop/project/project/main/views.pyfile
1import couchdb - At the end of
handleUploadedFilefunction located in the~/Desktop/project/project/main/views.pyfile add the following lines
123couch = couchdb.Server('http://userL:userP@127.0.0.1:5984/')db = couch['project']db.save(documentDict) - Open web browser and use
http://127.0.0.1:8000/jobURL. Click onImport GPX, fill the form (in my case: userId=2, trackId=1, description="u2, t1") and pressUpload. - If no errors are printed go to Fauxton and login as admin (with login=admin and password=admin in our case)
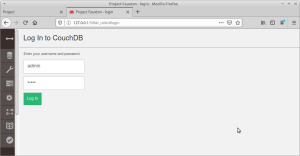
- Among all available databases you should be able to find
projectdatabase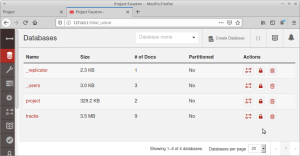
Select
projectdatabase(click on it)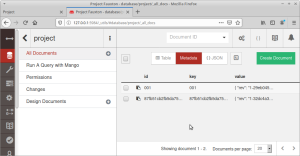
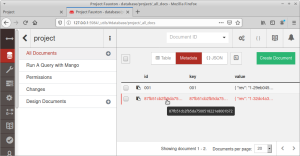
You should see two document: first (with
001key) is our test document, second (with87fb51cb2fb5da7500518221e8001b72key in our case) is a document related to the track we have just uploaded (in my case: userId=2, trackId=1, description="u2, t1"). You can click on it to see it's content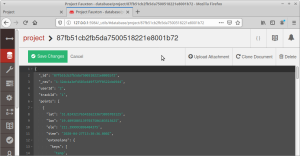
- Add one more import at the top of the


Now you should know how to save data in CouchDB. You can download a full project at this stage.
Now we will retrieve data from CouchDB. We can do this with simply querying for a document with given key, but this is not typical use case as in document databases keys are meaningless and it is very hard to identify document by key. More often we will use views and this is what we are going to do now. You can read more about querying in Working example, 1.2: CouchDB basics - querying
- Add simple view
The first view we will implement is intended to calculate length of every path. So this view (as every view) will receive a document and then will return document of the form
1{"userId":"1","trackId":"1","length":6278,"numberOfPoints":6278}
To simplify our consideration we assume, that distance between two recorded points is always equal to 1m, sonumberOfPointswill be the same aslength.- Go to Fauxton, select
projectdatabase, thenNew Docunder theDesign Documentssection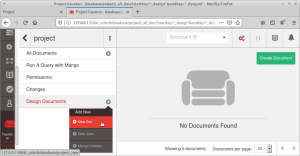
put as its content
123{"_id": "_design/queries"}and save it.
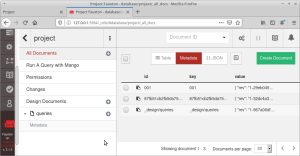
- Select
New Viewunder thequeriessection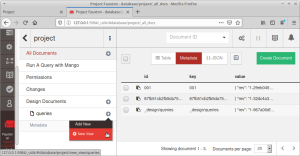
- In the
Index namefield type the name of our new view:getTrackLength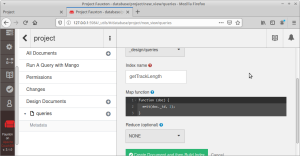
and paste the following code
1234567function (doc) {var length = 1;for (var letter of doc.points) {length += 1;}emit(null, {"userId": doc.userId, "trackId": doc.trackId, "length": length, "numberOfPoints": length});}as a
mapfunction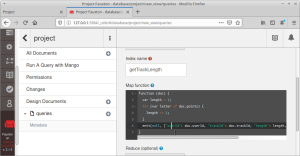
- Leave
Reducedropdown asNONEas we will not use in this case reduce function, and press greenCreate Document and then Build Indexbutton. - You should see
getTrackLengthin Fauxton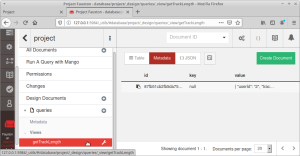
- To verify if
getTrackLengthview works, open terminal and type1234(project) fulmanp@vm-couchdb:~/Desktop$ curl -X GET -u userL:userP http://127.0.0.1:5984/project/_design/queries/_view/getTrackLength{"total_rows":1,"offset":0,"rows":[{"id":"87fb51cb2fb5da7500518221e8001b72","key":null,"value":{"userId":"2","trackId":"1","length":6278,"numberOfPoints":6278}}]} - In Fauxton you can press on
getTrackLengthand if you hover over the document you will see view result
- Go to Fauxton, select
- Update Django view
- At the end of
~/Desktop/project/project/main/views.pyfile paste the code1234567891011def trackLength(request):couch = couchdb.Server('http://userL:userP@127.0.0.1:5984/')db = couch['project']tracks = []for item in db.view('queries/getTrackLength'):tracks.append(item.value)return render(request, "main/track_length.htm", {"tracks": tracks}) - Add
1path('track_length', views.trackLength, name='trackLength')
to the
~/Desktop/project/project/main/urls.pyfile. - Change
job.htmfile located in templates folder~/Desktop/project/project/main/templates/main/so now it has the following content1234567891011121314151617{% extends "main/base.htm" %}{% block content %}<h2>Job</h2><ul><li><a href="gpx_upload">Import GPX</a></li><li><a href="track_length">Track length per track</a></li></ul><p>All uploaded files (and saved in DB):</p><ul>{% for f in gpx %}<li><a href="{{ f.document.url }}">{{ f.document.name }}</a>, {{ f.description }}<small>(Uploaded at: {{ f.uploaded_at }})</small></li>{% endfor %}</ul>{% endblock content %} - Add
track_length.htmfile to templates folder~/Desktop/project/project/main/templates/main/and paste there the following code123456789101112{% extends "main/base.htm" %}{% block content %}<h2>Track length</h2><table><tr><th>UserId</th><th>TrackId</th><th>Track length</th><th>Numer of GPS points</th></tr>{% for track in tracks %}<tr><td>{{ track.userId }}</td> <td>{{ track.trackId }}</td> <td>{{ track.length }}</td> <td>{{ track.numberOfPoints }}</td></tr>{% endfor %}</table>{% endblock content %} - Open web browser and use
http://127.0.0.1:8000/jobURL
- Click on
Track length per track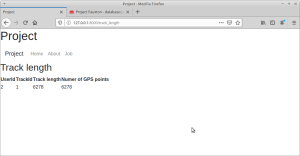
You should see length of a track
1of user2. - Use
http://127.0.0.1:8000/jobURL to add one more track for user2, add one track for user3. - Use our view to get their length
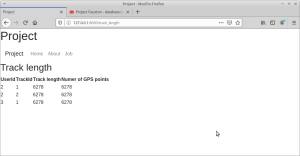
- At the end of
- Add view with reduce part
The second view we will implement is intended to calculate for every user a total length of all path related to this user. This view will return document of the form
1{"1":18834,"2":12556,"3":6278}
where keys are theuserId's and values are a total length of all path related to the user identified by a corresponding key.- Now we will create view with reduce part. Select, as we did it before,
projectdatabase in Fauxton and then selectNew Viewunder thequeriessection - In the
Index namefield type the name of our new view:getAllTracksLength, paste the following code
1234567function (doc) {var length = 1;for (var letter of doc.points) {length += 1;}emit(null, {"userId": doc.userId, "trackId": doc.trackId, "length": length, "numberOfPoints": length});}
as amapfunction. - In
Reducedropdown selectCUSTOMand paste the following code asCustom Reduce function
12345678910111213141516171819202122232425262728293031function (keys, values, rereduce) {if (rereduce) {// In our case values is an array of dictionaries// of the form {userId1: length1, userId2: length2}var dictionary = {};for (var d of values) {for(var key of Object.keys(d)){if (key in dictionary) {dictionary[key] += d[key];} else {dictionary[key] = d[key];}}}return dictionary;} else {var dictionary = {};for (var v of values) {if (v.userId in dictionary) {dictionary[v.userId] += v.length;} else {dictionary[v.userId] = v.length;}}// dictionary of the form// {userId1: length1, userId2: length2}return dictionary;}}
and press greenCreate Document and then Build Indexbutton. - You should see
getAllTracksLengthin Fauxton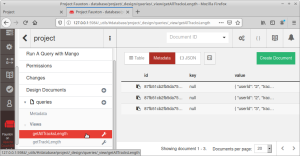
- To verify if
getAllTracksLengthview works, open terminal and type
1234(project) fulmanp@vm-couchdb:~/Desktop$ curl -X GET -u userL:userP http://127.0.0.1:5984/project/_design/queries/_view/getAllTracksLength{"rows":[{"key":null,"value":{"2":12556,"3":6278}}]}
- Now we will create view with reduce part. Select, as we did it before,
- Second update Django view
- At the end of
~/Desktop/project/project/main/views.pyfile paste the code
1234567891011121314151617181920212223def allTracksLength(request):couch = couchdb.Server('http://userL:userP@127.0.0.1:5984/')db = couch['project']users = []dictionary = {}for item in db.view('queries/getAllTracksLength'):dictionary = item.value# In this case, as it is map-reduce view, there should be only one item# Just in case I break the loopbreakfor key in dictionary:users.append({"userId": key,"allTracksLength": dictionary[key]})return render(request, "main/tracks_length_all.htm", {"users": users})</pre?</li><li>Add<pre class="lang:python decode:true" title="">path('all_tracks_length', views.allTracksLength, name='allTracksLength')
to the~/Desktop/project/project/main/urls.pyfile. - Change
job.htmfile located in templates folder~/Desktop/project/project/main/templates/main/so now it has the following content
123456789101112131415161718{% extends "main/base.htm" %}{% block content %}<h2>Job</h2><ul><li><a href="gpx_upload">Import GPX</a></li><li><a href="track_length">Track length per track</a></li><li><a href="all_tracks_length">All tracks length per user</a></li></ul><p>All uploaded files (and saved in DB):</p><ul>{% for f in gpx %}<li><a href="{{ f.document.url }}">{{ f.document.name }}</a>, {{ f.description }}<small>(Uploaded at: {{ f.uploaded_at }})</small></li>{% endfor %}</ul>{% endblock content %} - Add
tracks_length_all.htmfile to templates folder~/Desktop/project/project/main/templates/main/and paste there the following code
123456789101112{% extends "main/base.htm" %}{% block content %}<h2>All tracks length</h2><table><tr><th>UserId</th><th>All tracks length</th></tr>{% for user in users %}<tr><td>{{ user.userId }}</td> <td>{{ user.allTracksLength }}</td></tr>{% endfor %}</table>{% endblock content %} - Open web browser and use
http://127.0.0.1:8000/jobURL. - Click on
All tracks length per user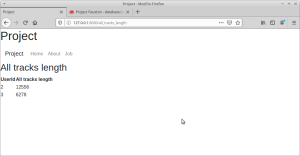
You should see length of all tracks for user
2(which is 6278+6278=12556) and3(which is 6278).
- At the end of


Now you should know how to use views to get data from CouchDB. You can download a full project at this stage.
If you don't want to use external library, or learn CouchDB details you can send POST request manually -- more apout sending POST request can be found here