
In this tutorial we cover the following topics
- General information
- Sandbox
- Getting the right path
- C is your friend
- Property list
- Excercise 1
- Excercise 2
- Object archives
- Step 1: Conforming to NSCoding
- Step 2: Making archives
- Step 3: Decoding archives
- Notes about naming values
- Excercise 3
- Excercise 4
- Example 1: Auto save and restore data.
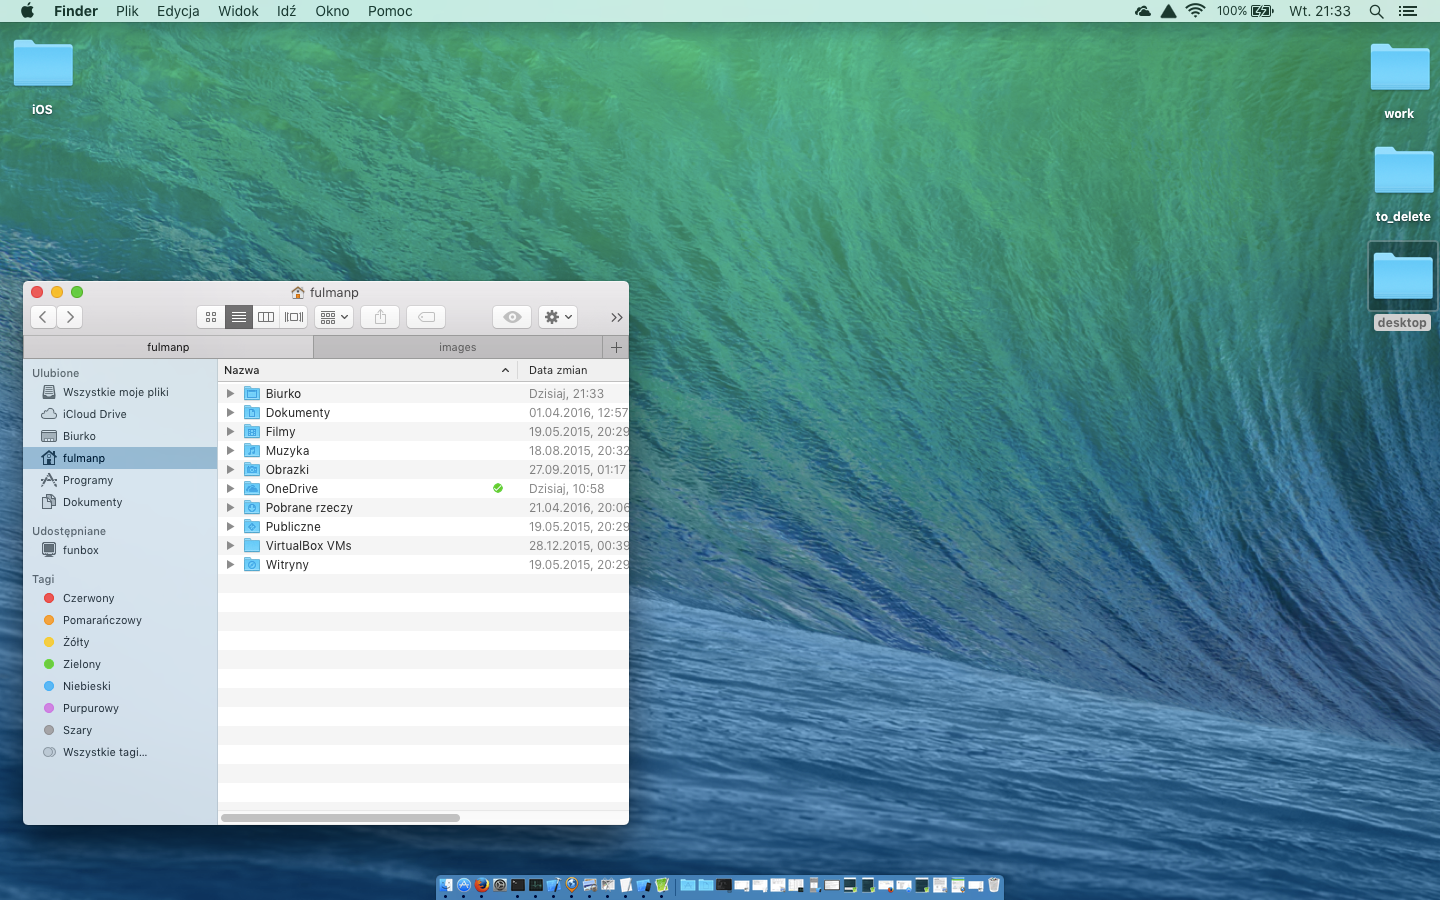
Every application has its own, independent and restricted, area in file system space, called sandbox. Generaly speaking, no other applications are allowed to get an access to this area. When working with simulator and Xcode, we can find this sandbox in
[YOUR_HOME_DIRECTORY]/Library/Developer/CoreSimulator/Devices/
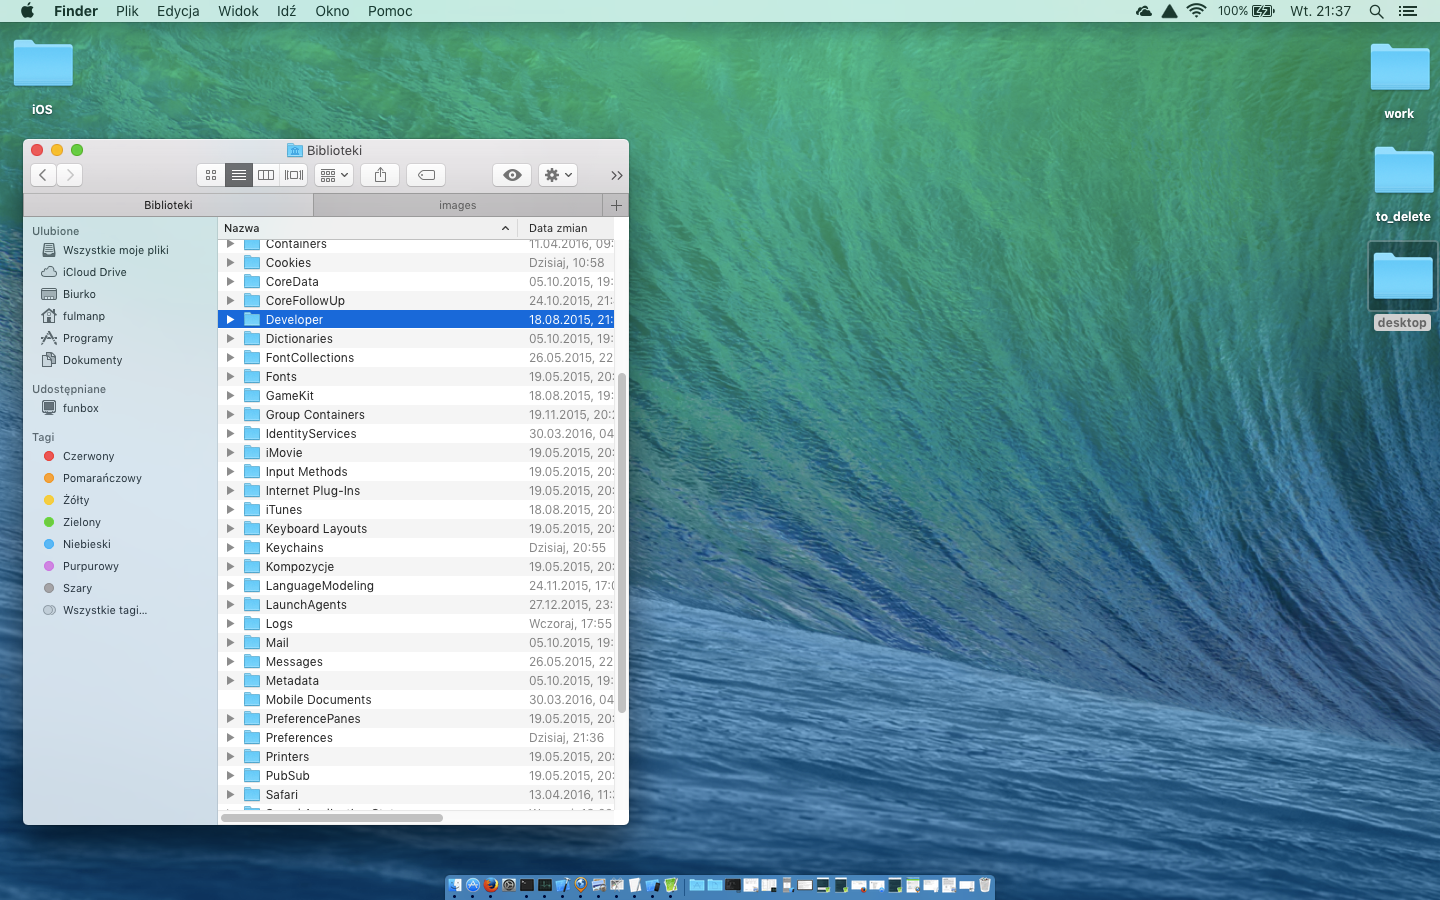
Let's test it. Open a Finder window and navigate to your home directory. If you can't see your Library folder, hold down the Alt key and select Go | Library from top main menu. Having Library displayed, select Developer/CoreSimulator/Devices/.
|

|

|
|
Within that directory, there is one subdirectory for each simulator in Xcode installation. The subdirectory names are GUIDs (globally unique identifiers) generated automatically by Xcode, so it’s impossible to know just by looking at them which directory corresponds to which simulator. To find out we should examine a file called device.plist in any of the simulator directories and open it.

|

|
pc18:Devices fulmanp$ pwd

/Users/fulmanp/Library/Developer/CoreSimulator/Devices

pc18:Devices fulmanp$ ls

017F1FAA-A538-4B05-99DD-56005B2A781E	8DE4F1A7-E3C2-473E-81A4-522DD7A07CC0

033BC02B-C984-44A5-BAF6-858E8521B879	8DFEAA23-D012-4FAB-A7F4-B5D000F2078B

[... cut to save some space ...]

89EF7B1E-0902-4CA6-8FE9-19EB5B99D1E0	FF38963D-624D-423E-8B93-6989F334A20A

8C70AEA1-A42A-42CB-A513-93EF80591E5D	device_set.plist

8D3575AE-DBDC-474E-8652-4E2420833DBB

pc18:Devices fulmanp$
We can also examine
[USER_HOME_DIRECTORY]/Library/Developer/CoreSimulator/Devices/device_set.plist

|

|

|
Every application sandbox contains three directories
- Documents Our application can store data in
Documentsdirectory. Use this directory to store user-generated content. If iTunes file sharing is enabled for our application, the user can see the contents of this directory and its subdirectories in iTunes and can also upload files to it. - Library This directory is used to store files that we do not want to share with others. This is the top-level directory for any files that are not user data files.
- tmp This directory is a place where an application can store temporary files. Files written into it will not be backed up by iTunes.
As we have seen, path to the applicaton folder is somehow random. To get the right one, we have to use one of the function prepared for this occasion.
|
1 2 3 4 5 6 7 8 9 10 11 12 13 |
// To get Documents directory NSArray *paths = NSSearchPathForDirectoriesInDomains(NSDocumentDirectory, NSUserDomainMask, YES); NSString *documentsDirectory = paths[0]; // To get Library directory NSArray *paths = NSSearchPathForDirectoriesInDomains(NSLibraryDirectory, NSUserDomainMask, YES); NSString *libraryDirectory = paths[0]; // To get tmp directory NSString *tmpDirectory = NSTemporaryDirectory(); // To create a full path to a file (someFile.txt) located in directory directory NSString *fileNameFull = [directory stringByAppendingPathComponent:@"someFile.txt"]; |
Remember that we always have the option of using traditional C methods to read and write data. Simply speaking, property lists and object archives, ie. the topics discussed in this section, seems to be much easier and more common in iOS world.
In case we want to use property lists to persist our data, we have to use either an
NSArray or an NSDictionary as a main data structure to hold the data that needs to be saved. In addition to this we can build our data model from the following objects
NSArray,NSMutableArrayNSDictionary,NSMutableDictionaryNSData,NSMutableDataNSString,NSMutableStringNSNumberNSDate
Main drawback of this approach is that custom objects cannot be serialized into property lists.
Assuming that all the objects that we put into the NSArray or an NSDictionary are serializable objects from this list, we can write and read a property list, like so
|
1 2 3 |
[array writeToFile:filePath atomically:YES]; NSArray *array = [[NSArray alloc] initWithContentsOfFile:filePath]; |
Write an iOS application according to the following rules
- Assumptions
- This application is an extension of an application from Excercise 5.
- Add an option to add/edit/delete data in our running application.
If the Excercise 1 task is too difficult, write an iOS application according to the following rules
- Assumptions
- There should be two text fields.
- There should be one button called
Save. - Every time you press
Savebutton, data from text fields shuld be saved. - Every time you run the application, data beeing last saved should be restored automatically.
The term archiving, like property list, refers to serialization, but in a little bit different form: it’s a more generic that any object can implement. According to this approach, every model objects build with properties which are either a scalar, like int or float, or an instance of a class that conforms to the
NSCoding protocol, can be archived. Since most of Foundation and Cocoa Touch classes capable of storing data do conform to NSCoding, archiving, in most cases, is relatively easy to implement.
The
NSCoding protocol declares two methods, which are both required. One encodes an object into an archive; the other one creates a new object by decoding an archive.
To support archiving, we have to encode each of our instance variables into encoder using the appropriate encoding method. In case we are subclassing a class that also conforms to NSCoding, we have to call encodeWithCoder: on a superclass to ensure that the superclass encodes its data.
Therefore, a method to encode an object might look like this:
|
1 2 3 4 5 6 7 8 9 |
- (void)encodeWithCoder:(NSCoder *)encoder { // In case we have a superclass, // let them encode its state. // If we subclassing NSObject directly, we can skip this line. [super encodeWithCoder:encoder]; [encoder encodeObject:fooObject forKey:@"keyFooObject"]; [encoder encodeInt:fooInteger forKey:@"keyFooInteger"]; [encoder encodeFloat:fooFloat forKey:@"keyFooFloat"]; } |
To support unarchiving, we have to implement a initWithCoder: method that initializes an object from an NSCoder.
|
1 2 3 4 5 6 7 8 9 10 11 12 13 14 |
- (id)initWithCoder:(NSCoder *)decoder { // Use the following when subclassing NSObject directly // or subclassing some other class that doesn’t conform to NSCoding. self = [super init]; // Use the following when implementing NSCoding for a class // with a superclass that also conforms to NSCoding. self = [super initWithCoder:decoder]; if (self) { fooObject = [decoder decodeObjectForKey:@"keyFooObject"]; fooInteger = [decoder decodeIntForKey:@"keyFooInteger"]; fooFloat = [decoder decodeFloatForKey:@"keyFooFloat"]; } return self; } |
Creating an archive from an objects that conforms to
NSCoding is quite easy.
-
Step 1: create an instance of
NSMutableDatato hold the encoded data
1NSMutableData *mutableData = [[NSMutableData alloc] init]; -
Step 2: create an
NSKeyedArchiverinstance to archive objects into previously createdNSMutableDatainstance
12NSKeyedArchiver *archiver = [[NSKeyedArchiver alloc]initForWritingWithMutableData: mutableData]; -
Step 3: use key-value coding to archive any objects we wish to include in the archive
1[archiver encodeObject: anObject forKey:@"keyForAnObject"]; -
Step 4: inform the archiver we are finished
1[archiver finishEncoding]; -
Step 5: write the
NSMutableDatainstance to the file system
1BOOL success = [data writeToFile:@"/path/to/archive" atomically:YES];
In case we want to archive a single object we can do
|
1 2 |
NSData *data = [NSKeyedArchiver archivedDataWithRootObject: object]; BOOL success = [data writeToFile: @"/path/to/archive" atomically: YES]; |
or even simpler
|
1 2 |
BOOL success = [NSKeyedArchiver archiveRootObject: object toFile: @"/path/to/archive"]; |
To recreate objects from the archive, we go through a vary similar process.
-
Step 1: create an
NSDatainstance from the archive file
1NSData *data = [[NSData alloc] initWithContentsOfFile: @"/path/to/archive"]; -
Step 2: create an
NSKeyedUnarchiverto decode the data
12NSKeyedUnarchiver *unarchiver = [[NSKeyedUnarchiver alloc]initForReadingWithData: data]; -
Step 3: read all objects from the unarchiver using the same keys that were used to archive the object
1self.anObject = [unarchiver decodeObjectForKey: @"keyForAnObject"]; -
Step 4: inform the archiver we are finished
1[unarchiver finishDecoding]; -
Step 5: write the
NSMutableDatainstance to the file system
1BOOL success = [data writeToFile:@"/path/to/archive" atomically:YES];
In case we want to unarchive a single object directly from an NSData object or from a file without allocating an NSKeyedUnarchiver instance we can do respectively either
|
1 2 3 4 5 6 7 |
// Archive NSData *data = [NSKeyedArchiver archivedDataWithRootObject: object]; BOOL success = [data writeToFile: @"/path/to/archive" atomically: YES]; // Unarchive NSData *data = [NSData dataWithContentsOfFile:@"/path/to/archive"]; NSObject *obj=[NSKeyedUnarchiver unarchiveObjectWithData:data]; |
or
|
1 2 3 4 5 6 |
// Archive BOOL success = [NSKeyedArchiver archiveRootObject: object toFile: @"/path/to/archive"]; // Unarchive BOOL success=[NSKeyedUnarchiver unarchiveObjectWithFile:@"/path/to/archive"]; |
This note is taken from Archives and Serializations Programming Guide: Naming Values.
Values that an object encodes to a keyed archive can be individually named with an arbitrary string. Archives are hierarchical with each object defining a separate name space for its encoded values, similar to the object’s instance variables. Therefore, keys must be unique only within the scope of the current object being encoded. The keys used by object A to encode its instance variables do not conflict with the keys used by object B, even if A and B are instances of the same class. Within a single object, however, the keys used by a subclass can conflict with keys used in its superclasses.
Public classes, such as those in a framework, which can be subclassed, should add a prefix to the name string to avoid collisions with keys that may be used now or in the future by the subclasses of the class. A reasonable prefix is the full name of the class. Cocoa classes use the prefix NS in their keys, the same as the API prefix, and carefully makes sure that there are no collisions in the class hierarchy. Another possibility is to use the same string as the bundle identifier for the framework.
You should avoid using $ as a prefix for your keys. The keyed archiver and unarchiver use keys prefixed with $ for internal values. Although they test for and mangle user-defined keys that have a $ prefix, this overhead slows down archiving performance.
Subclasses also need to be somewhat aware of the prefix used by superclasses to avoid accidental collisions on key names. Subclasses of Cocoa classes should avoid unintentionally starting their key names with NS. For example, don’t name a key NSString search options.
Write an iOS application according to the following rules
- Assumptions
- Use code from Excercise 1 but save training data using object archives approach instead of property list.
If the Excercise 3 task is too difficult, write an iOS application according to the following rules
- Assumptions
- Use code from Excercise 2 but save data from text fields using object archives approach instead of property list.
- Step 1: Add two Text Field components and all necassary constraints to your project.
- Step 2: Create an outlet for the first text field named
textField(in interface section ofViewController.m)
1@property (weak, nonatomic) IBOutlet UITextField *textField; - Step 3: Add code
In the code below you can usevalueForKeyfunction to get the value for the property identified by a given key
1NSArray *array = [NSArray arrayWithObjects: [self.textField valueForKey:@"text"], nil];
or simply
1NSArray *array = [NSArray arrayWithObjects: self.textField.text, nil];
Remember: to use property list, we have to use either array or dictionary (NSArray or NSDictionary).Add or change in implementation section of
ViewController.m)123456789101112131415161718192021222324252627282930313233343536- (NSString *)getDataFilePath{NSArray *paths = NSSearchPathForDirectoriesInDomains(NSDocumentDirectory,NSUserDomainMask,YES);NSString *documentsDirectory = [paths objectAtIndex:0];return [documentsDirectory stringByAppendingPathComponent:@"data_basic_data_storage_example_1_property_list.plist"];}- (void)applicationWillResignActive:(NSNotification *)notification {NSString *filePath = [self getDataFilePath];NSArray *array = [NSArray arrayWithObjects: [self.textField valueForKey:@"text"], nil];//NSArray *array = [NSArray arrayWithObjects: self.textField.text, nil];[array writeToFile:filePath atomically:YES];}- (void)viewDidLoad {[super viewDidLoad];// Do any additional setup after loading the view, typically from a nib.NSString *filePath = [self getDataFilePath];if ([[NSFileManager defaultManager] fileExistsAtPath:filePath]) {NSArray *array = [[NSArray alloc] initWithContentsOfFile:filePath];self.textField.text = array[0];}// Sign up for an application notificationUIApplication *app = [UIApplication sharedApplication];[[NSNotificationCenter defaultCenter]addObserver:selfselector:@selector(applicationWillResignActive:)name:UIApplicationWillResignActiveNotificationobject:app];}
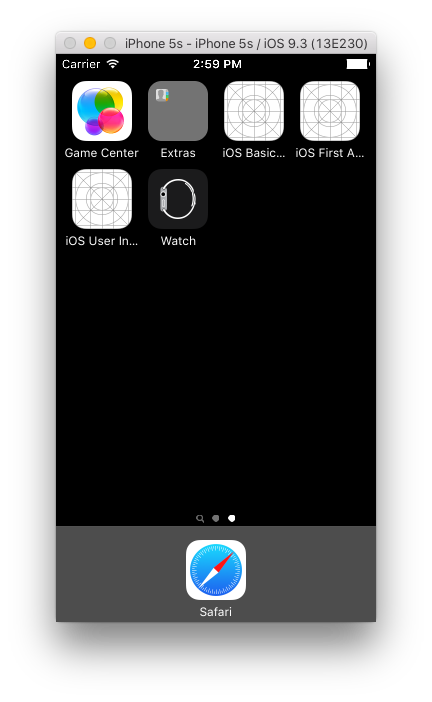
Now it's time to make a test. Run the application and enter text test1 into first text field and text test2 into second.

|
Press Home button (Shift + Command + H)
|
And launch the application directly from a simulator.

|
If you are lucky, the text
test2 should disappear. If not, it’s important to know that pressing the Home button doesn’t mean that the application quits immediately. The application is put into a background state, ready to be instantly reactivated in case the user switches back to it. If you want to verify that the data really was saved, you need to dig into file system.
As you remember, our simulator sandbox is located in our home directory
[YOUR_HOME_DIRECTORY]/Library/Developer/CoreSimulator/Devices/
pc18:Devices fulmanp$ pwd

/Users/fulmanp/Library/Developer/CoreSimulator/Devices
There are a lot of subdirectories
pc18:Devices fulmanp$ ls -l

total 24

drwxr-xr-x@ 4 fulmanp  staff    136 11 lut 17:34 017F1FAA-A538-4B05-99DD-56005B2A781E

...

drwxr-xr-x@ 4 fulmanp  staff    136 31 mar 18:33 FF38963D-624D-423E-8B93-6989F334A20A

-rw-r--r--@ 1 fulmanp  staff  11215 31 mar 18:33 device_set.plist
I use
find to find a correct one
pc18:Devices fulmanp$ find . -name *storage_example*

./60C2CE4B-060A-41F9-A0B7-52714A177E9B/data/Containers/Data/Application/EE20554E-E003-4DBA-B616-039E88A44A0B/Documents/data_basic_data_storage_example_1_property_list.plist

pc18:Devices fulmanp$ cd 60C2CE4B-060A-41F9-A0B7-52714A177E9B/data/Containers/Data/Application/700D8A09-ACB7-47E3-A511-A524888B9837/Documents/

pc18:Documents fulmanp$ ls -l

total 8

-rw-r--r--  1 fulmanp  staff  210  6 maj 15:45 data_basic_data_storage_example_1_property_list.plist
Finally we can print contents of out
plist file
pc18:Documents fulmanp$ cat data_basic_data_storage_example_1_property_list.plist
|
1 2 3 4 5 6 7 |
<?xml version="1.0" encoding="UTF-8"?> <!DOCTYPE plist PUBLIC "-//Apple//DTD PLIST 1.0//EN" "http://www.apple.com/DTDs/PropertyList-1.0.dtd"> <plist version="1.0"> <array> <string>test1</string> </array> </plist> |
As we can see there is only text test1 while test2 wasn't save.