
 Informations presented on this page may be incomplete or outdated. You can find the most up-to-date version reading my book Learn Swift by examples. Beginner level
What we will do:
In this part we will learn how to create a class with properties and methods. We add a class to represent game board and another one to be an entry point to the whole game logic.
We will learn new things:
- array,
- class,
- constant and variable,
- enumeration,
- functions,
- range operators.
In this part we cover the following topics
- Creating project
- Class
- Properties
- Enumerations
- Arrays
- Functions and methods
- Add
EngineGameBattleshipclass - Last step
Source code for this chapter.
To play with Swift we have to use right tool. In this case I recommend Xcode which can be found by icon

|
Just after start a welcome screen should be displayed

|
Select Create a new Xcode project
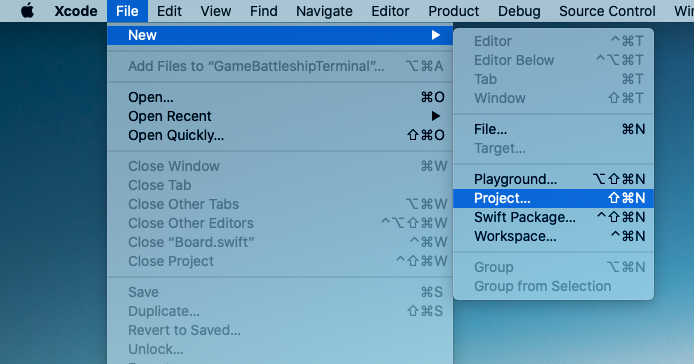
If this window is not present on a screen press Shift + Command + N or select from top menu File / New / Project...
|
New project template selection window is then shown. Select Command line tool

|
Next some project identification data should be provided.

|
- Product Name -- name of our "product". Choose it carefuly, because changing it in a future, although possible, is not so easy.
- Team -- select team if any.
- Organzation Name -- just a name of an "organization"; may be a company name, developer name as in my case or any other name.
- Organization Identifier -- identifier of an "organization"
- Bundle Identifier -- this is something which uniquely identify our "product" in a scale of a whole glob, and is formed as a result of concatenating Organzation Identifier and Product Name. This is why Organzation Identifier should be something realy unique -- reverse domain name is on of a method to meet this condition. As long as we only test some code or we don't want to put it in the App Store both names may be any strings we want.
- Language -- select Swift.
After pressing the Next button folder to save project should be given

|
If we want to keep the code under source control, check Create Git repository on my Mac.
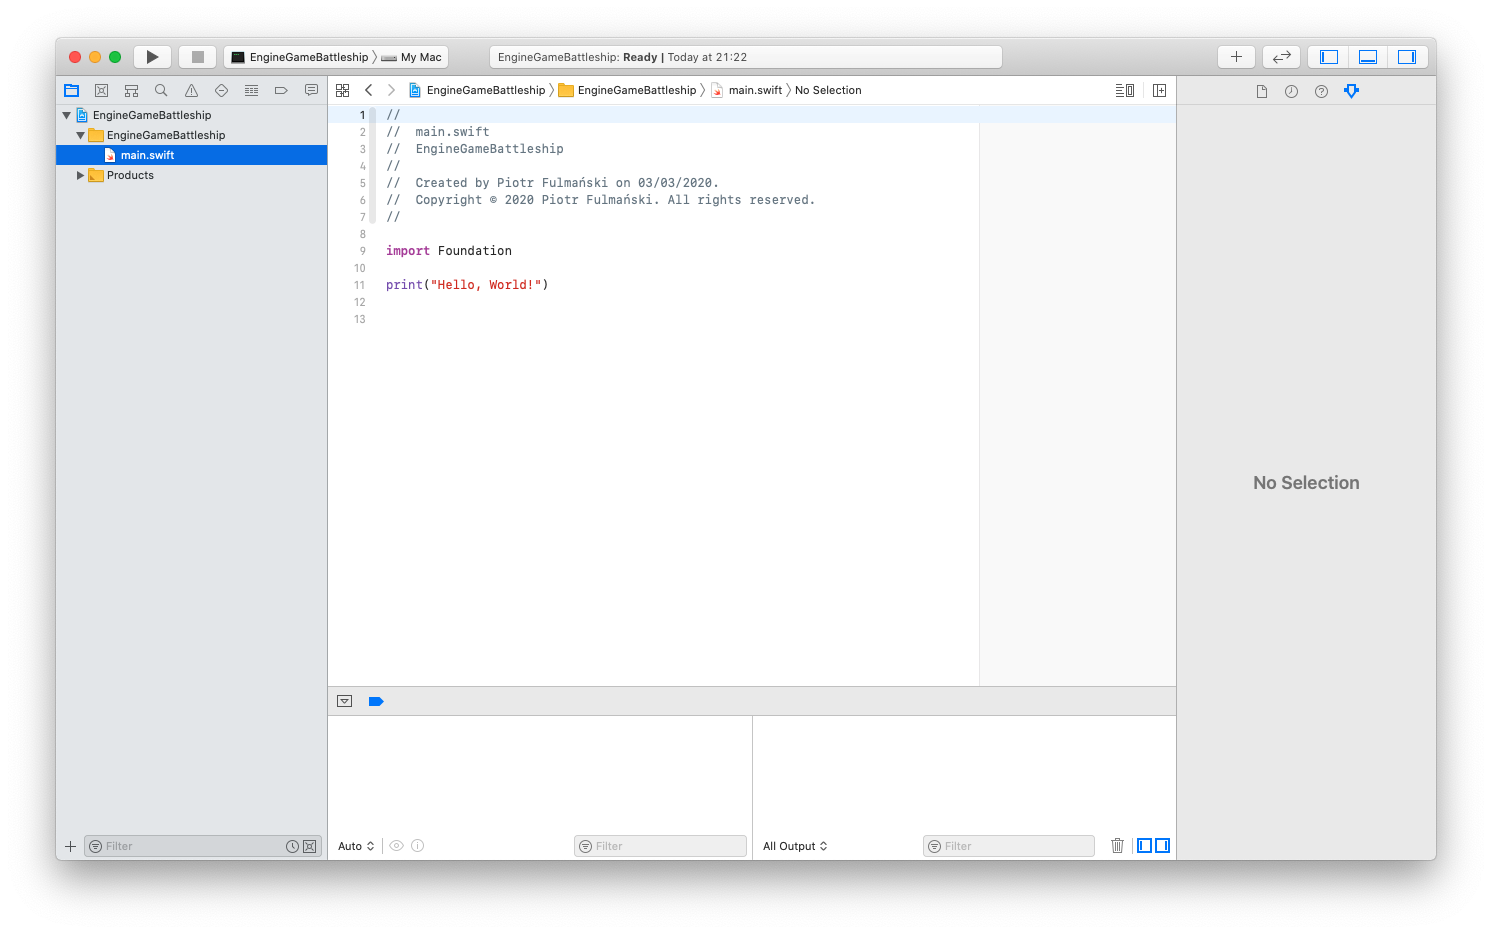
This was the last step and main Xcode window should appaear

|
Selecting
main.swift file from the tree displayed in the Project navigator located on the left part of the main window displays the code located in this file
|
Press
Command + R, select from top menu Product / Run or press "play" button to compile and execte a code

|
Sometimes firs run takes more time than you expect. Please be patient and be sure that console window is displeyed. If not, it can be turn on with a button located in the right-bottom corner of a main window.

|
That's all. Now the project is ready to be developed.
Let's start with creating a
Board class to be used to represent game board in our game. Press Command + N or select from top menu File / New / File...

|
Alternatively we can select EngineGameBattleship group in the Project navigator, right click on it and select from pop-up menu New File...

|
Then select macOS and Swift File and accept it pressing Next button

|
Provide file name, which in case of Swift doesn't have to be consistent with the class name we want to put inside (although it's a good habit)

|
Press Create to create the file

|
Initial contents of this file is almost empty except import declaration
|
1 |
import Foundation |
It lets us access symbols that are declared in another module/library/framework (different names are used). The Foundation is one of the fundametal framework. It provides a base layer of functionality for apps and other frameworks, including data storage and persistence, text processing, date and time calculations, sorting and filtering, and networking.
Add
|
1 2 |
class Board { } |
code to this file -- this would be a "frame" enclosing code of a class.
At the very first beginning add some variables to store information about board: number of rows end columns
|
1 2 3 4 |
class Board { private let rows, cols: Int private var board: [[CellType]] } |
This two simple additons requires a lot of comments.
Declaring "variables" in Swift we have two options.
- With kyword
varwe can declare real variable -- a components of our class whose contents we can change through a time. It may be initiated as integer storing value 7 and later it can be changed to 3. - With kyword
letwe can declare constant (variable) -- a components of our class whose contents, when initiated, may not be change through a time. If initiated as integer storing value 7 it can not be changed and keeps this value forever.
Remarks:
- Both types of objects sometimes are called field or property of a class.
- Despite we differ variables and constants, if this not lead to confusion, we will refere both them as variables.
Every object in Swift must have a type and this type must be known during compilation. Type defines kind of object allowed to be stored inside an object.
- We can explicitely define it as we did it above. From the above code we know that both
rowsandcolsare of integer type (Int) whileboardis a two-dimensional array (because of double square brackets pairs[[]]) of objects of typeCellType. - Type can be inferred based on the object substitution instruction. From the code below,
1var foo = 1
we infer thatfoovariable must be an integer. So, to avoidType annotation missing in patternerror we have to provide either a type annotation when we declare constant or variable or we have to assign a value to allow compiler infer the type of constant or variable.
Every object must have a value or must be explicitely defined as optional which is a way to indicate that this object may not have a value. At this moment we will see Class 'Board' has no initializers message. Even if we add an initializer but don't initialize all properties we will see another message: Return from initializer without initializing all stored properties. Optionals are used in situations where a value may be absent. For example an optional integer is written as Int?.
|
1 |
var thisMayBeEmpty: Int? |
We set an optional variable to a valueless state by assigning it the special value nil. Notice that Swift's nil is not the same as nil in Objective-C or other programming languages. In Objective-C nil is a pointer to a nonexistent object. In Swift, nil is not a pointer. It is the absence of a value of a certain type. We may say, that nil is a value which tell us, that there is no correct value. In some sense it plays the same role as NaN "number" for numeric values. Optionals of any type we want can be set to nil, not just object types. Conversely, nil cannot be used with nonoptionals. If a variable (rather constant) in our code needs to take no value, we have to declare it as an optional value of the appropriate type. More details about optionals will be given in next chapter.
Once we've declared constant or variable of a certain type, we can't redeclare it, or change it to store values of different type. Nor can we change a constant into a variable or a variable into constant.
private is an access modiffier and prevents other classes from using internal details of our class. There are many reasons we do this and this is one of fundamental assumption of object oriented programming. Discussing this topic is out of scope of this book, so please refer to some external sources.
Our
board variable is a two dimensional array of type CellType but this type has not been defined so far. To fix this we can use enumeration. An enumeration is a way we define a one common type for a group of related values. It enables us to work with those values in a type-safe way within our code. Instead of using unrelated (from compilator point of view) values we create a "set" of values and specify that in some places of our code only values from this "set" will be used.
|
1 2 3 |
enum CellType { case none, empty, hit, notAllowed, rescue, ship, shot } |
In our case we have "set" CellType with values "hidden" under the names none, empty, hit, etc. Saying the truth we pay greater attention to names than values. Vaues are what we really need and what in most cases we will use in our code when we work with enumerations.
The meaning of each case is as follows:
- none -- nothing, none cell should have this value; use to signal unexpected problems,
- empty -- empty cell; cell where we can put a ship or we can shot,
- hit -- cell where we have already shot and hit,
- notAllowed -- cell we can't put a ship or shot,
- rescue -- cell around sunken ship,
- ship -- ship,
- shot -- cell where we have already shot but miss.
An array stores values of the same type in an indexed order. The same value can appear in an array multiple times at different positions.
|
1 2 3 4 5 6 7 8 9 10 11 12 13 14 15 16 17 18 19 20 21 22 23 24 |
import Foundation // Declare an array var mutableArrayDeclaration: [String] let immutableArrayDeclaration: [String] // Define an empty array var mutableArray1 = [String]() var mutableArray2 = Array<String>() let immutableArray = [String]() // We can do mutableArray1.append("Zero") mutableArray1.append("One") mutableArray1.append("Two") // or mutableArray2 = ["zero", "one", "two"] // but can't do //mutableArrayDeclaration.append("Zero") // or //immutableArray.append("Zero") print(mutableArray1) print(mutableArray2) |
["Zero", "One", "Two"]

["zero", "one", "two"]
In Swift, differently than in Objective-C, we can't create an array that has pre-allocated memory but does not contain elements. We can't create an empty array of fixed, predefined size. A good news is that we can easily concatenate arrays.
|
1 2 3 4 5 6 7 8 9 10 11 12 13 14 15 16 17 |
// We can't //var mutableArray3 = [String](repeating: nil, count: 10) // but we can var mutableArray3 = [String](repeating: "", count: 5) print(mutableArray3) mutableArray3[3] = "THREE" print(mutableArray3) mutableArrayDeclaration = mutableArray2 + mutableArray3 print(mutableArrayDeclaration) mutableArrayDeclaration += ["FIVE", "SIX"] print(mutableArrayDeclaration) |
["", "", "", "", ""]

["", "", "", "THREE", ""]

["zero", "one", "two", "", "", "", "THREE", ""]

["zero", "one", "two", "", "", "", "THREE", "", "FIVE", "SIX"]
We can use subscript syntax to change a range of values at once, even it the replacement set of values has a different length than the range we are replacing.
|
1 2 3 4 5 6 7 8 9 10 11 12 13 14 15 16 17 18 19 20 21 |
mutableArrayDeclaration[1...2] = ["ONE", "TWO", "THREE"] print(mutableArrayDeclaration) mutableArrayDeclaration[4...6] = ["***"] print(mutableArrayDeclaration) mutableArrayDeclaration.remove(at: 4) print(mutableArrayDeclaration) // Iterating over an array for item in mutableArrayDeclaration { print("value: \(item)") } for (index, value) in mutableArrayDeclaration.enumerated() { print("at index: \(index) value: \(value)") } |
["zero", "ONE", "TWO", "THREE", "", "", "", "THREE", "", "FIVE", "SIX"]

["zero", "ONE", "TWO", "THREE", "***", "THREE", "", "FIVE", "SIX"]

["zero", "ONE", "TWO", "THREE", "THREE", "", "FIVE", "SIX"]

value: zero

value: ONE

value: TWO

value: THREE

value: THREE

value:

value: FIVE

value: SIX

at index: 0 value: zero

at index: 1 value: ONE

at index: 2 value: TWO

at index: 3 value: THREE

at index: 4 value: THREE

at index: 5 value:

at index: 6 value: FIVE

at index: 7 value: SIX
In Swift, as in many other programming languages, two-dimensional array of objects is a one-dimensional array of one-dimensional-arrays of objects. And n-dimensional array of objects is a one-dimensional array of one-dimensional-arrays of... etc. To creating a multi-dimensional array we have to add another set of brackets. For example, to turn [Int] array into an array of arrays, we would just write [[Int]].
|
1 2 3 4 5 6 7 8 9 10 11 12 13 14 15 16 17 18 19 20 |
// Example 1 // This is our array of arrays var array2DEx1 = [[Int]]() // We create three simple 1D arrays of Int var row1 = [11, 12, 13, 14] var row2 = [21, 22, 23] var row3 = [31, 32] // Add them all to the "main" array array2DEx1.append(row1) array2DEx1.append(row2) array2DEx1.append(row3) print(array2DEx1) array2DEx1[1].append(24) print(array2DEx1) array2DEx1[1][1] = 0 print(array2DEx1) |
[[11, 12, 13, 14], [21, 22, 23], [31, 32]]

[[11, 12, 13, 14], [21, 22, 23, 24], [31, 32]]

[[11, 12, 13, 14], [21, 0, 23, 24], [31, 32]]
|
1 2 3 4 5 6 7 8 9 |
// Example 2 var array2DEx2 : [[Int]] = [] array2DEx2 = Array(repeating: Array(repeating: 0, count: 2), count: 3) // or //var array2DEx2 : [[Int]] = Array(repeating: Array(repeating: 0, count: 10), count: 10) print(array2DEx2) array2DEx2[1][1] = 1 print(array2DEx2) |
[[0, 0], [0, 0], [0, 0]]

[[0, 0], [0, 1], [0, 0]]
|
1 2 3 |
// Example 3 var array2DEx3 : [[Int]] = [[1, 2, 3], [4, 5, 6]] print(array2DEx3) |
[[1, 2, 3], [4, 5, 6]]
We have to be very careful working with arrays in Swift -- generally, substitution with = operator makes a copy of an array.
For simple types such as integers and other structureswe have
|
1 2 3 4 5 6 7 |
var numbers = [1, 2, 3, 4, 5] var numbersCopy = numbers numbers[0] = 100 print(numbers) // Prints "[100, 2, 3, 4, 5]" print(numbersCopy) // Prints "[1, 2, 3, 4, 5]" |
If the elements in an array are instances of a class, the semantics are the same, though they might appear different at first.
|
1 2 3 4 5 6 7 8 9 10 11 12 13 14 15 16 17 18 19 |
// An integer type with reference semantics class IntegerReference { var value = 10 } var firstIntegers = [IntegerReference(), IntegerReference()] var secondIntegers = firstIntegers // Modifications to an instance are visible from either array firstIntegers[0].value = 100 print(secondIntegers[0].value) // Prints "100" // Replacements, additions, and removals are still visible // only in the modified array firstIntegers[0] = IntegerReference() print(firstIntegers[0].value) // Prints "10" print(secondIntegers[0].value) // Prints "100" |
More we can read in Array (Modifying Copies of Arrays).
Let's make all the variables to have some values -- add the following code to our class' body
|
1 2 3 |
init(rows: Int = 10, cols: Int = 10) { } |
Again just a piece of code but lots to explain. init is en example of a special kind of a code called function which, in this case, is used to initialize an object. Here is a place to make all the setup needed or required to make the object usable. This special function is named in Swift as initializator while in other programming languages is refered very often as a constructor. Generaly speaking, function (sometimes subprogram or procedure in other programming languages) is a separate part of the code responsible for performing some operations and possible to be used during program execution. Subprograms are used to simplify the (structure of a) main program and increase the readability of the code.
Whether it is an initializator or "normal" funtion, it has some common properties. In short, Swift functions can be characterized as follow (this list comprises only information needed now -- full function characterustic is much more complex):
- Each function parameter has both an argument label and parameter name.
- We write an argument label before the parameter name, separated by a space.
- The argument label is used when calling the function.
- The parameter name is used in the implementation of the function.
- By default, parameters use their parameter name as their argument label.
- All parameters must have use unique names.
- It is possible for multiple parameters to have the same argument label.
- If we don't want to use an argument label for a parameter, an underscore character must be used as label for that parameter.
- If we use an underscore character, we cannot use a parameter name as an argument label.
- If a parameter has an argument label, the argument must be labeled when we call the function.
- Although arguments have their labels, we cannot change arguments order.
The following examples should clarify what was writen in the list above. The simplest form of a function, taking no arguments and returning nothing, is as follow
|
1 2 3 |
func functionSimplestForm(){ print("functionSimplestForm") } |
and we call it with
|
1 |
functionSimplestForm() |
We may also explicitely define, with Void keyword preceded by "right arrow", that function returns no value
|
1 2 3 |
func functionSimplestFormVersion2() -> Void { print("functionSimplestFormVersion2") } |
or return a String object
|
1 2 3 4 5 |
func functionWithoutParameters() -> String { return "noParameters" } print(functionWithoutParameters()) |
A function with a parameter
|
1 2 3 |
func functionWithOneParameter(parameter1: String) -> String { return "Parameter value: " + parameter1 } |
should be called as
|
1 |
print(functionWithOneParameter(parameter1: "foo")) |
Missing argument label 'parameter1:' in call
|
1 |
print(functionWithOneParameter(parameter1: "foo")) |
results a message Missing argument label 'parameter1:' in call. In case of more than one parameter, we write a function as
|
1 2 3 |
func functionWithMultipleParameters(parameter1: String, parameter2: String) -> String { return "Parameter value: " + parameter1 + " : " + parameter2 } |
and call as
|
1 |
print(functionWithMultipleParameters(parameter1: "foo", parameter2: "bar")) |
Gathering all the above together
|
1 2 3 4 5 6 7 8 9 10 11 12 13 14 15 16 17 18 19 20 21 22 23 24 |
func functionSimplestForm(){ print("functionSimplestForm") } functionSimplestForm() func functionSimplestFormVersion2() -> Void { print("functionSimplestFormVersion2") } functionSimplestFormVersion2() func functionWithoutParameters() -> String { return "noParameters" } print(functionWithoutParameters()) func functionWithOneParameter(parameter1: String) -> String { return "Parameter value: " + parameter1 } print(functionWithOneParameter(parameter1: "foo")) func functionWithMultipleParameters(parameter1: String, parameter2: String) -> String { return "Parameter value: " + parameter1 + " : " + parameter2 } print(functionWithMultipleParameters(parameter1: "foo", parameter2: "bar")) |
we should see the following results
functionSimplestForm

functionSimplestFormVersion2

noParameters

Parameter value: foo

Parameter value: foo : bar
Let's continue...
|
1 2 3 4 5 6 7 8 9 10 11 12 13 14 15 16 17 18 19 20 21 22 23 24 25 26 27 28 29 30 31 32 33 34 35 36 37 38 39 |
// In this code we show // - (optional) tuple return // - guard usage func functionWithMultipleReturnValues(values: [Int]) -> (maxValue: Int, maxPos: Int)?{ guard values.count > 0 else { return nil } var maxValue: Int = values[0] var maxPos: Int = 0 for index in 0...values.count-1 { if values[index] > maxValue { maxValue = values[index] maxPos = index } } return (maxValue, maxPos) } var result = functionWithMultipleReturnValues(values: []) if result != nil { // With the following // print("maxValue: \(result?.maxValue), maxPos: \(result?.maxPos)") // Xcode 8.3 print the warning: // String interpolation produces a debug description for an optional value; did you mean to make it explicit? // One solution to silence the warning is to use suggested print("maxValue: \(String(describing: result?.maxValue)), maxPos: \(String(describing: result?.maxPos))") // second print("maxValue: \(result?.maxValue as Int?), maxPos: \(result?.maxPos as Int?)") } else { print("No return value") } result = functionWithMultipleReturnValues(values: [1, 5, 2, 7, 9, 4, 3, 0, 8, 6]) if result != nil { print("maxValue: \(String(describing: result?.maxValue)), maxPos: \(String(describing: result?.maxPos))") } else { print("No return value") } |
No return value

maxValue: Optional(9), maxPos: Optional(4)
|
1 2 3 4 5 6 7 8 9 10 11 12 13 14 15 16 17 18 19 20 21 |
func functionLabelsTest(argumentLabel parameterName: String, parameterWithDefaultLabel: String, _ parameterWithNoArgumentLabel: String, justALabel parameter1: String, justALabel parameter2: String) { print(parameterName + ":" + parameterWithDefaultLabel + ":" + parameterWithNoArgumentLabel + ":" + parameter1 + ":" + parameter2) } functionLabelsTest(argumentLabel: "first", parameterWithDefaultLabel: "second", "third", justALabel: "fourth", justALabel: "fifth") func fooFunction(noDefaultParameter: String, defaultParameter: String = "defaultValue") { return print("\(noDefaultParameter) \(defaultParameter)") } fooFunction(noDefaultParameter: "definedByUser") fooFunction(noDefaultParameter: "definedByUser", defaultParameter: "alsoDefinedByUser") |
first:second:third:fourth:fifth

definedByUser defaultValue

definedByUser alsoDefinedByUser
|
1 2 3 4 5 6 7 8 9 10 11 12 13 14 15 16 17 18 19 20 21 22 23 |
func average(_ values: Double...) -> Double { guard values.count > 0 else { return 0 } var sum = 0.0 for value in values { sum += value; } return sum/Double(values.count) } print(average(1.5, 1.5, 3, 4, 5)) // Should print 3.0 func swapInts(_ first: inout Int, _ second: inout Int){ let save = first first = second second = save } var firstToSwap = 3, secondToSwap = 5 print("before swap: \(firstToSwap) \(secondToSwap)") swapInts(&firstToSwap, &secondToSwap) print("after swap: \(firstToSwap) \(secondToSwap)") |
3.0

before swap: 3 5

after swap: 5 3

Program ended with exit code: 0
Having knowledge how functions can be written it's time to practise it. Going back to our initializer frame let's fill it with the following code
|
1 2 3 4 5 6 7 8 |
init(rows: Int = 10, cols: Int = 10) { self.rows = rows self.cols = cols board = Array(repeating: Array(repeating: .none, count: cols+2), count: rows+2) prepareBoard() } |
self keyword is used to avoid name conflict. Writing self.rows we tell the compiler that we want to use row variabel which is defined as a class variable. On the right hand side of the = character local (visible only in initializer) rows variable is used -- the one defined in initializer as the first argument. Without the self, statement
|
1 |
cols = cols |
would be ambiguous. In the line
|
1 |
board = Array(repeating: Array(repeating: .none, count: cols+2), count: rows+2) |
we create a two dimensional array of CellType objects. Simply speaking, two dimensional array is an array of arrays. In our case this is an Array of rows+2 object beeing Arrays. And an inner Array in turn consist of cols+2 object of type CellType having value none. Notice that we may but don't have to write the full enumeration case name CellType.none because the type of board is known and Swift infers what shoud be placed in front of none.
Last line is a prepareBoard() function call which is intended to prepare our gameboard, because now it is filled with meaningless nones. To simplify our further considerations we will add around our game board a one-cell width border of type notAllowed. Other cells are filled with empty value.
|
1 2 3 4 5 6 7 8 9 10 11 12 13 14 15 16 17 |
func prepareBoard() { for i in 0...rows+1 { board[i][0] = .notAllowed board[i][cols+1] = .notAllowed } for i in 0...cols+1 { board[0][i] = .notAllowed board[rows+1][i] = .notAllowed } for r in 1...rows { for c in 1...cols { board[r][c] = .empty } } } |
Although we have just refered to prepareBoard() as function, beeing more precisely we should call it method. Methods are functions that are associated with a particular type. We differ two types of methods: Instance methods and Class methods. Both types are explained in the next chapter.
Another detail worth to stop for a while is a for loop. Its syntax and meaning should be intuitively understandable. In the example above, i (as well as r and c) is a constant whose value is automatically set at the start of each iteration of the loop. As such, i does not have to be declared before it is used. It is implicitly declared simply by its inclusion in the loop declaration, without the need for a let declaration keyword. Thing we should clarify is a range operator .... Swift provides two range operators unknown in C-like world, as a shortcut for expressing a range of values.
- The closed range operator (
a...b) defines a range that runs fromatob, including both values. The value ofamust not be greater thanb. - The half-open range operator (
a..<b) defines a range that runs fromatob, but does not includeb. The value ofamust not be greater thanb. If the value ofais equal tob, than the resulting; range will be empty. - Starting from Swift 4 we can omit the upper or lower bound of a range specification to create a one-sided range
12345678// Open range expressionlet someArray = ["one", "two", "three", "four", "five"]print(someArray[3...])// In Swift 3, you had to writeprint(someArray[3..<someArray.endIndex])print(someArray[...2])print(someArray[..<2])
["four", "five"]

["four", "five"]

["one", "two", "three"]

["one", "two"]
Finally let's add a frame for our future (will be implemented in the next chapter) board printing method
|
1 2 |
func printBoard() { } |
EngineGameBattleship classNow we will create the
EngineGameBattleship class. This class would be an entry point to the whole game logic. Create a new class as we did in case of Board at the beginning of this chapter and name it EngineGameBattleship. Next fill it with a following code
|
1 2 3 4 5 6 7 8 9 10 11 12 13 14 15 16 17 18 |
import Foundation class EngineGameBattleship { private var boardPlayer: Board private var boardOpponent: Board init(rows: Int = 10, cols: Int = 10) { self.boardPlayer = Board(rows: rows, cols: cols) self.boardOpponent = Board(rows: rows, cols: cols) } func printBoards() { print("PLAYER") boardPlayer.printBoard() print("OPPONENT") boardOpponent.printBoard() } } |
This code should be self-explanatory in the context of what we have lerned in this chapter. I only mentione here that [object].[function] convention as in
|
1 |
boardPlayer.printBoard() |
case is used to call function (printBoard() in our case) on specific object (boardPlayer in our case).
In the last step we should add to the
main file two lines
|
1 2 |
let game = EngineGameBattleship() game.printBoards() |
With the first we create an object representing our battleship game engine. The second is used to call printBoards() method from EngineGameBattleship class. Now we can run our code. As a result, we should see
|
1 2 3 |
PLAYER OPPONENT Program ended with exit code: 0 |
Hmmm... As for now not very sepectacular but it is going to be changed in next chapters.