Prepared and tested with Xcode 9.2 and Swift 4 (2018-04-10)
In this tutorial we cover the following topics
General information
We can use the view controllers that the UIKit framework provides by themselves or in conjunction with other view controllers to create even more sophisticated interfaces. When combining view controllers, however, the order of containment is important; only certain arrangements are valid. The order of containment, from child to parent, is as follows:
- Content view controllers, and container view controllers that have flexible bounds (such as the page view controller)
- Navigation view controller
- Tab bar controller
- Split view controller
More details can be found in
- Combined View Controller Interfaces
- UINavigationController And UITabBarController Programmatically (Swift 3)
- Navigation controllers (Swift)
- Table views basics (Swift)
- Tab bar (Swift)
Project
- Step 1: create a new project
Create a new project- Select File | New | Project...
- Select Single View Application on the template selection sheet.
- As the product name enter
Swift iOS Navigation and Tab Bar - Set the Language to Swift. Because we will not use tests in this tutorial, you can leave both test check boxes unchecked as well as make sure the check box labeled Use Core Data is also unchecked.

- Step 2: add two view controllers and one navigation controller
- Select
Main.storyboard. - Find
View Controllerin the Object Library and drag an instance into the editing area

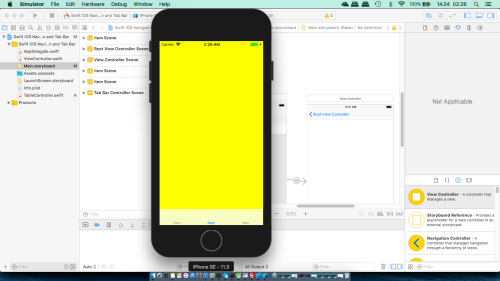
- Change in Attributes inspector, section View the background property to be different for every view controller (for example green for the first and yellow for the second).

- Add
Navigation Controllerfrom the Object Library

- Select
- Step 3: join controllers - add tab bar
- Select the two custom view controllers and the navigation controller (only the navigation controller scene, not it’s root view controller) and choose Editor | Embed In | Tab Bar Controller
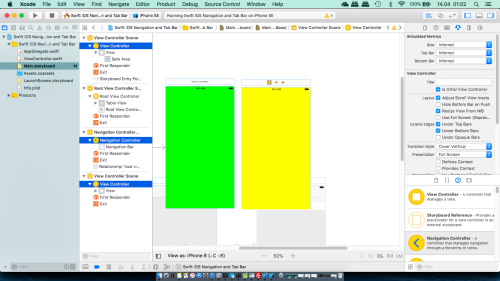
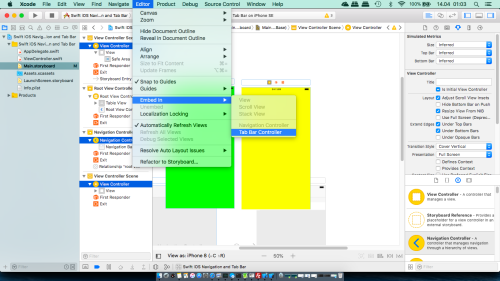

- Select the two custom view controllers and the navigation controller (only the navigation controller scene, not it’s root view controller) and choose Editor | Embed In | Tab Bar Controller
- Step 4: add one more view
- Find
View Controllerin the Object Library and drag an instance into the editing area

- Single-click the yellow View Controller icon in the row of icons at the top of the Root View Controller Scene (or in the Document Outline), press right mouse button

and from popup menu drag from Triggered Segues | manual circle to the view controller we have just added

and select Show from popup menu


- Find
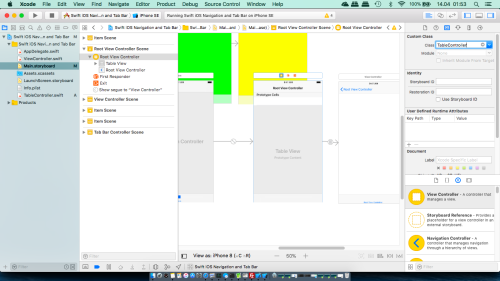
- Step 5: add table view controller
- In the Project Navigator, right-click the Swift iOS Navigation and Tab Bar group and select New File....
- Choose Cocoa Touch Class from the iOS Source section in the template dialog and then press Next.
- Name the new class
TableController, make it a subclass ofUITableViewController. Because we are going to add this controller to the storyboard later manually, so make sure that the Also create XIB file check box is not checked. - Press Next and then press Create to save the files for the new view controller

- Single-click the yellow View Controller icon in the row of icons at the top of the Root View Controller Scene. Next press Alt+Command+3 to bring up the Identity Inspector. In the Custom Class section as Class select TableController.
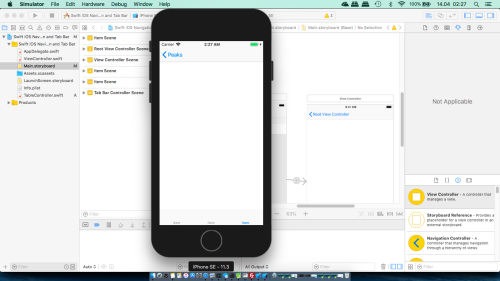
- Click on segue between Root View Controller and View Controler and bring up Attributes Inspector (we can use mouse or shortcut Alt+Command+4).
- In Storyboard Segue section as Identifier type
SegueFromTable
- Select the table view in the Document Outline and bring up the Connections Inspector (use shortcut: Alt + Command + 6)
and make sure if data source and delegate are connected with Root View Controller

If not drag from the circle next to dataSource and delegate in Outlets section to the View Controller icon in the Document Outline or above the view controller in the storyboard editor. This makes our controller class both the data source and delegate for this table. - Open
TableController.swiftfile and add/modify
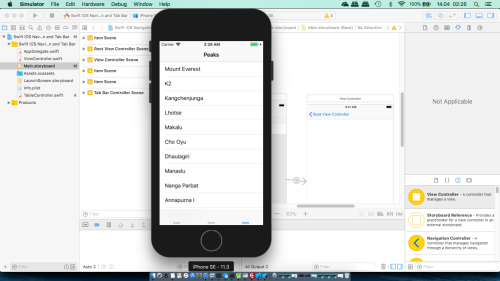
1234567891011121314151617181920212223242526272829303132333435363738394041424344454647484950515253545556import UIKitclass TableController: UITableViewController {var eightThousandersPeaks = [String]()override func viewDidLoad() {super.viewDidLoad()// Uncomment the following line to preserve selection between presentations// self.clearsSelectionOnViewWillAppear = false// Uncomment the following line to display an Edit button in the navigation bar for this view controller.// self.navigationItem.rightBarButtonItem = self.editButtonItemself.navigationItem.title = "Peaks"eightThousandersPeaks += ["Mount Everest", "K2", "Kangchenjunga","Lhotse","Makalu", "Cho Oyu","Dhaulagiri","Manaslu", "Nanga Parbat","Annapurna I", "Gasherbrum I", "Broad Peak","Gasherbrum II", "Shishapangma"]}override func didReceiveMemoryWarning() {super.didReceiveMemoryWarning()// Dispose of any resources that can be recreated.}// MARK: - Table view data sourceoverride func numberOfSections(in tableView: UITableView) -> Int {return 1;}override func tableView(_ tableView: UITableView, numberOfRowsInSection section: Int) -> Int {return eightThousandersPeaks.count;}override func tableView(_ tableView: UITableView, didSelectRowAt indexPath: IndexPath) {performSegue(withIdentifier: "SegueFromTable", sender: self)}override func tableView(_ tableView: UITableView, cellForRowAt indexPath: IndexPath) -> UITableViewCell {// Trick to get static variable in Swiftstruct staticVariable { static var tableIdentifier = "TableIdentifier" }var cell:UITableViewCell? = tableView.dequeueReusableCell(withIdentifier: staticVariable.tableIdentifier)if cell == nil {cell = UITableViewCell(style: .default, reuseIdentifier: staticVariable.tableIdentifier)}cell?.textLabel?.text = eightThousandersPeaks[indexPath.row]return cell!}}
- Step 6: run the application
Now the application is ready to run.